Quantcast
Channel: Benchcrafted
Viewing all 305 articles
Browse latest View live

Hayward on Mitre Shooting Blocks

$
0
0

For the upcoming release of our La Forge Miter Jack we've uploaded an article from "The Woodworker" detailing the construction and use of a miter jack from an English perspective. Charles Hayward covered nearly every aspect of woodworking through his countless  publications, and this one doesn't disappoint. Make sure you read through the construction details, since they give clues to how the vise is used.

Download "The Mitre Shooting Block"here.

I've had a miter jack in the shop since I first discovered it early in my woodworking. It doesn't get used every day, but when its needed, nothing else will do. Shooting boards are better for repetitive, simpler tasks like mitering a flat frame member or squaring the end of a board. It's when you encounter more complex joints that the miter jack really shines. Try planing a miter on crown with a shooting board. The other plus with a miter jack is that it creates a platform around nearly the entire workpiece. This means you can pare joint shoulders in one go and know that the surfaces will be in the same plane. If you're ever screwed up tenon shoulders, you know how easy it is to chase your tail around the joint with a shoulder plane, risking blowout at each corner. A miter jack not only gives you a flat plane to work from, but also holds the work at the correct angle automatically, and backs up the work to prevent blowout.

Next week, the wooden bits for our Miter Jack Hardware ship from Lake Erie Toolworks to us. We'll start a series of posts on building the jack using the hardware, and share even more uses for this less common shop appliance.

Thanks to the folks at the traditional woodworking publishing house Lost Art Press for the scans from "The Woodworker".


Don't Crochet With Your Leg Vise

$
0
0


We get this question a lot.

"Chris Schwarz put a crochet and a leg vise on his first Roubo bench, why don't you include one in your plans?"

Chris' first bench was largely an experiment. He built it to prove out Roubo's design in a modern setting. The rest as they say, is history. We were of course influenced by Chris' work, but our bench is Plate 11 at its core. In "L'Art du Menuisier" we don't have an illustration of the bench with the leg vise installed (discounting pl. 279--which incidentally has no crochet), but only close-ups of the leg vise in Plate 11. Roubo doesn't specifically say that benches with leg vises shouldn't have a crochet. But he does specifically mention the superiority of the leg vise for furniture makers. So we put two and two together and didn't include a crochet in our plans. If you do some research you'll find that anyone who's used a crochet, then a leg vise, never goes back to using the crochet (Schwarz included.)

To boil it down, don't include a crochet if you're planning to install a leg vise. There are reasons why it would not only be superfluous, but also a disadvantage. A crochet reduces the capacity of the bench (see pic above).

Although Roubo doesn't show a bench sans crochet, there are plenty of French shops with Plate 11-style benches with leg vises and no crochet.


Benchcrafted's Book Of Plates Now Available

$
0
0

Earlier today we received the first and only shipment of our new publication "The Book of Plates, Connoisseur Edition." It was delivered in a Bugatti Veyron, Sang Noir Edition by the mayor of Shueyville, IA.

What is this book you might ask? Well, it's a reprint of Roubo's original work, "l'Art du Menuisier". We went back in time to Paris, to when I was 3 years old in Iowa, and asked Leonce Laget in Paris to give a copy to his son Jacques in Paris, and then sign it and ship it to us, from Paris, in Iowa in 2011. That all really happened, well, except for the time travel part. I do have a flux capacitor though. And it lets me sweat copper joints like there's no tomorrow (literally.)

So why would you buy our version the Book of Plates instead of the one by the Lost Art Press? A few good reasons.

1. Our's comes with words. French ones. The Lost Art Press version is pictures only. That's fine if you is illiterate. Or have the patience of a 16-year old. Or you like to use Twitter.

2. Our's is almost a foot thick. The Lost Art Press version is only 1-3/4" thick. Schwarz calls this "a sizable chunk." I'd like to see Schwarz tell that to Jack Palance.

3. You have to store our's flat. Our's is so huge you can't stand it up on edge, like the puny LAP version. That one stands at attention, like a skinny soldier waiting for orders. Our's loafs around on its own dedicated bookshelf and gives orders.

4. Ours smells musty. Like something old, but good, and vintage too (but definitely not hipster, oh no) The Schwarz version smells like pansy-banana soy ink.

5. Our's is actually printed on a press. The Lost Art Press version was made with a Mac Book Air, tethered to an Apple Newton, on top a coffee table in a (flat screen tv-less!) living room, while Schwarz sipped warm Schlitz through a straw from a red Solo cup.

6. Our's costs ten times as much as the LAP version. Sure, you could have ten copies of Schwarz's version, but that's because it's 1/10 of what our version is. Our is ten times better, literally. Yeah, its pretty much the same, but still, its ten times (10x) better. It just is.

7. Our comes with a dust jacket. LAP doesn't even give you a wooden box. Neither do we, but our's does have a dust jacket, with Plate 11 on it. Three times.

8. Our's is in French. That's awesome-ique. The LAP version isn't even in English, because it's so lame IT DOESN'T EVEN HAVE WORDS (see #1)

9. Our's actually does come in a wooden box. (see picture above) We built a special marquetry cabinet embellished with Roubo's engravings just for this book. LAP gives you cardboard. I've never seen good marquetry done on cardboard before.

Satisfied? Contact me if you'd like to buy the one and only Benchcrafted Book Of Plates.

Seriously, this is still available. For more (totally honest) info on our copy of "l'Art du Menuisier"see here.

Also, needless to say, everything about LAP's Book of Plates (which is incredible) was offered tongue-in-cheek. I personally buy everything LAP produces. Well, except for the hoodie. I quit wearing those when I hung up my parachute pants for the last time. But the books are good! The best!


Holdfasts: Still a few left

Miter Jacks - Just About There

$
0
0

Today we received the wood components for the La Forge Royale Miter Jack Kits from Nick Dombrowski of Lake Erie Toolworks, who machined the hard maple screws and nuts to machinist tolerances.

We're again floored by Nick's work. It is simply flawless. Nick nailed the fitment of our machined metal parts with the screw's tenon. We didn't check every screw, but on the first one we grabbed, the ferrule slid on with no play and snugged up at the last 1/4", dead flush with the end of the ferrule. Sweet. The garter pin slid into place perfectly. The fresh brass, steel, and maple are going to make a gorgeous vise.

We sourced the stock for the kits from our good friend Pete Terbovich of Horizon Wood Products and boy did he deliver. The nut blocks are cut from prime quartersawn 10/4 hard maple.

Tomorrow morning we hit the road to pick up the last couple bits for the kits, and then we'll get busy packing these for shipment. We're still fiddling with branding for these, so Christmas delivery is quite likely not going to happen (sorry!) We expect to have these ready to ship very soon though.

To remind, we're only making 100 of these. Actually, 99, since we'll use one kit to do a series of blog posts on making the miter jack start to finish. If you're planning to build one, you should source your maple now and get it roughed down so you can start building when the parts arrive. Get the Sketchup drawing here.

We still have a few kits available. If you'd like to order, click here.


Building The La Forge Royale Miter Jack - Body Dims

$
0
0


Today we were busy packing up Miter Jack kits and printing out postage labels for the many that have pre-ordered. We're scrambling to get as many shipped as soon as possible. Some of you may receive them before Christmas, but most won't. We're sorry we didn't hit that target, but we think the quality of the kit will make up for it. I admired every nut block that I packed today, and was simply awestruck by the quality of the material. All nearly dead quartered, dead clear, straight. This maple looks like it was extruded at the Silly Putty factory. It's beautiful. There are even a few curly blocks in the mix. I got tempted to single out one of these for my personal vise, but I resisted (you're welcome.)

So this evening, long after its safe to do real work, I sit at my computer and figure out how to get the Sketchup drawing out to the shop. I don't like to keep a computer in there because of dust, so its over to Layout to make some measured drawings. You can make your own from the Sketchup drawing using the tape measure tool, but I figured since I'm making these for myself, I might as well post them.

I'm not including every dimension on these prints. Some you'll have to interpolate. But all the info necessary is there. This is also just the info I need to start milling wood. No more. I will post instructions for how I mill the components as I build them, including photos.

If you want to rough down your stock now, you'll see that the final thickness of the body is 1 15/16". That's going to be a trick to squeeze from typical 8/4 stock. So use your own judgement. I'll say that you can go a bit thinner, but you'll have to adjust for the discrepancy as you go along. I'll be building to the print. I have 12/4 maple for this project, so I'll be able to easily hit 1-15/16. You can also laminate to get the necessary thickness. And if you use quartersawn boards, which are easier to find in thinner dimensions, your base will be ultra stable. Mill all the components to 1 15/16", and don't cut the spacers to length yet (mill the stock for them at least 12" long, and you'll have enough to make three.) Make the front body section about 1/8" over width at 3-3/4" wide, the spacer stock on size at 2-19/32" and the rear body section also about 1/8" over width at 2-13/16" The body will get cut to final width later, after the spline grooves are milled. This will help remove any blowout from the groove cutting operation, and allow you to dial in the final width exactly. Do not cut the 45 degree bevel at the front, but keep it square for now.

A Case For Sharp Tools

$
0
0

If there's one single thing that can make or break your quest to better your work, it is, without a doubt, sharpness.

Several years ago I moved from making furniture to musical instruments and it completely changed the way I work wood. If you're stuck in a rut and making typical Shaker or Craftsman-style pieces (and I make both, and like both) I suggest you step back, buy a guitar kit and prepare yourself to become a Jedi-master of woodworking.


Here's one thing luthiery did for me. It taught me why tack sharp is the deciding factor in doing exacting work in all woods, and how less than tack sharp doesn't just mean tearout, but likely complete destruction of your work. A rough spot on a table top is child's play compared to tearout in a piece that's only 1/32" thick to begin with. You don't scrape that out. You scrap it out.


But this isn't about sharpening. It's more about the workmanship of risk. Do you build things for completely practical purposes? Or do you build for that intangible sense of creative satisfaction? If more the latter than the former, you should try upping the ante in your work. I don't build like this all the time. It's too much for me. But every now and then I return to this type of work to fertilize the rest of my woodworking. Taking on an intense project has lots of carryover. It will feed simpler work, sometimes for years. It simultaneously drives me mad while depositing loads into the satisfaction bank.

Now, as long as the bank doesn't burn down before I can make my withdrawal.


Building The La Forge Royale Miter Jack- The Body

$
0
0

When I build, I use a simple principle. I keep parts as large as possible, for as long as possible. I only make cuts or plane surfaces that are essential to the task at hand. This accomplishes two things. It gives you the opportunity to correct small errors, and it prevents you from making errors by keeping your mind focused on simple, individual tasks. This is especially important when building something for the first time. As this is the first miter jack I've built using this design, be warned that I have not had a trial run. I'm as green as you are if you're building along.


First thing is to mill the stock for the base, which finishes out at 1-15/16" thick. If you choose good straight stock, and tell your yard not to hit or miss it (skip plane), you can likely get that thickness from 8/4 stock. If not, you'll need to laminate, or use 9/4 stock at least. I began with 12/4 hard maple, and sawed about 3/4" off the thickness (each face) before milling it to 1-15/16". I did not have access to quartered stock, but if you do, definitely use it. It will make the base very stable.


After milling, layout the large rabbets on the spacer stock and the two body sections. If you use a table saw to cut the rabbets, you only need to layout on one end of each board.


The rabbets are 13/16" wide and 31/32" deep. The latter dimension centers the rabbet on the stock's thickness. Note that the spacer stock is milled to final width, and is the full length of the other body pieces. More on that later. The two body pieces have not been milled to final width.


If you use machinery, the table saw excels for cutting the rabbets. With only four to cut, I didn't bother mounting a dado set. I like the more controlled results I get with the two cut method anyway. Especially with these very large rabbets in hard maple.


It's best to cut the rabbets a tad small, then dial them in with a shoulder plane. If you do this, make absolutely sure your iron is set parallel to the sole. It's all too easy to go past 90 degrees, even with just a couple strokes. The trick to using a shoulder plane in this situation is to take as much of yourself out of the equation as possible. Use your leading hand to firmly press the toe of the plane directly into the rabbet's corner. Now use your other hand and push forward only. Don't grab the plane with this other hand, your leading hand is the steering wheel, and your other hand is the gas pedal. If your iron is sharp (it better be) the plane will jig itself into the rabbet and make it dead square with successive passes. I like to take many light passes with a rabbet plane. It may be slower, but I can be extremely precise.


Here you can see that I've got to take a couple passes either on the top edge of the spacer stock, or on the side of the rabbet in the body section. I took a couple passes on the spacer stock with a bench plane to get the fit right.


A good fit on all three surfaces. It's not entirely necessary that you nail a certain dimension here. So if you need to make the spacer a little narrower to get a sweet fit, do so. Good joinery is more important than an arbitrary number.


With the spacer stock in place, mark for the final length of the body, and for the length of the two spacer piece at each end. There's a minor mistake in the Sketchup drawing. The spacer blocks are both 3-1/4" long, but in the original jack the spacer block on the nut block end is 3" long. It won't affect anything on the vise, so I'm leaving the SU drawing as-is. I did mark my nut-end block at 3".

Next, cut the spacer blocks from the piece, but only cut the inside end. Leave them long for now, like the body pieces. You will cut them to final length after gluing them to the body pieces. You will want to sand the ends of the spacer blocks now, before glue up.

The remainder of the spacer stock will get used for the jaw spacers and retaining blocks.


Glue up the base assembly, carefully aligning the inside ends of the spacer blocks with the marks on the body sections. The ends won't necessarily be flush, since all pieces are over length. I made two special cauls with relieved mid sections so I could draw up the spacer blocks tight into the rabbets. Make sure when you apply glue that you glue not only the rabbet in the spacer blocks, but also the lower edge that fits into the rabbet on the body pieces. I realized a few minutes after they were in the clamps that I had only glued the rabbet in the spacer blocks. I'm not worried about the strength, since these blocks don't see a whole lot of stress. The splines at the end will help reinforce as well. Still, don't make my mistake.


The jaws are glued up from 12/4 stock, or thinner if you need to. The original is finger jointed. Feel free to do this if you like the look. I'm not convinced it adds any strength if you can make a great glue joint.


Building The La Forge Royale Miter Jack- Part 2

$
0
0


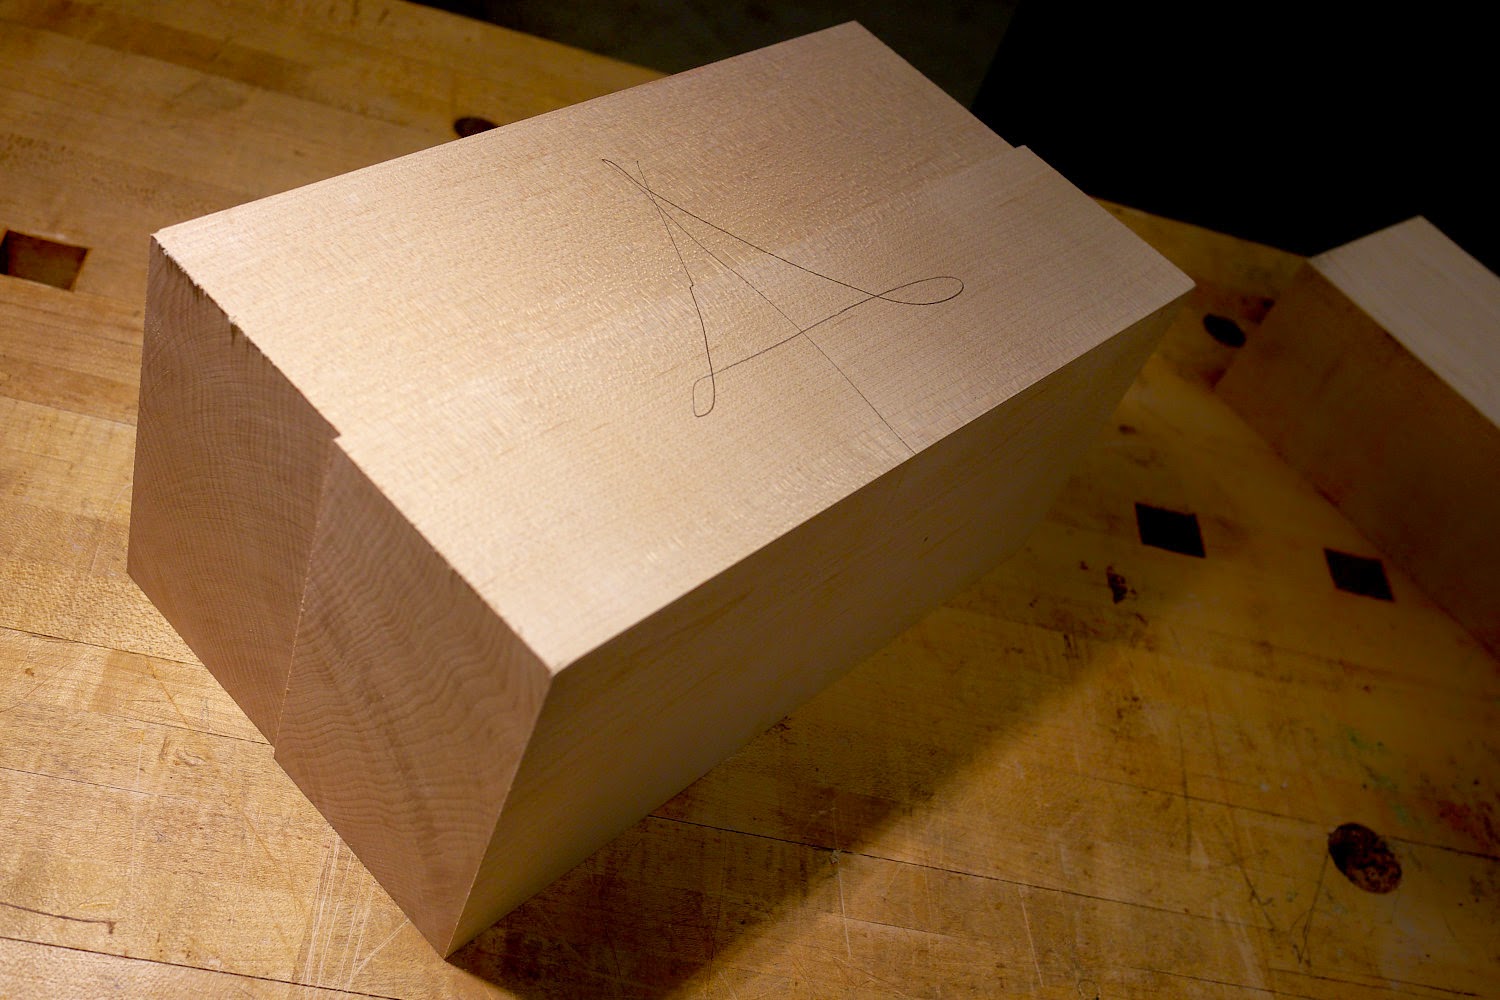
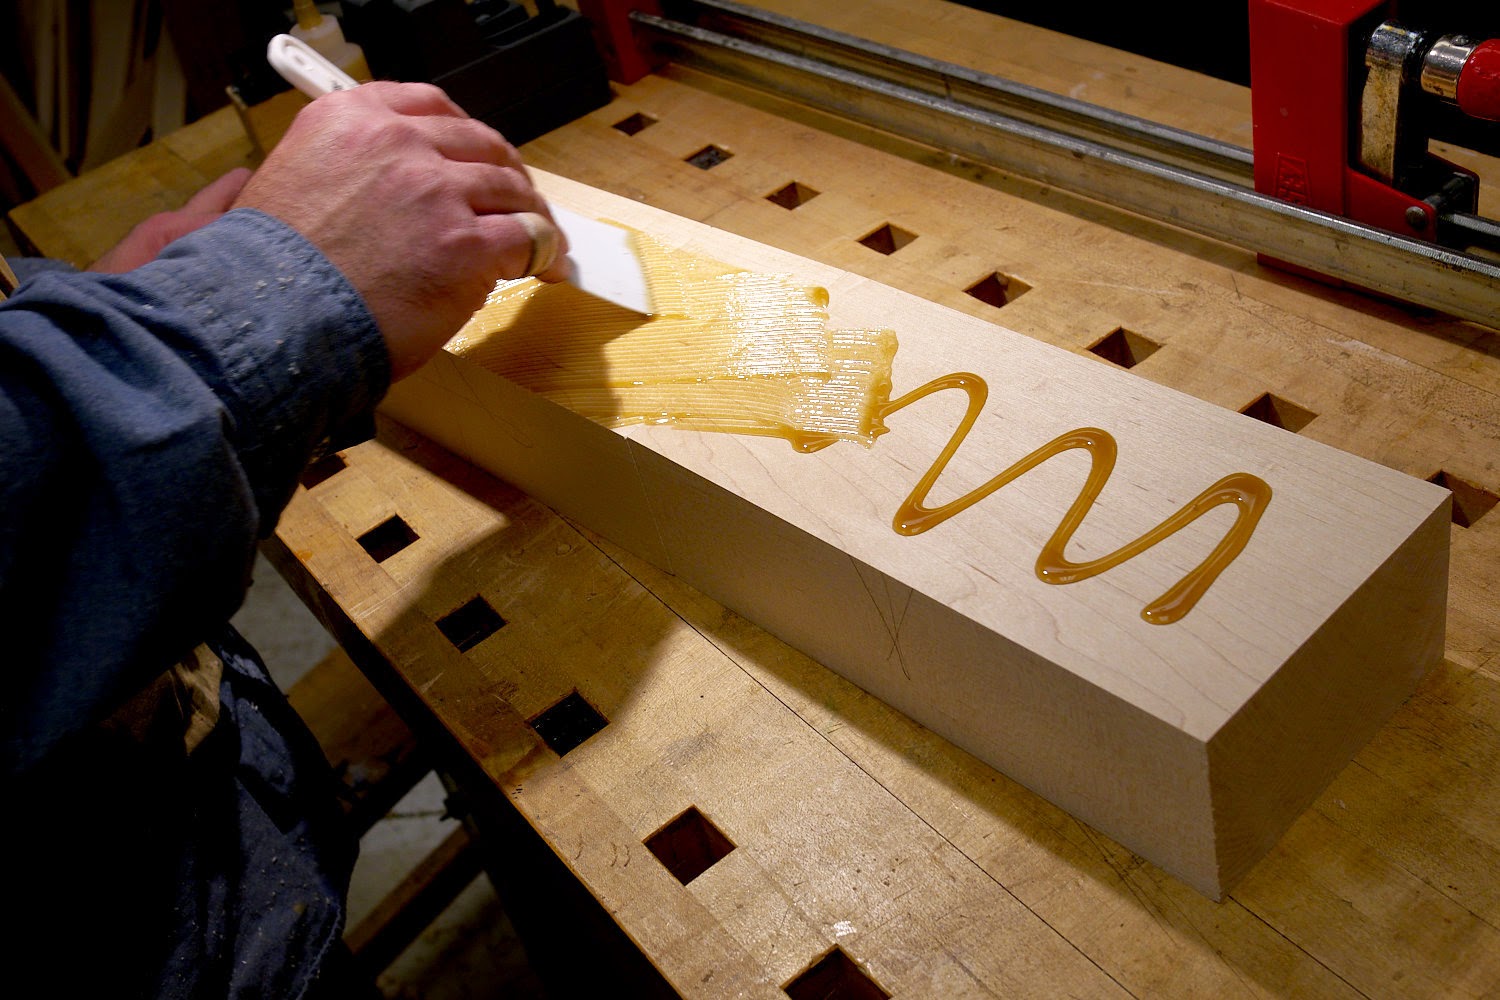
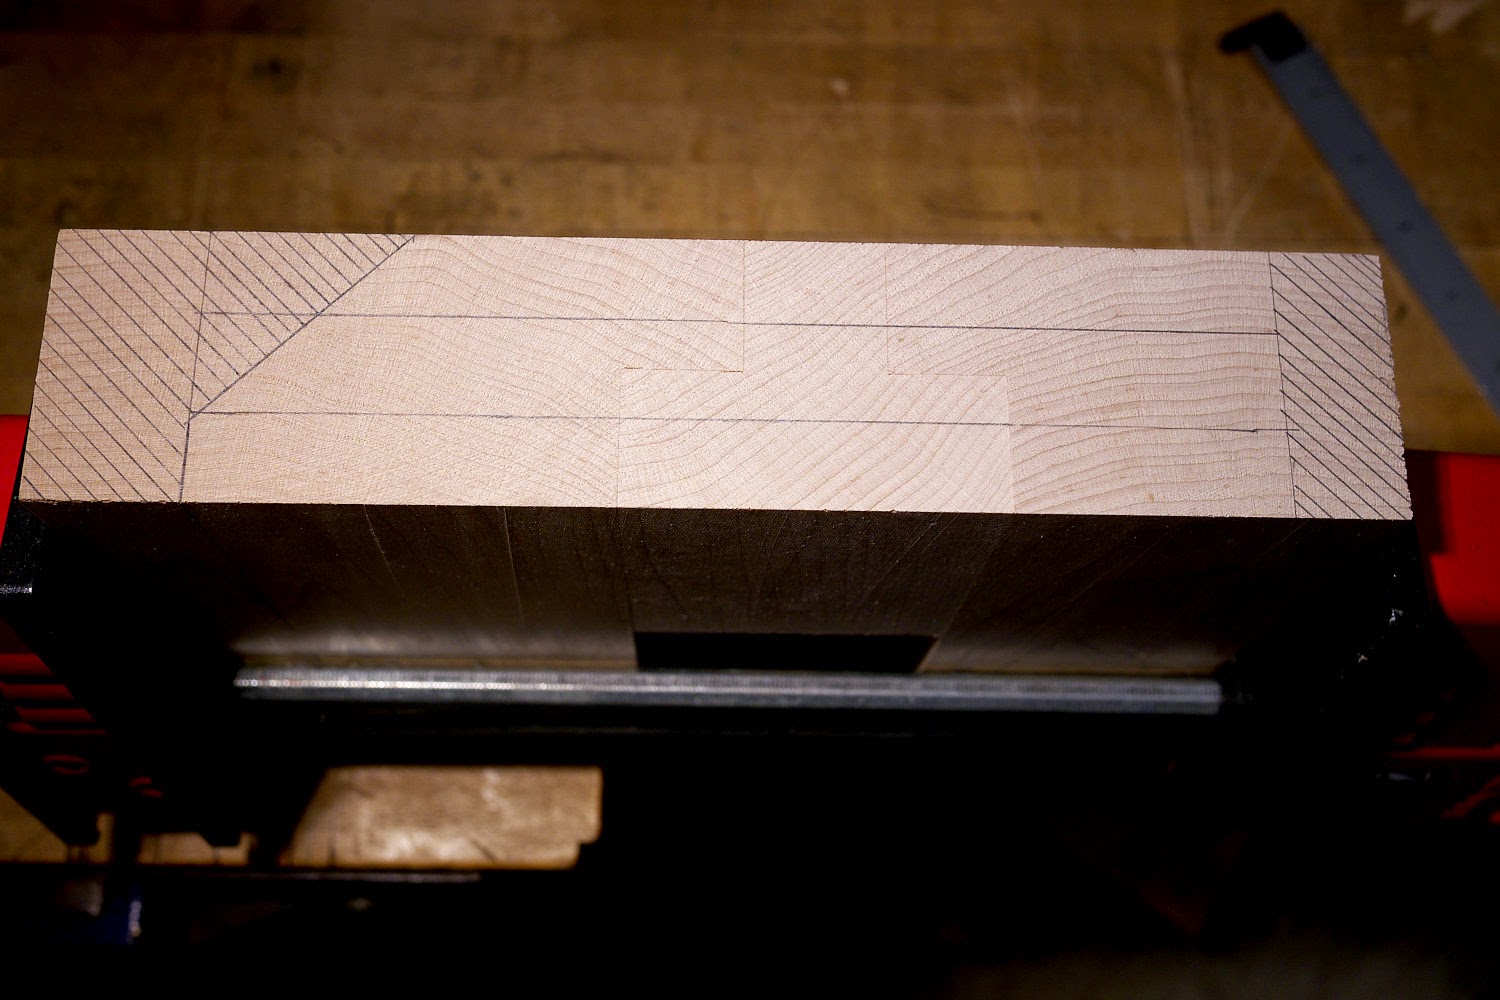
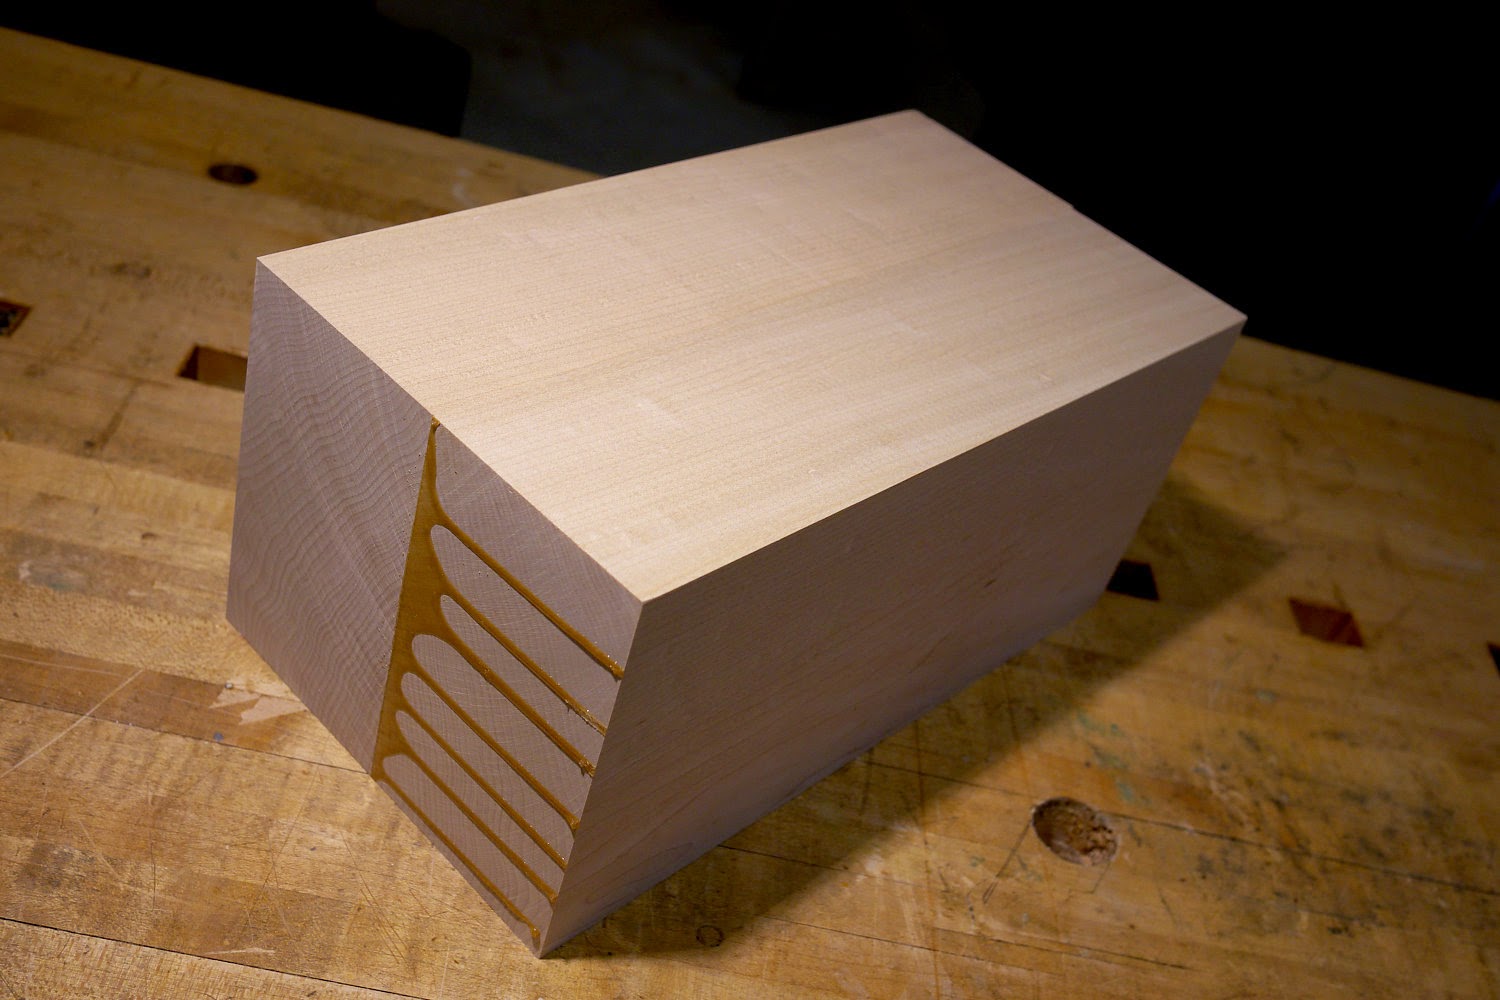
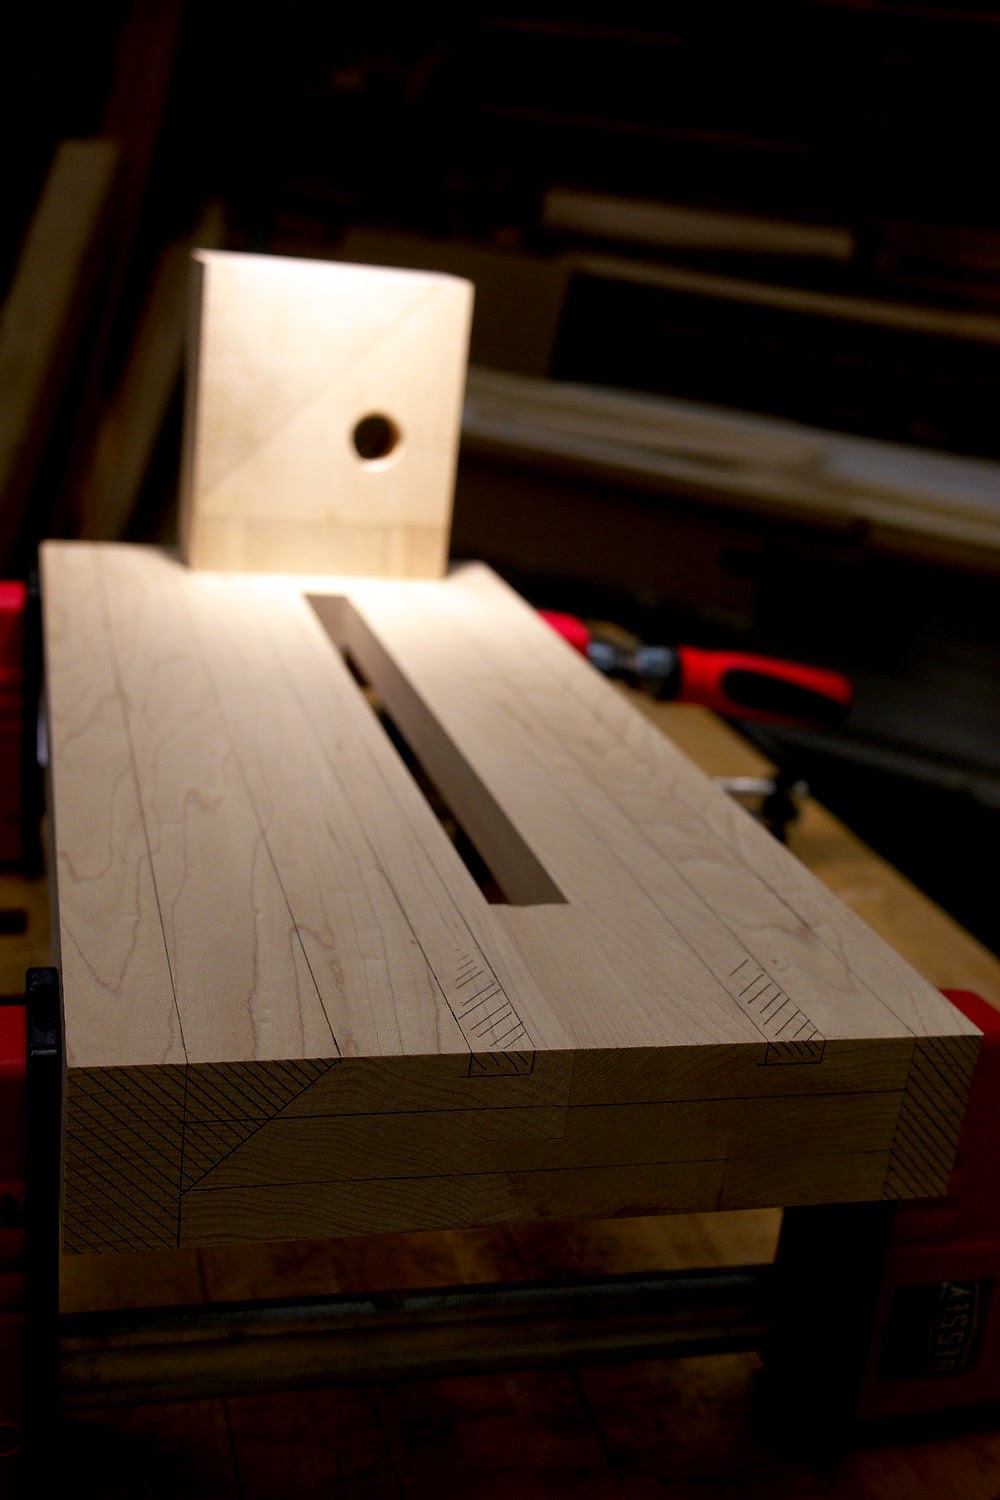
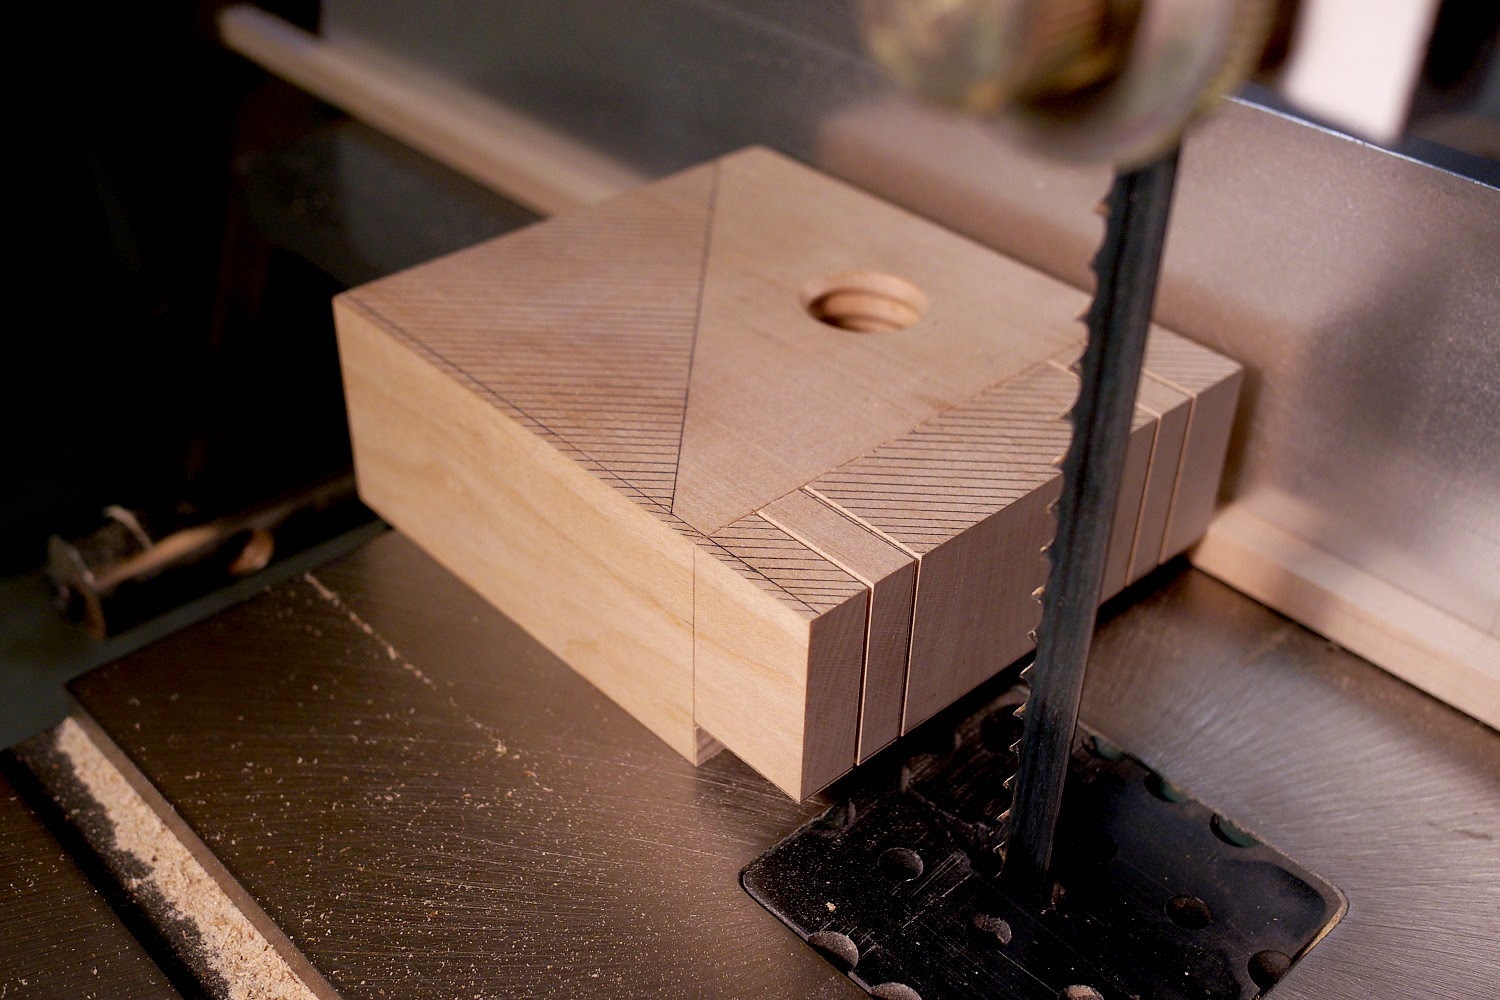
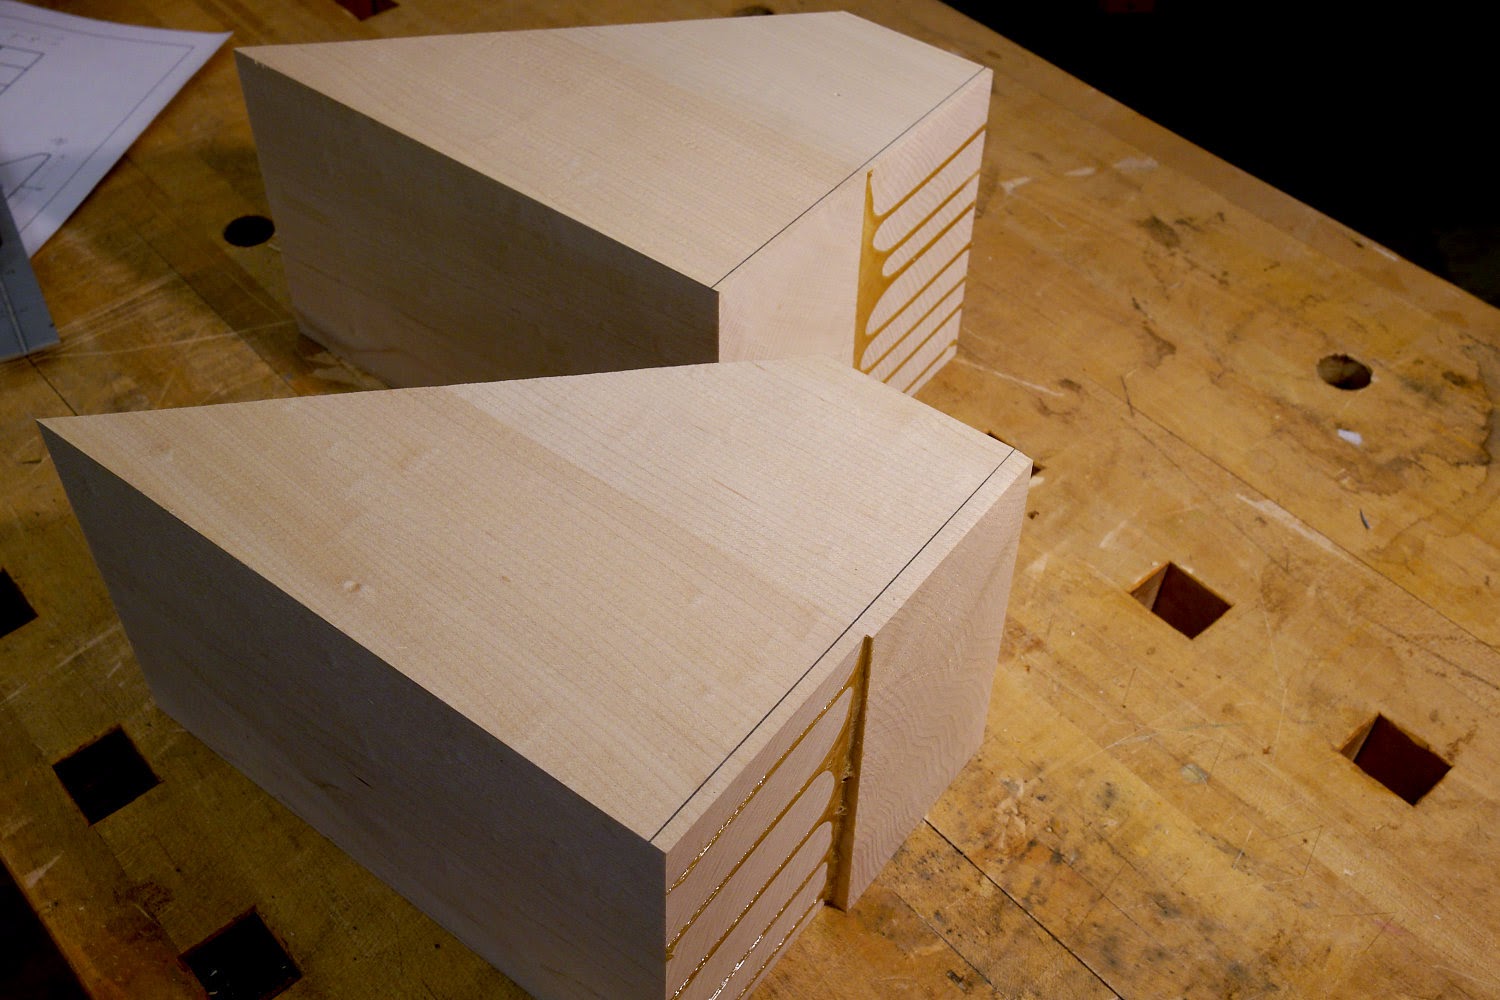
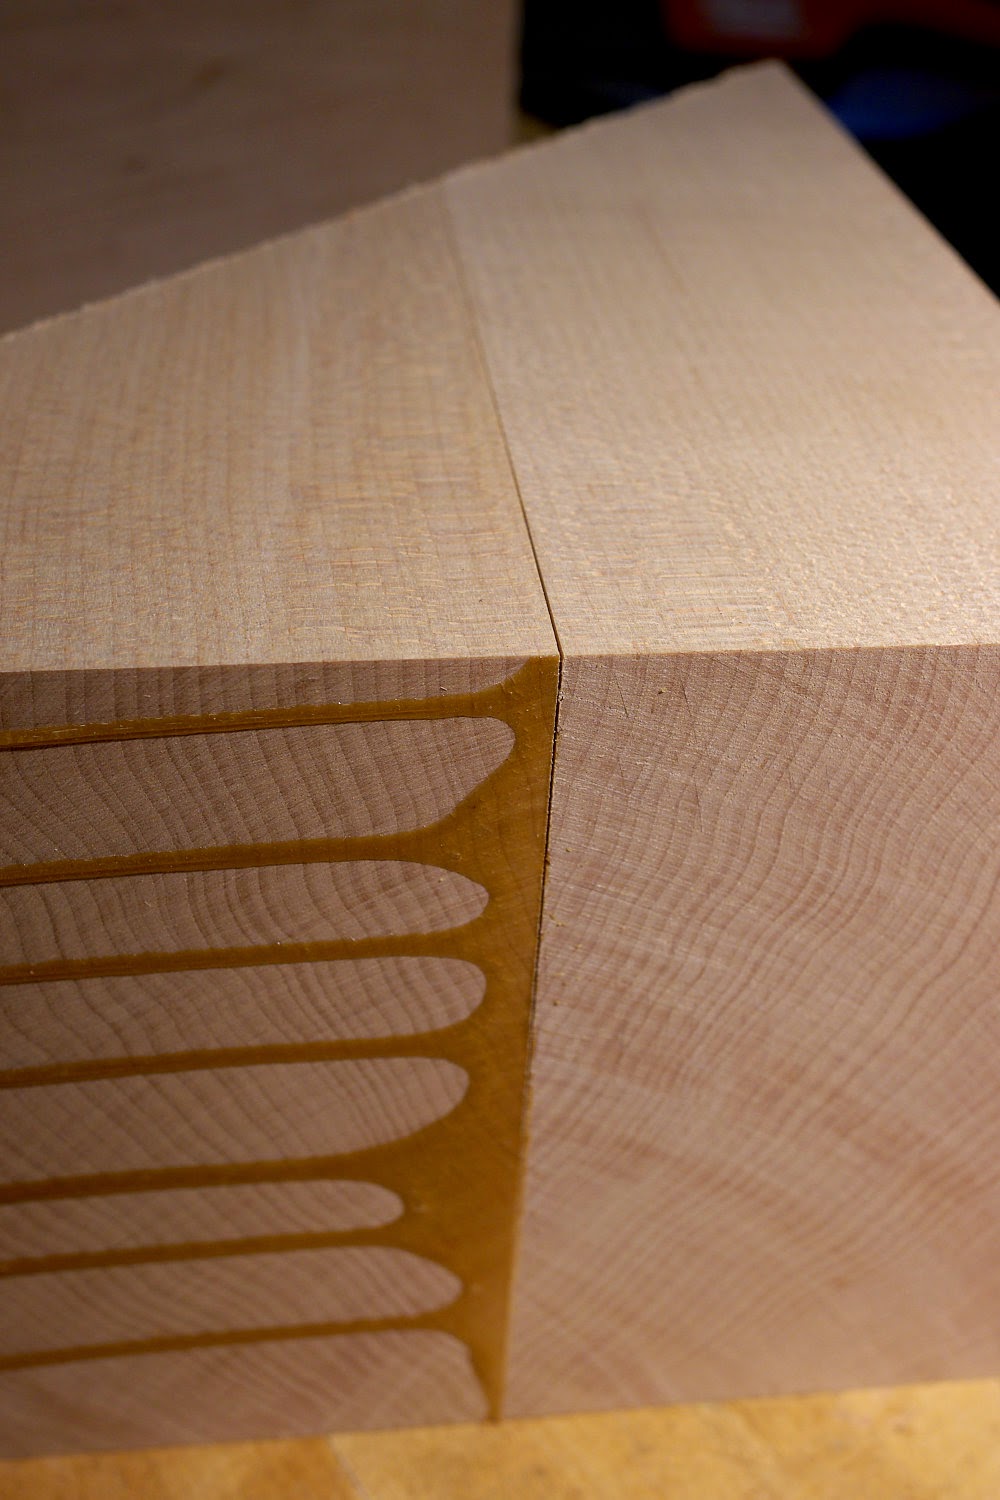
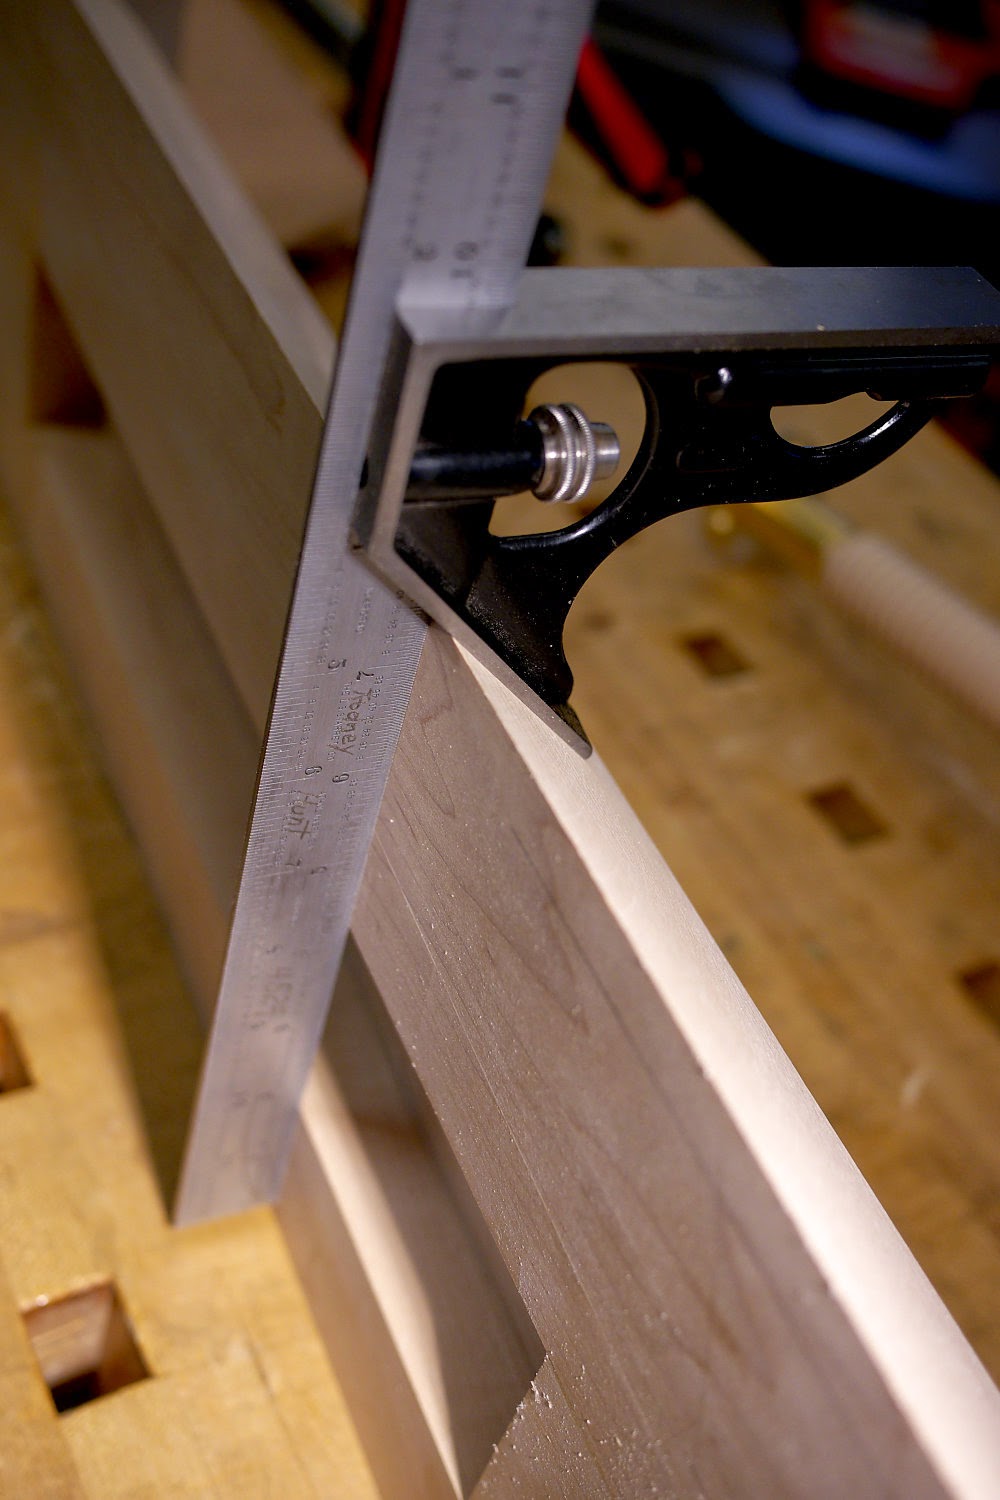
This morning I cut the assembled body to final length and laid out the final width as well as the main 45 degree chamfer. I won't cut the waste sections off until later.


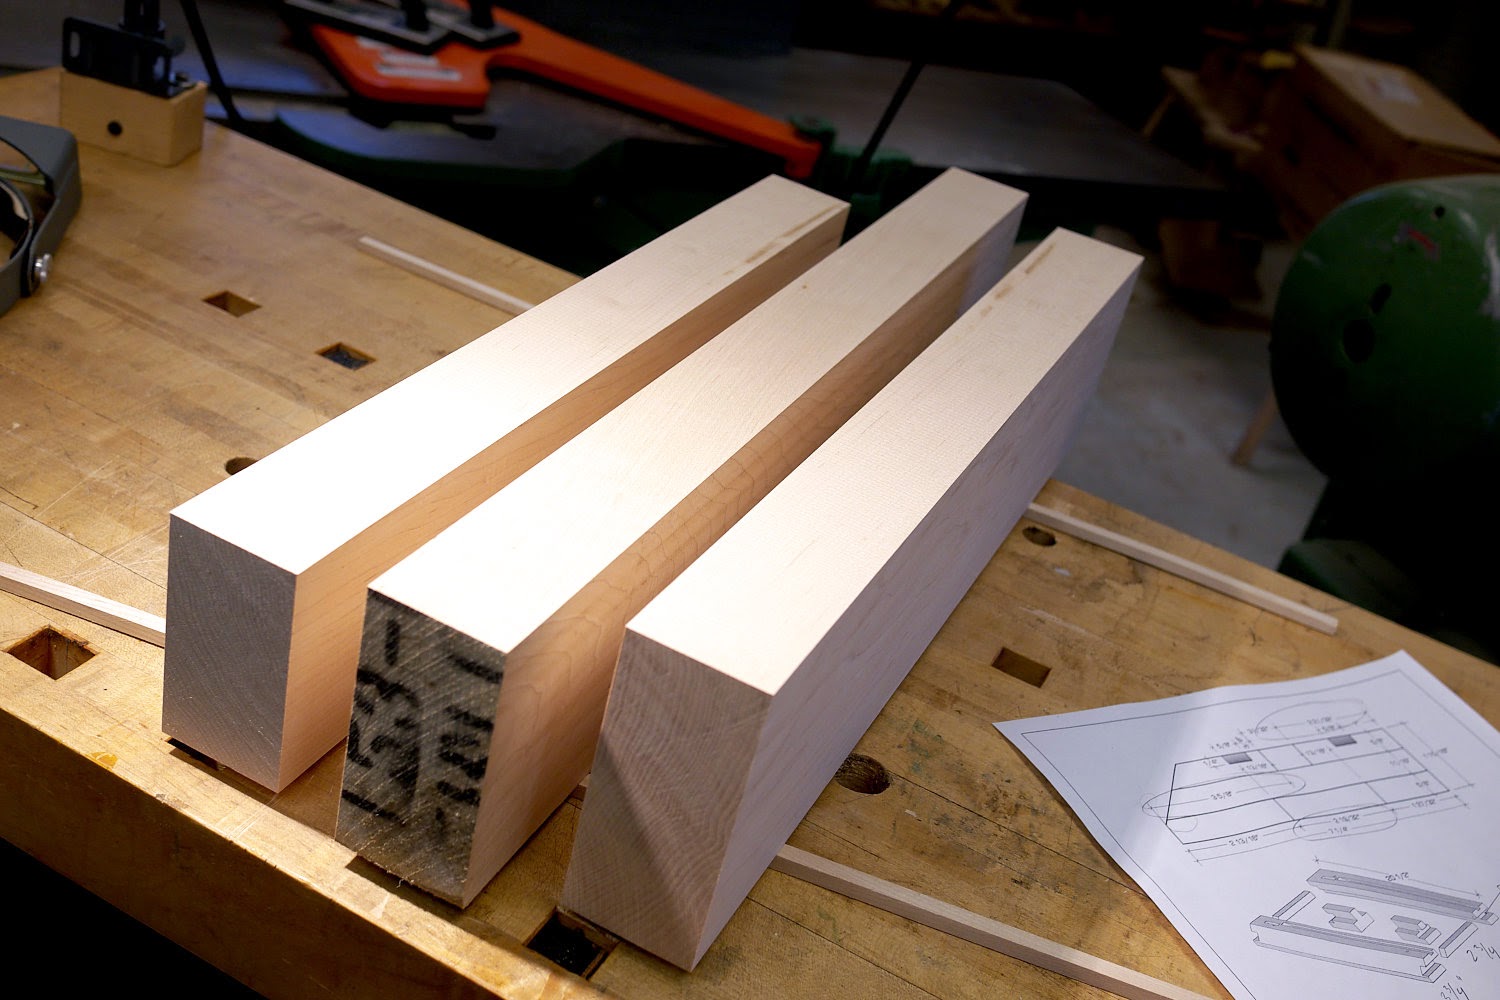
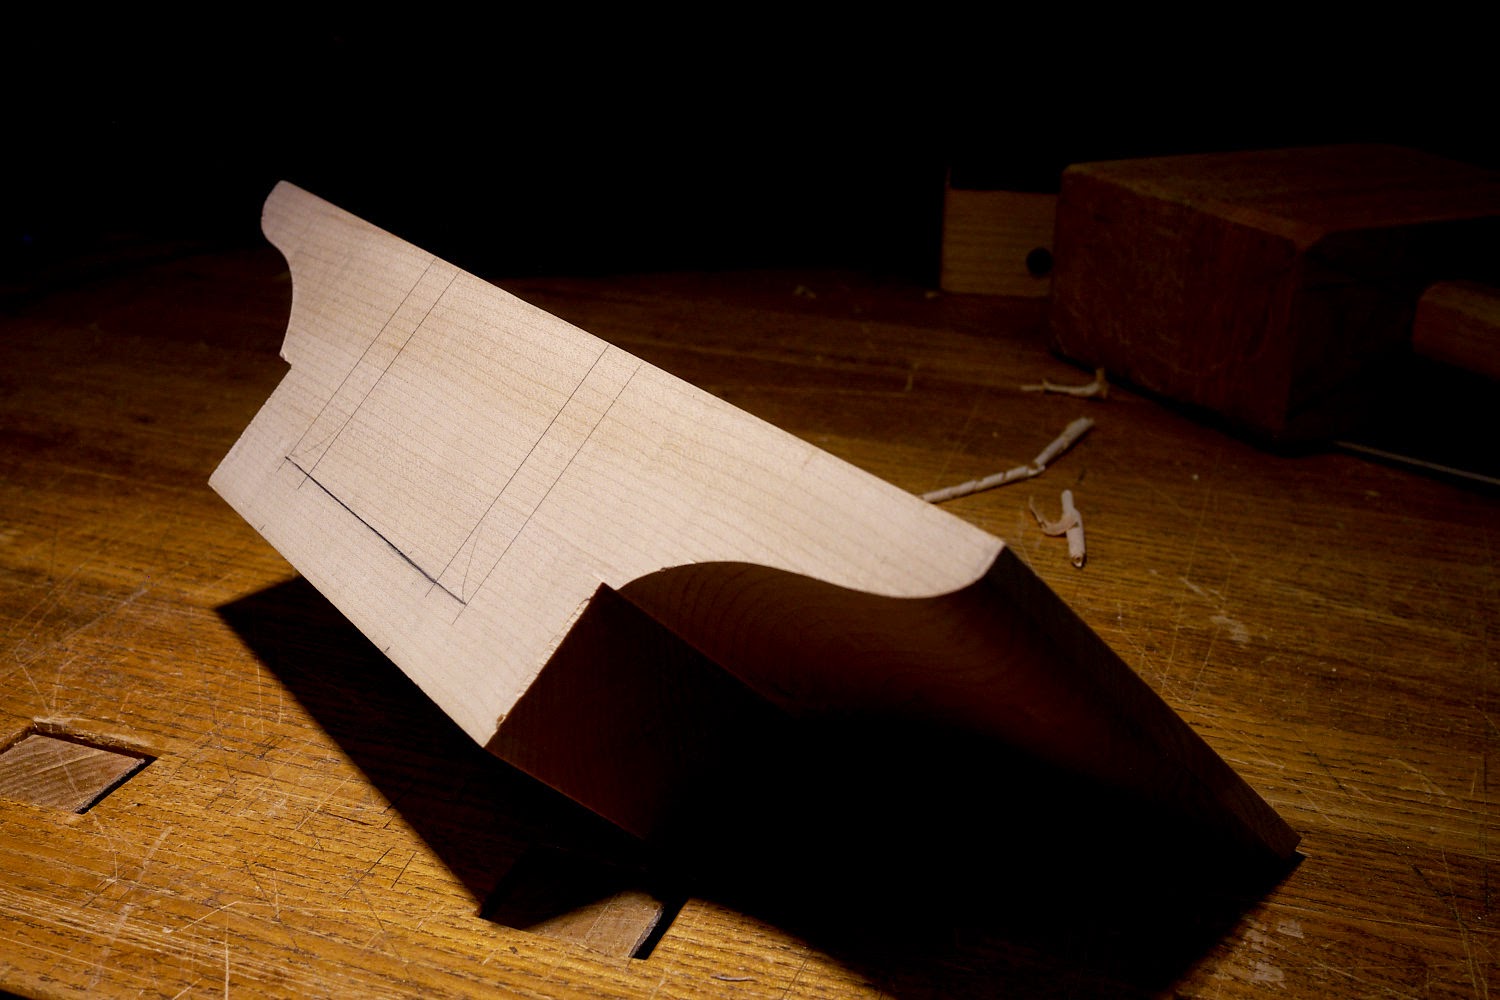
I took the jaw blank out of the clamps and four squared it. I milled it to 4-13/16" wide (the width of the wider, fixed jaw) by 5-9/16" tall. Don't confuse the nut block in the drawing above for the jaws. I didn't include the jaws in this drawing. I then sawed the blank in half at 45 degrees on the band saw. Each jaw is overlength by an inch or so. I'll cut them to final size after all the joinery is done and the vise is working smoothly.


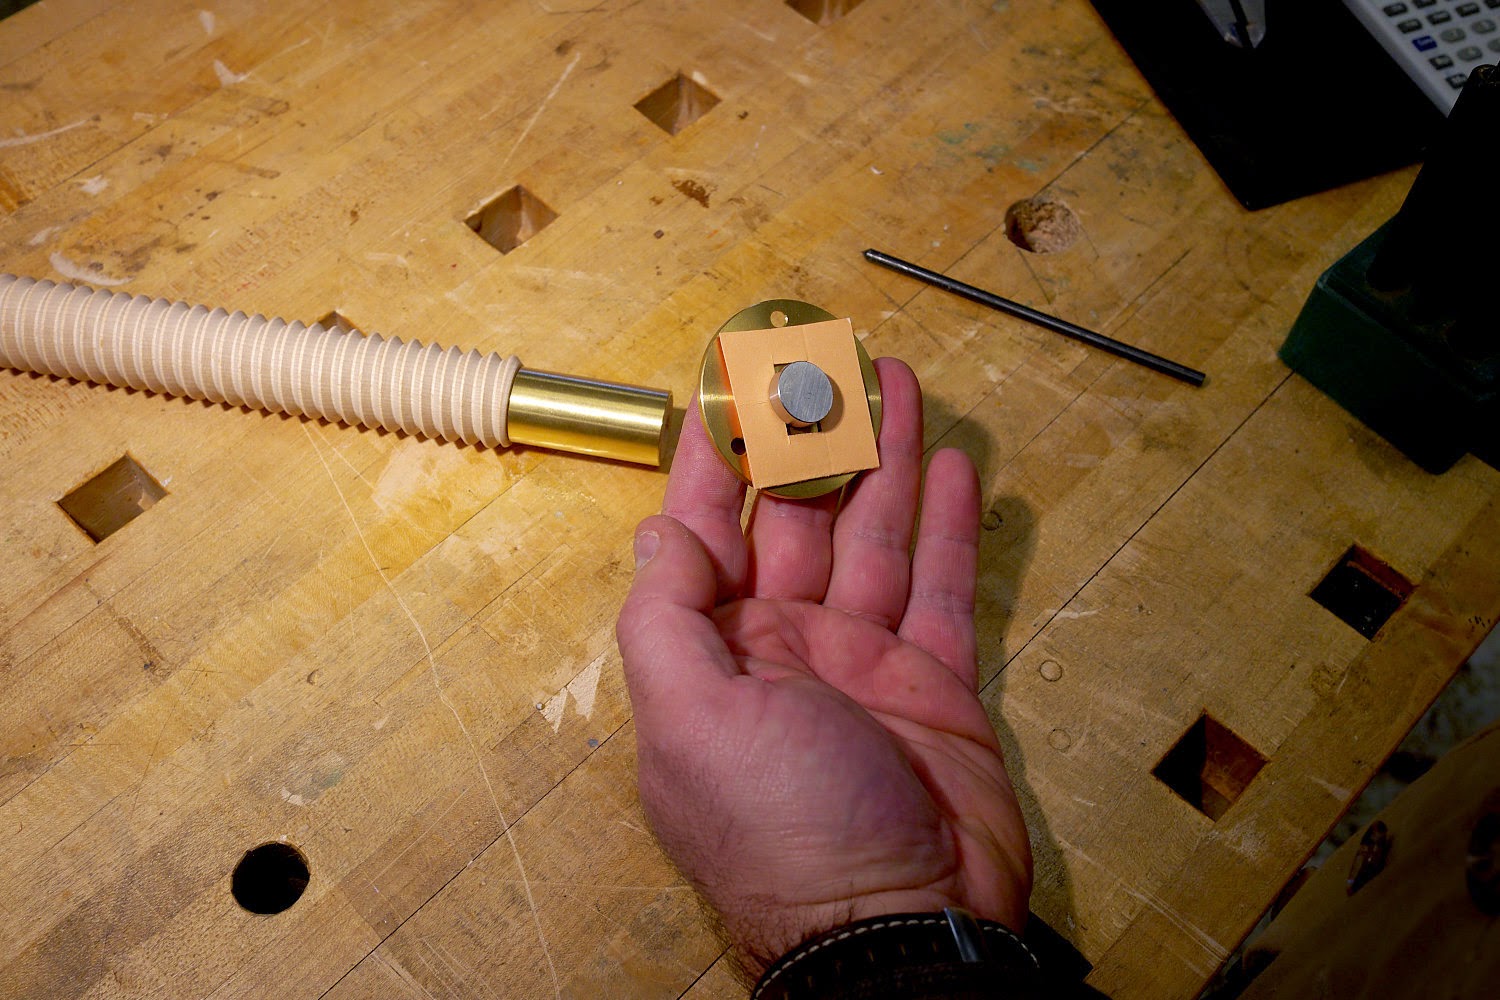
To install the garter you'll need to make a small drilling block. But first you'll need to find the location of the groove pin which holds the ferrule and garter pin in place.

The garter must be somewhat loose on the garter pin so the screw is free to turn easily. To achieve that loose fit, we need to position the groove pin in the right place.


Cut a shim that's about 20 thousands thick. I made mine from a double layer of paper cut from a file folder. Place this shim between the garter and the garter pin.


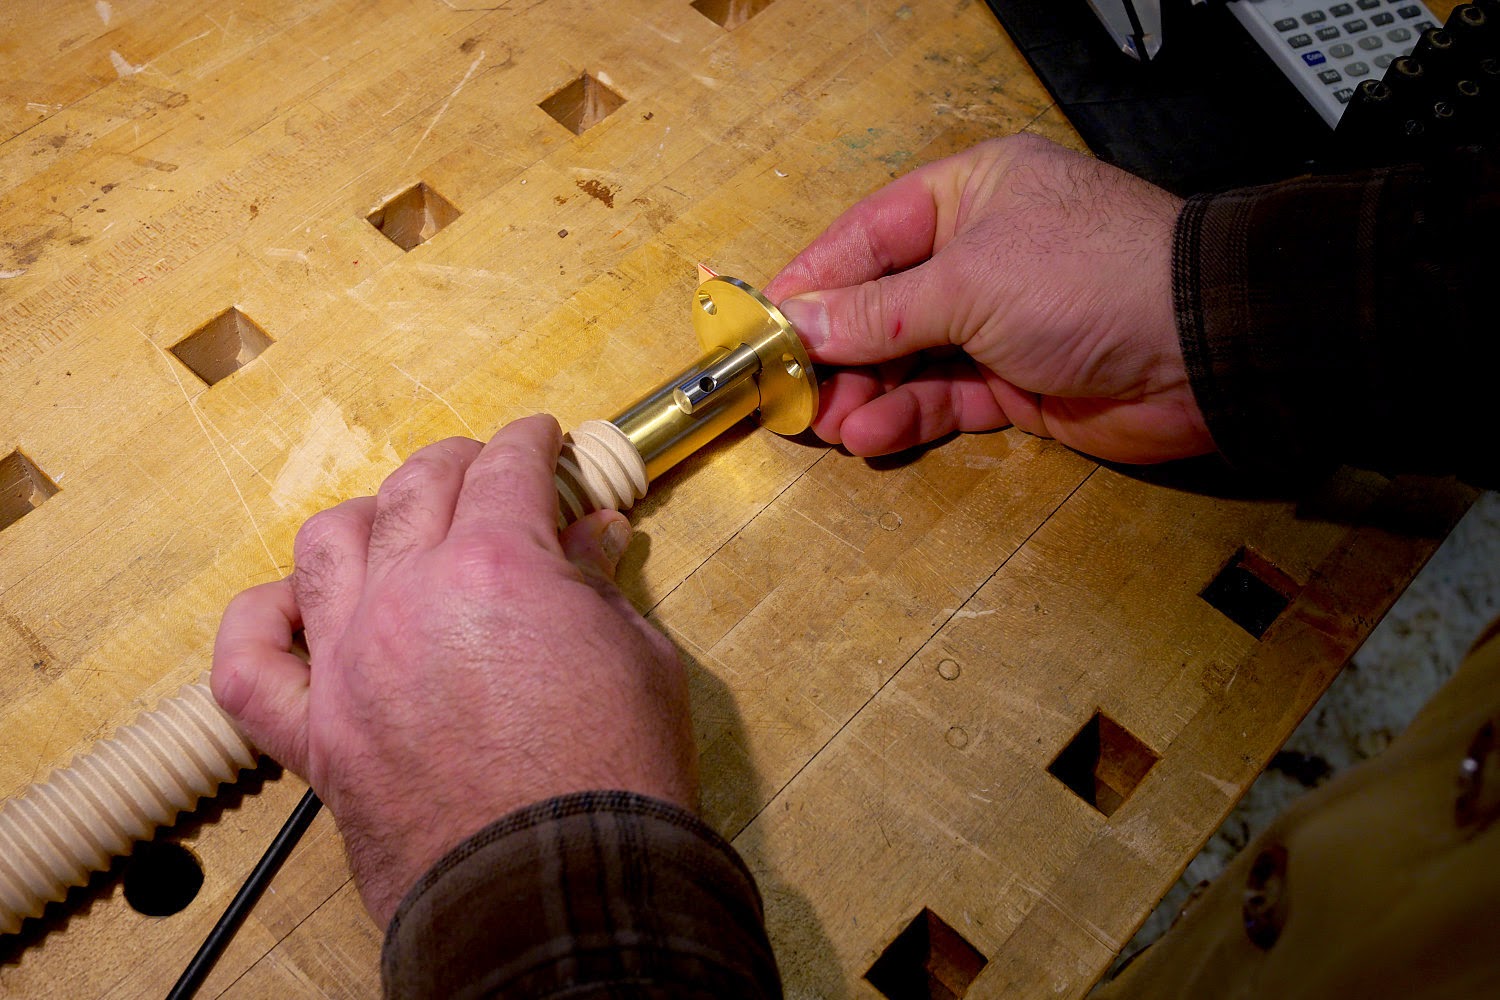
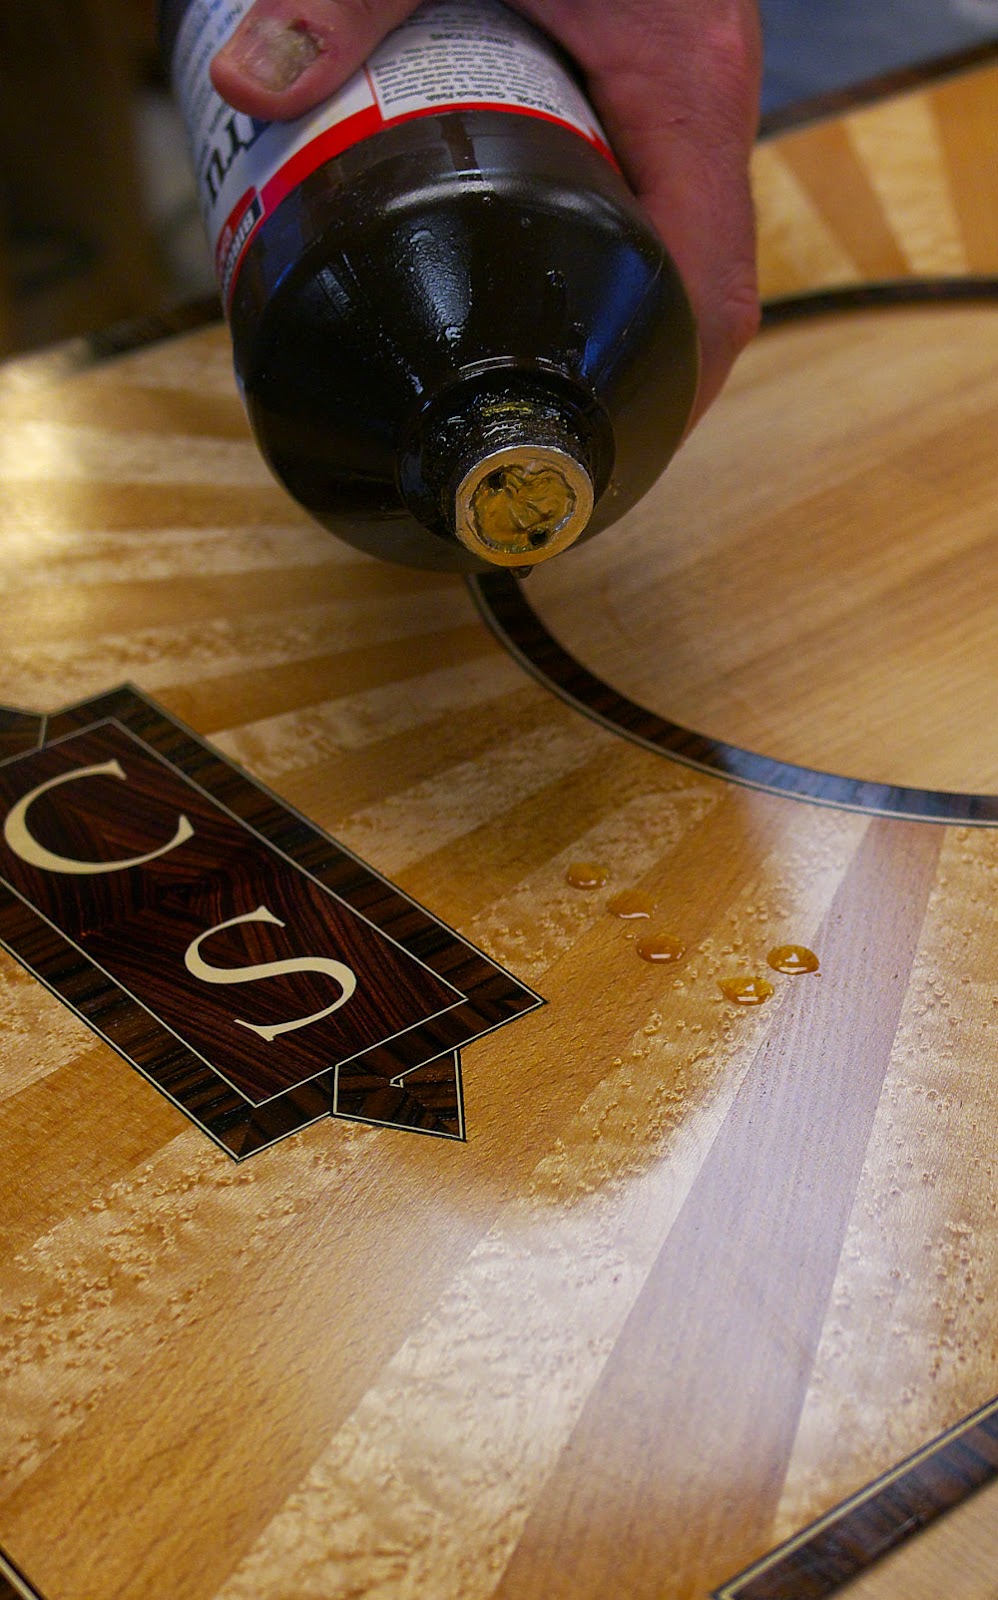
With the ferrule on the screw's tenon, press the garter and garter pin flat to the end of the screw.


Using a transfer punch (or a 3/16" bradpoint bit) insert it into the hole in the garter pin and mark the brass ferrule. Don't tap it with a hammer, just press by hand. The soft brass will mark easily.


 Remove the garter pin and set a marking gauge so the scribe touches the mark you made.


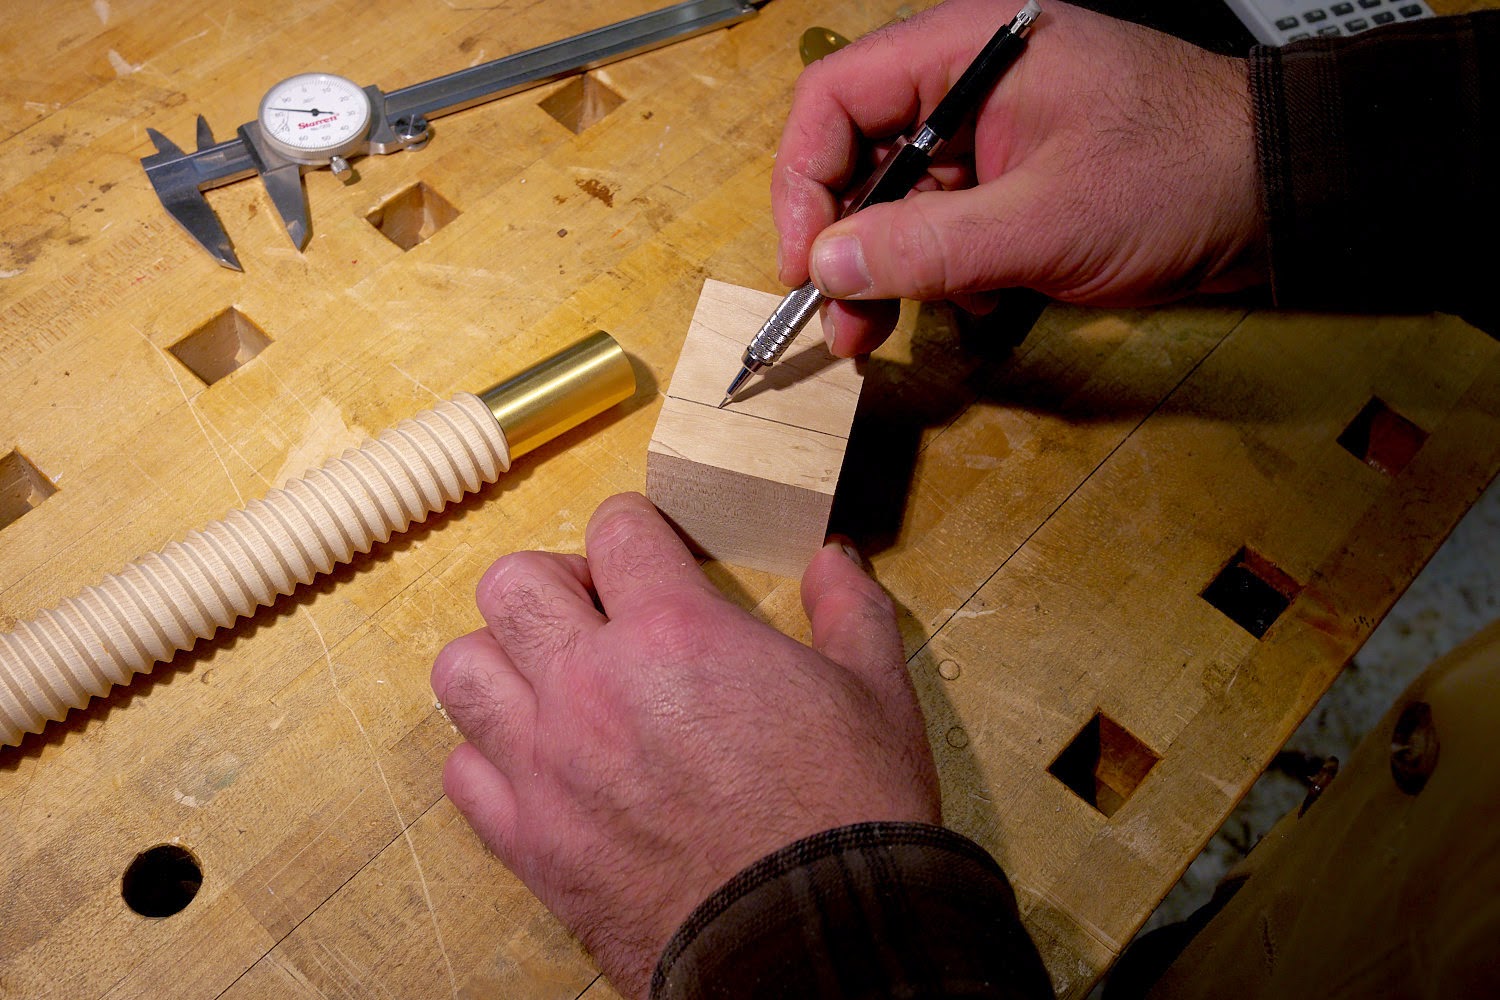
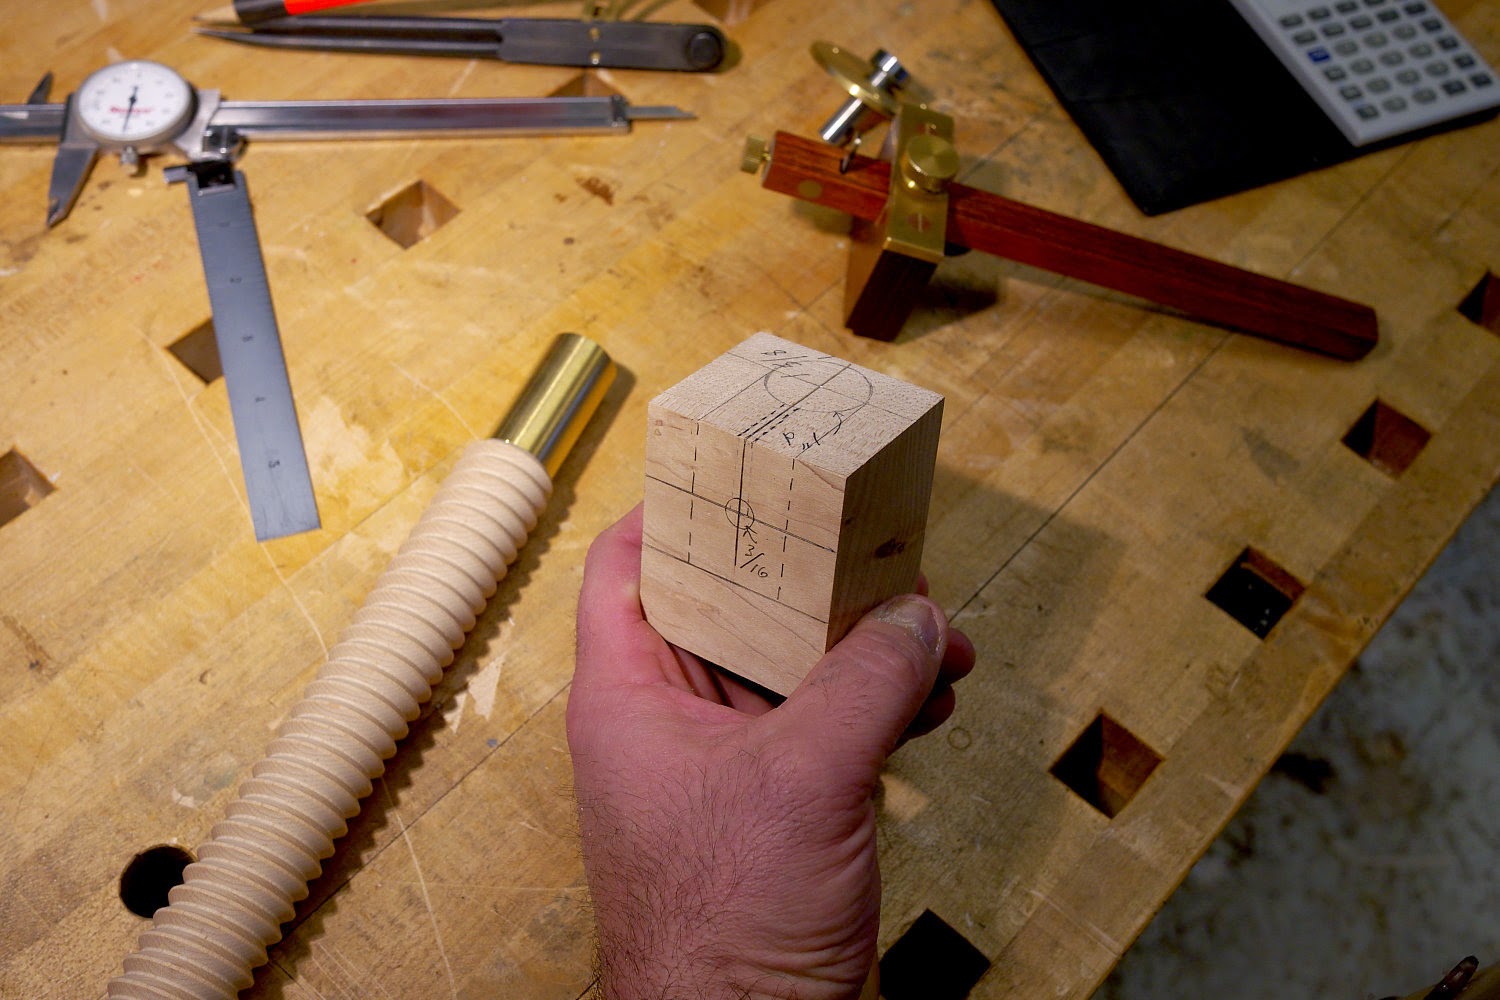
Get a scrap of wood that's true. The size is not important. Just make sure its about 1/2" wider than the length of the screw's tenon. Using the marking gauge, scribe a line across the top of the block. I'm pinching the end grain here with my left hand. I'm darkening the scribe line with a pencil. This is the location of the 3/16" cross hole.


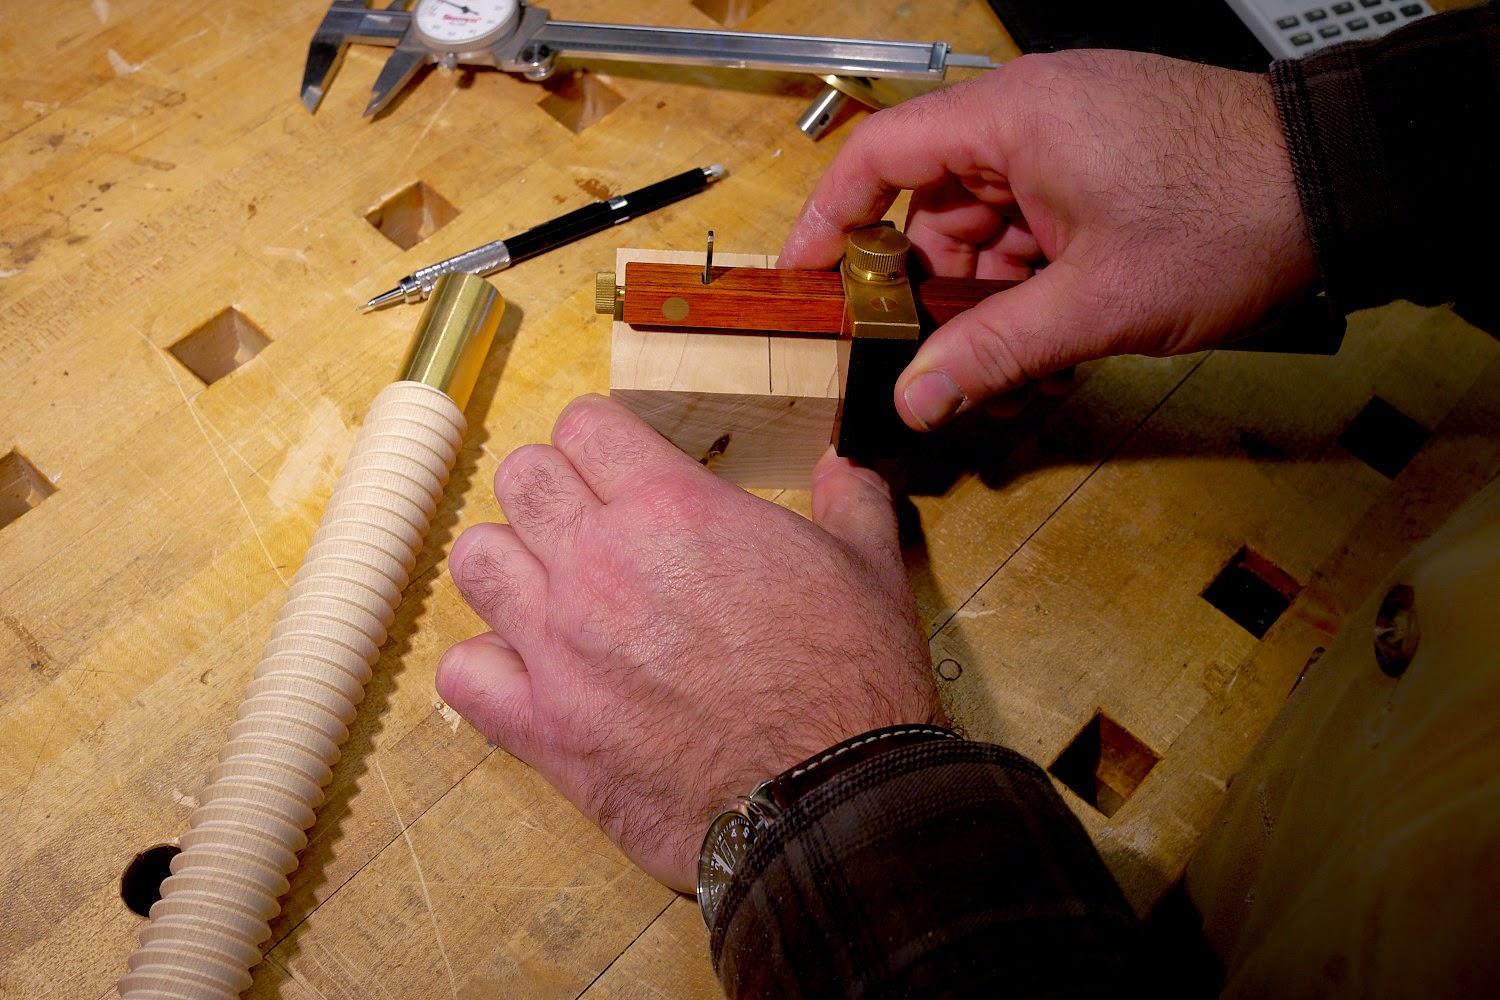
Reset your marking gauge for exactly twice the previous setting and scribe another line parallel to the previous one. This will be the depth of the hole the screw's tenon fits into.


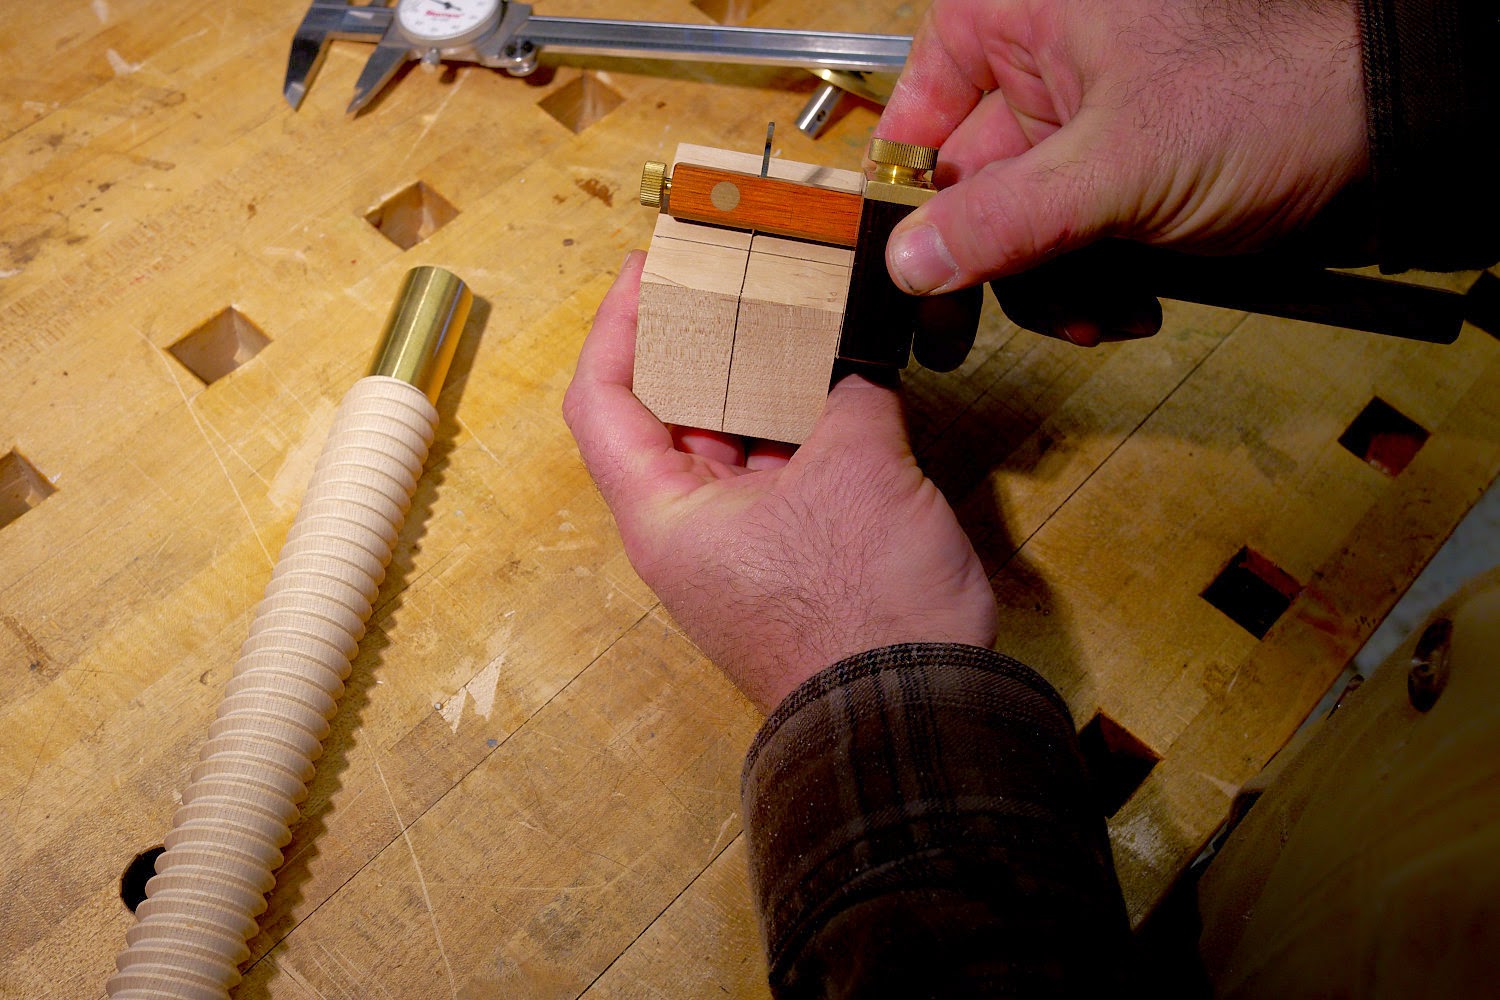
Now scribe a center line perpendicular to the other lines in the middle of the block (it doesn't have to be exactly in the middle) and carry the line down the front of the block.


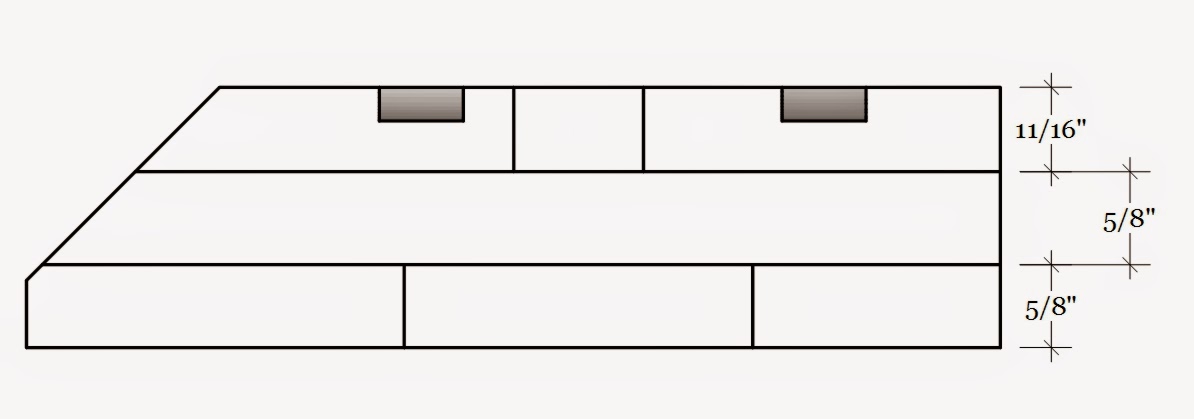
Now scribe a line 5/8" up from the bottom of the block on the front side and draw a 1" circle where it intersects. This is the hole for the screw's tenon.


Where the center line intersects the line on the top of the block you'll drill a 3/16" hole.


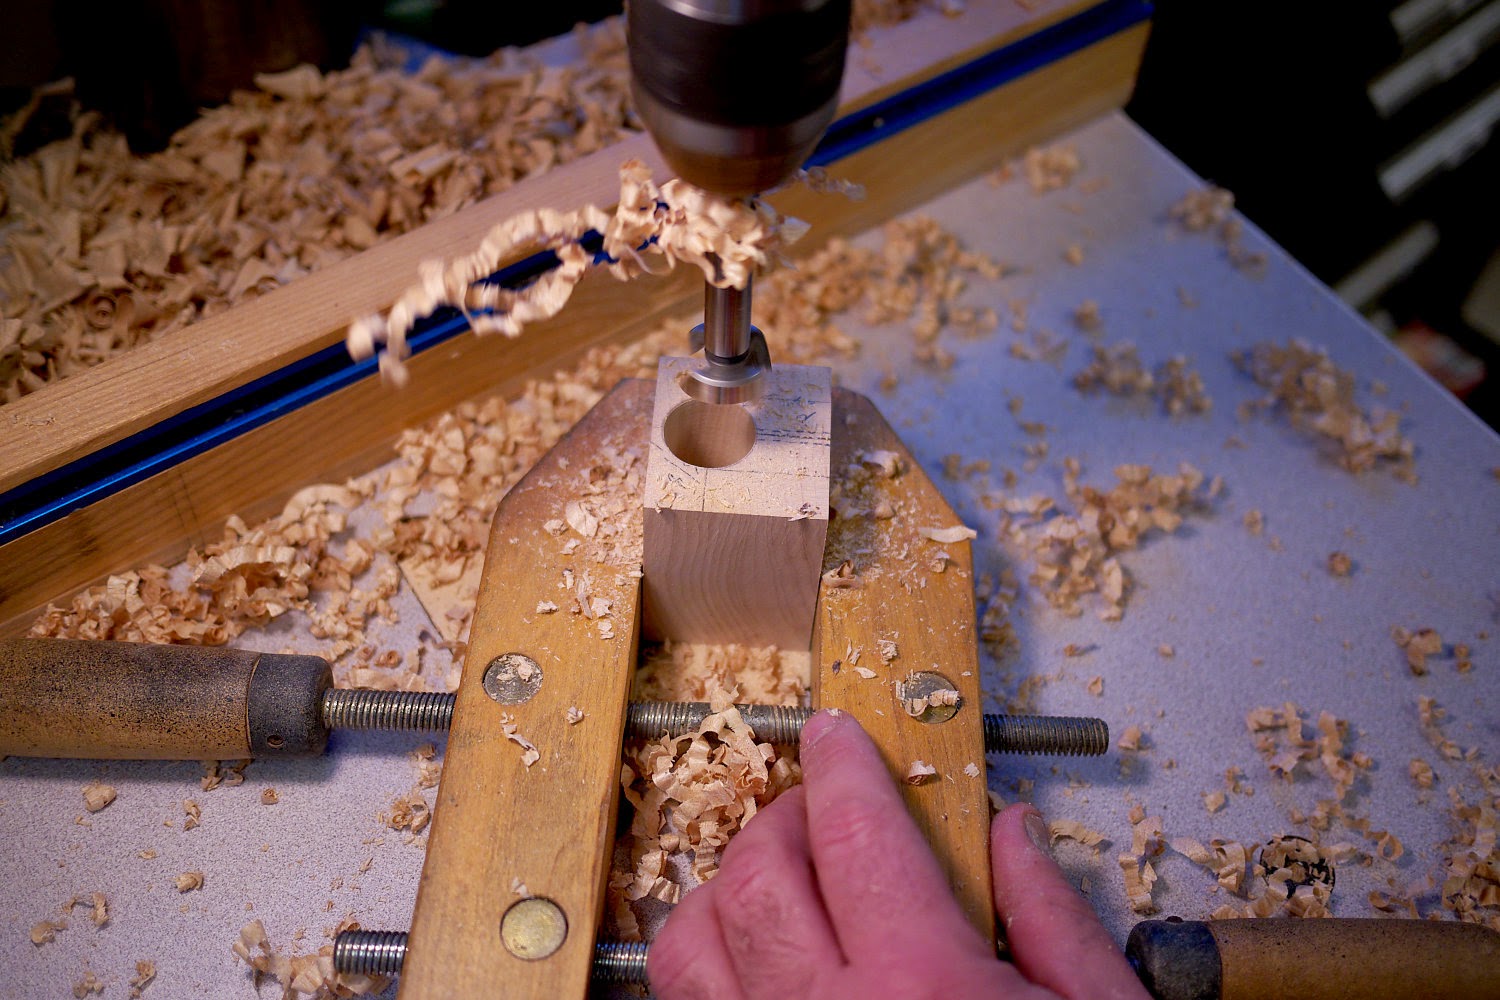
If you have a 15/16" forstner bit, mount it in your drill press. A brace and bit works too. Otherwise, use a 1" bit. Set your depth stop so the bit stops at the second scribe line on the top of the block.


Now flip the block so the top is up. Using a brad point bit, drill the 3/16" hole until you feel it break through into the larger hole.


If you drilled a 1" hole, you'll need to wrap some masking tape around the ferrule to take up the slack. Put enough layers so it fits snugly into the hole.


Hold the screw firmly into the drilling block with a clamp and drill the 3/16" hole through the guide block, ferrule and screw tenon. Use a regular twist bit, and use a sharp one.


Assemble the components and see how they all line up. The cross hole in the ferrule, screw tenon and garter pin should all line up, with about 20 thousandths play about the garter.


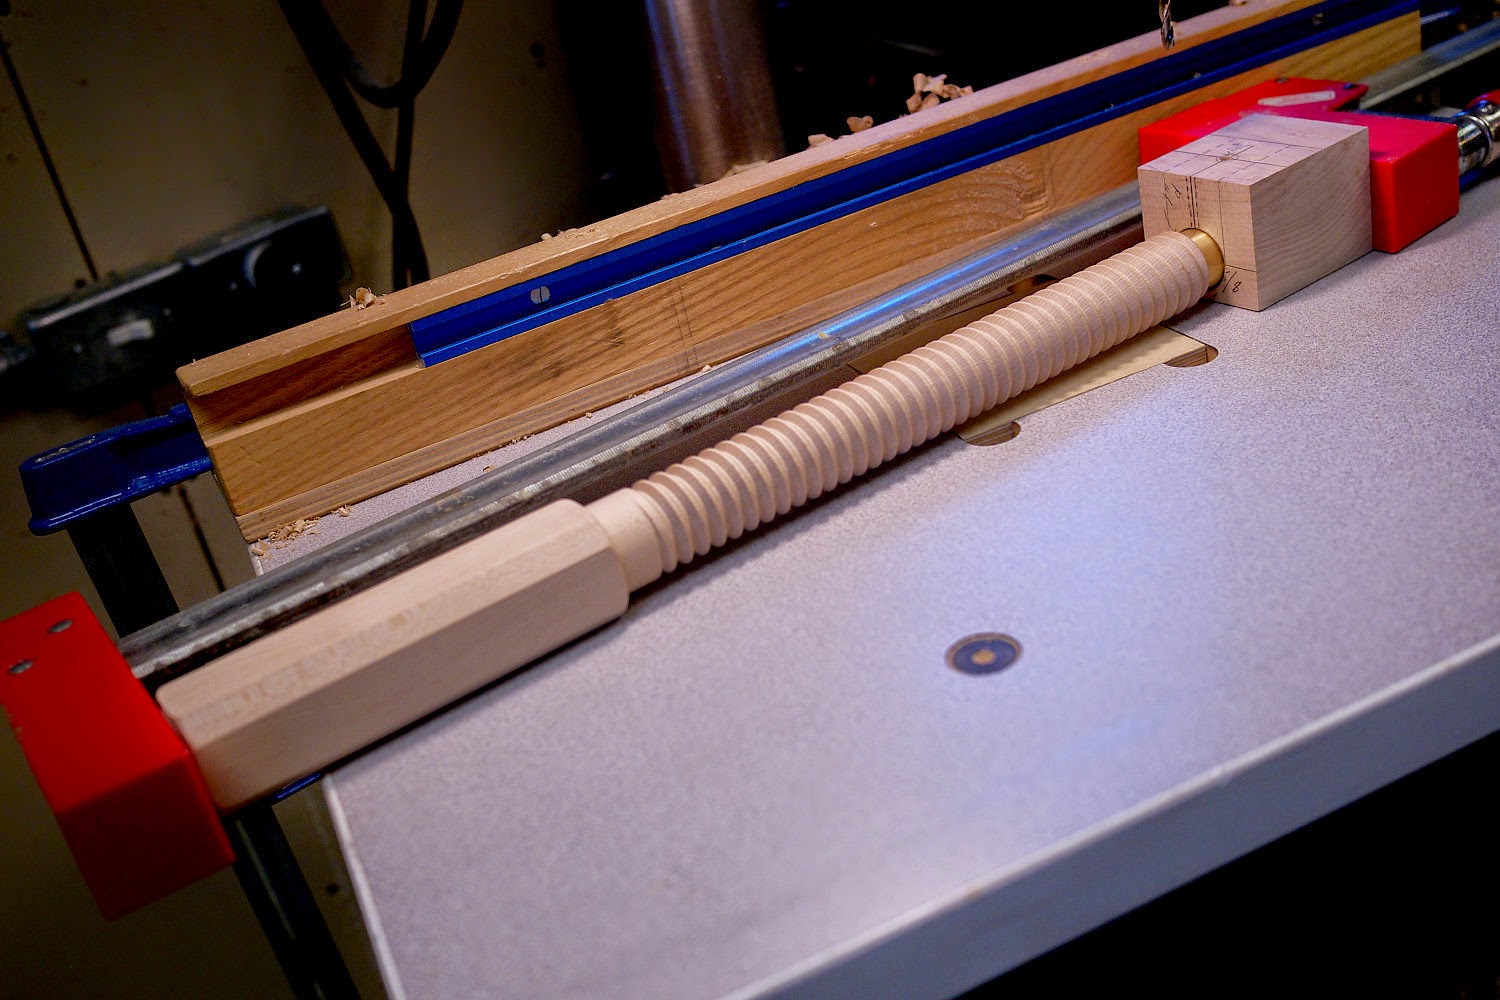
To test fit the groove pin in the garter pin, cut the drilling block in half and use it to support the end of the screw. Do this without the garter in place, then remove the pin. Later, when the vise is totally finished, you'll install the garter after the screw is threaded through the nut block.See video below.

If you've messed up somewhere and the garter is too tight, you can file and/or sand the end of the ferrule and tenon to loosen up the fit. If the fit is too loose or sloppy, you may be able to place a washer on the garter pin's shaft between the head of the pin and the garter. This will get buried in the moving jaw, so you'll never see it.


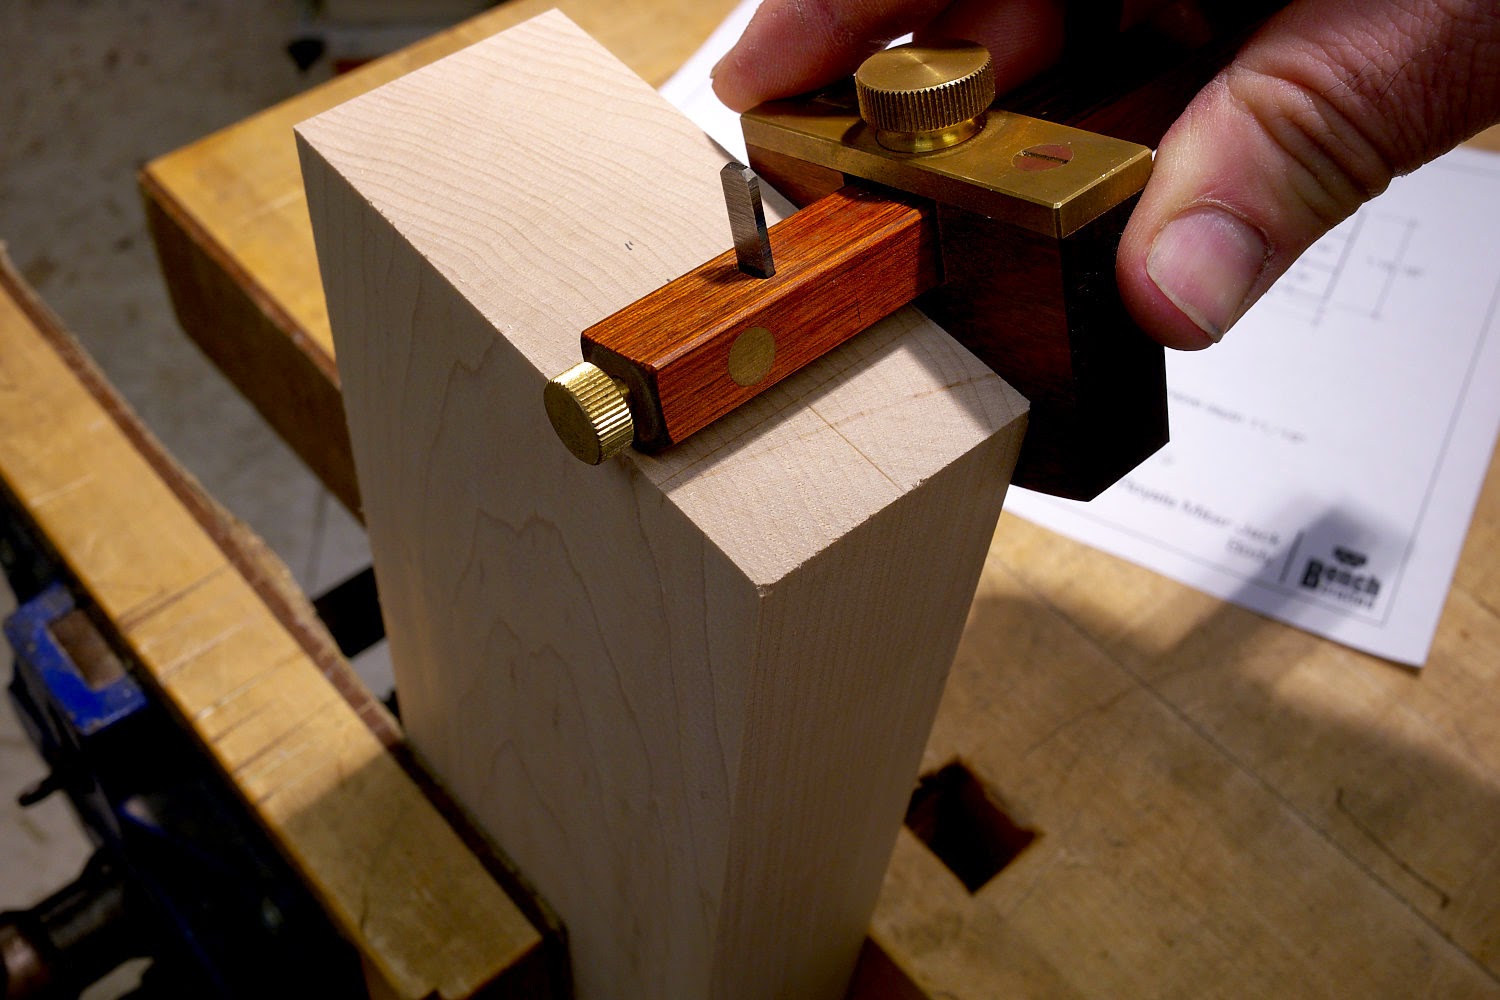
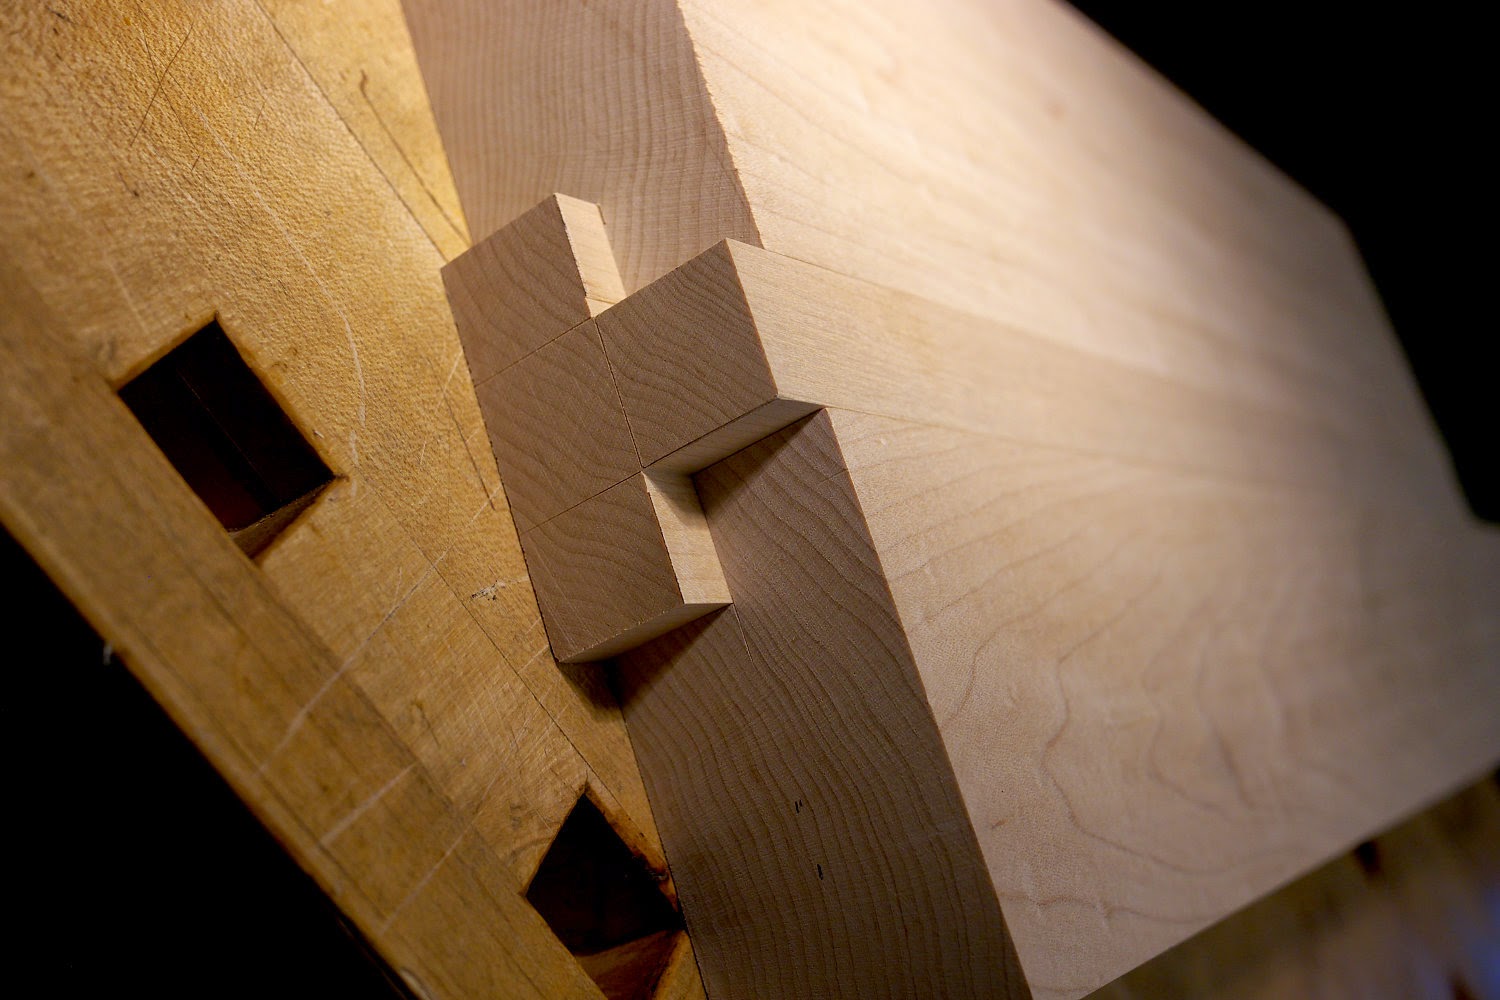
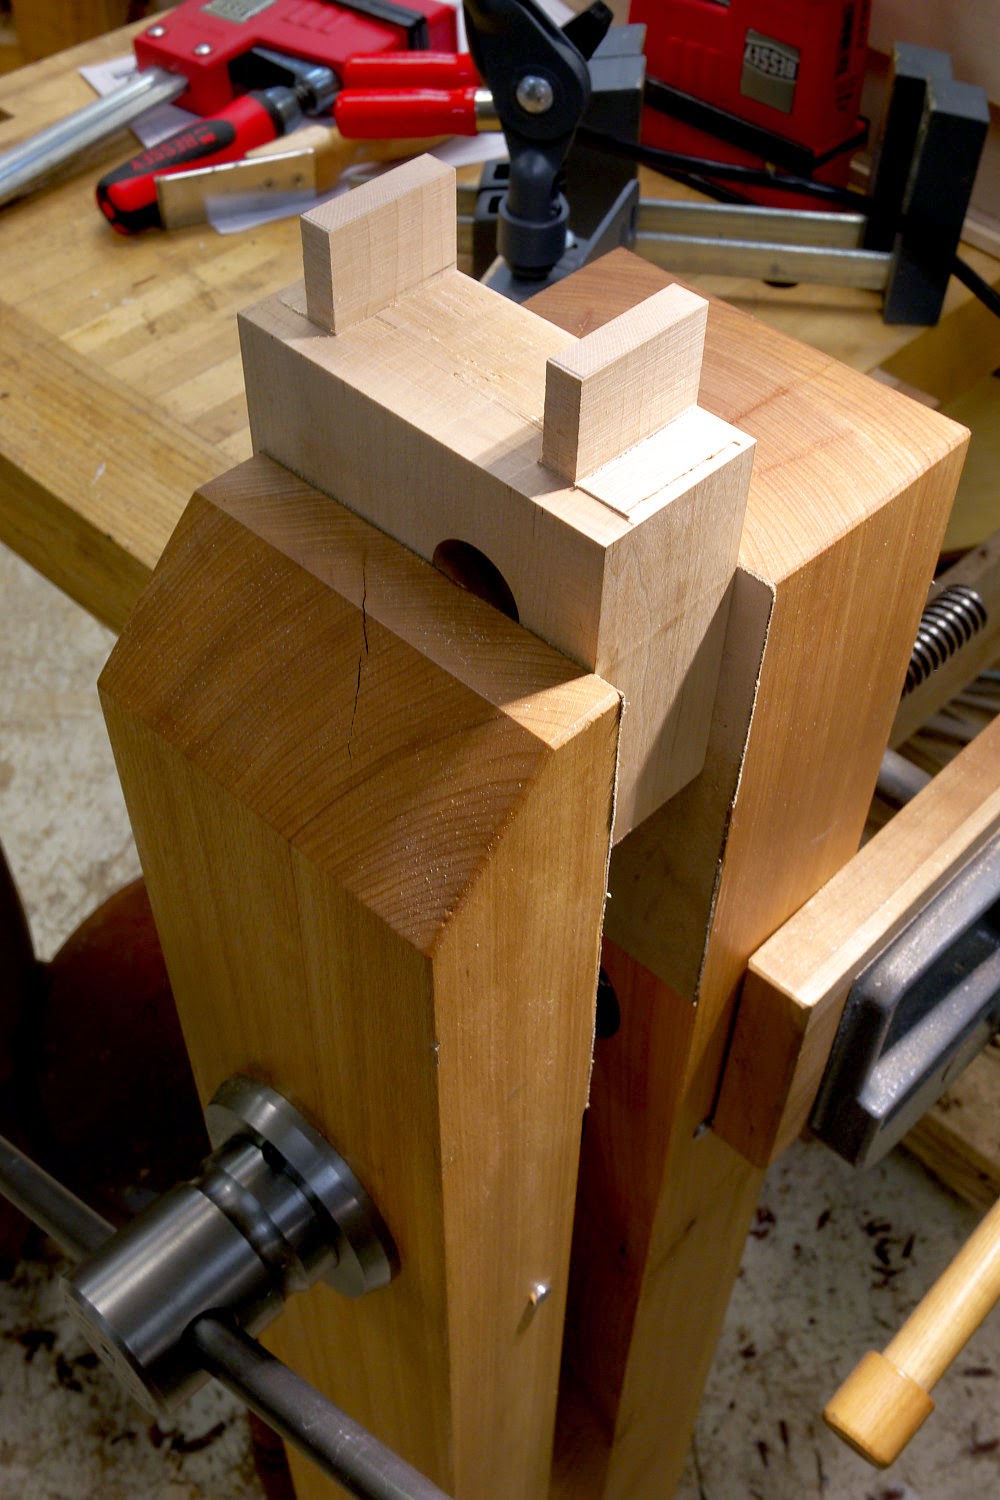
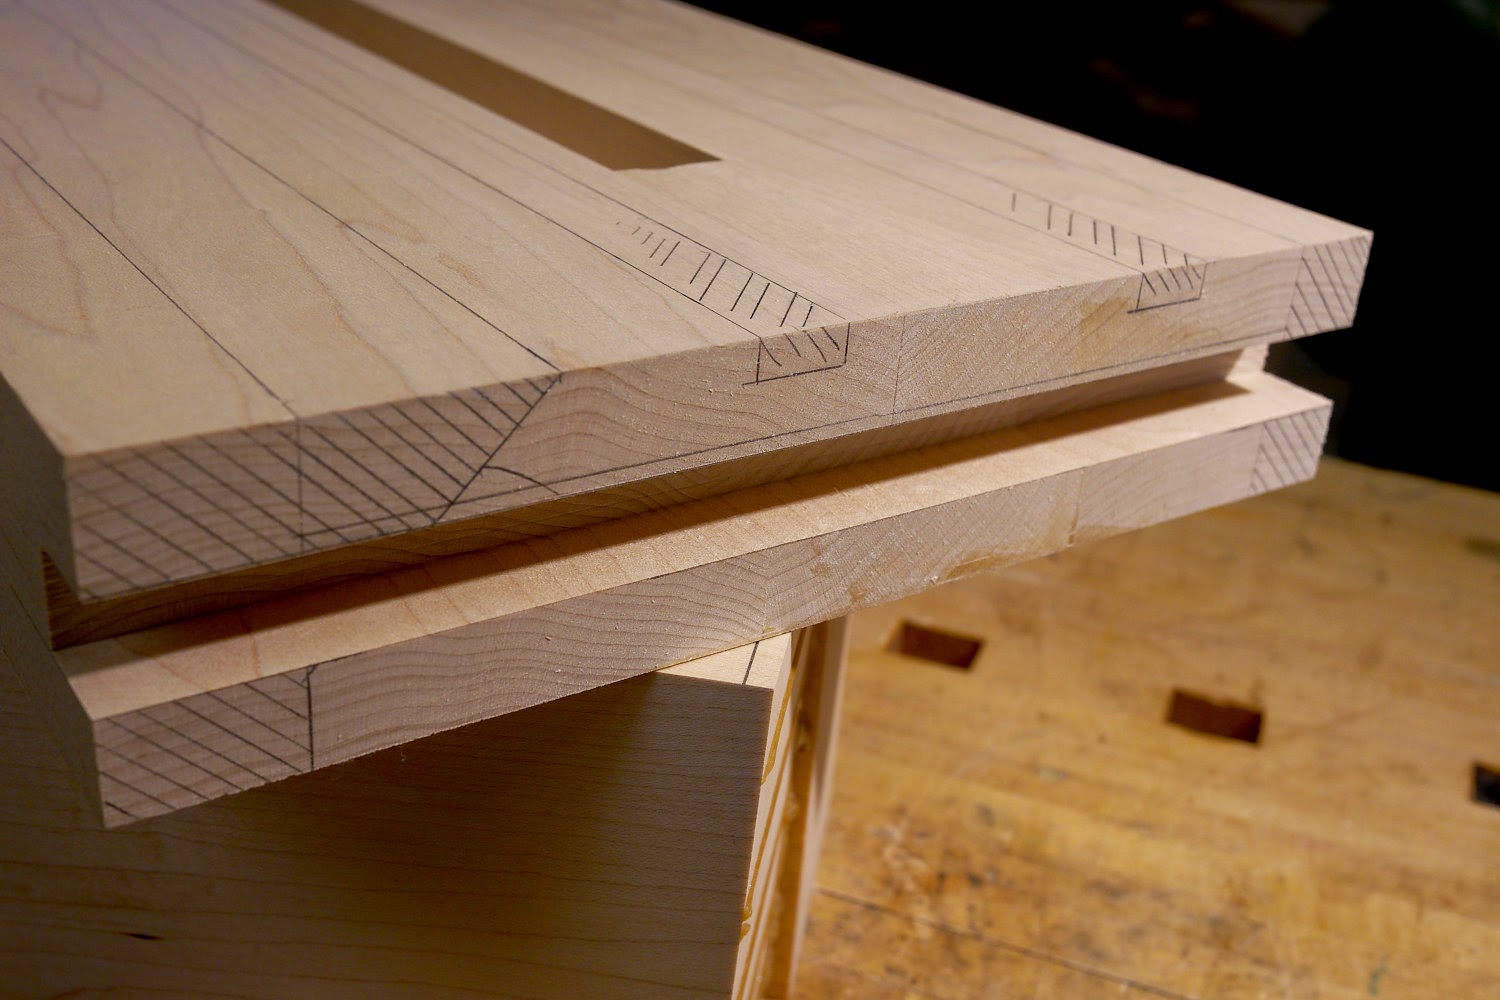
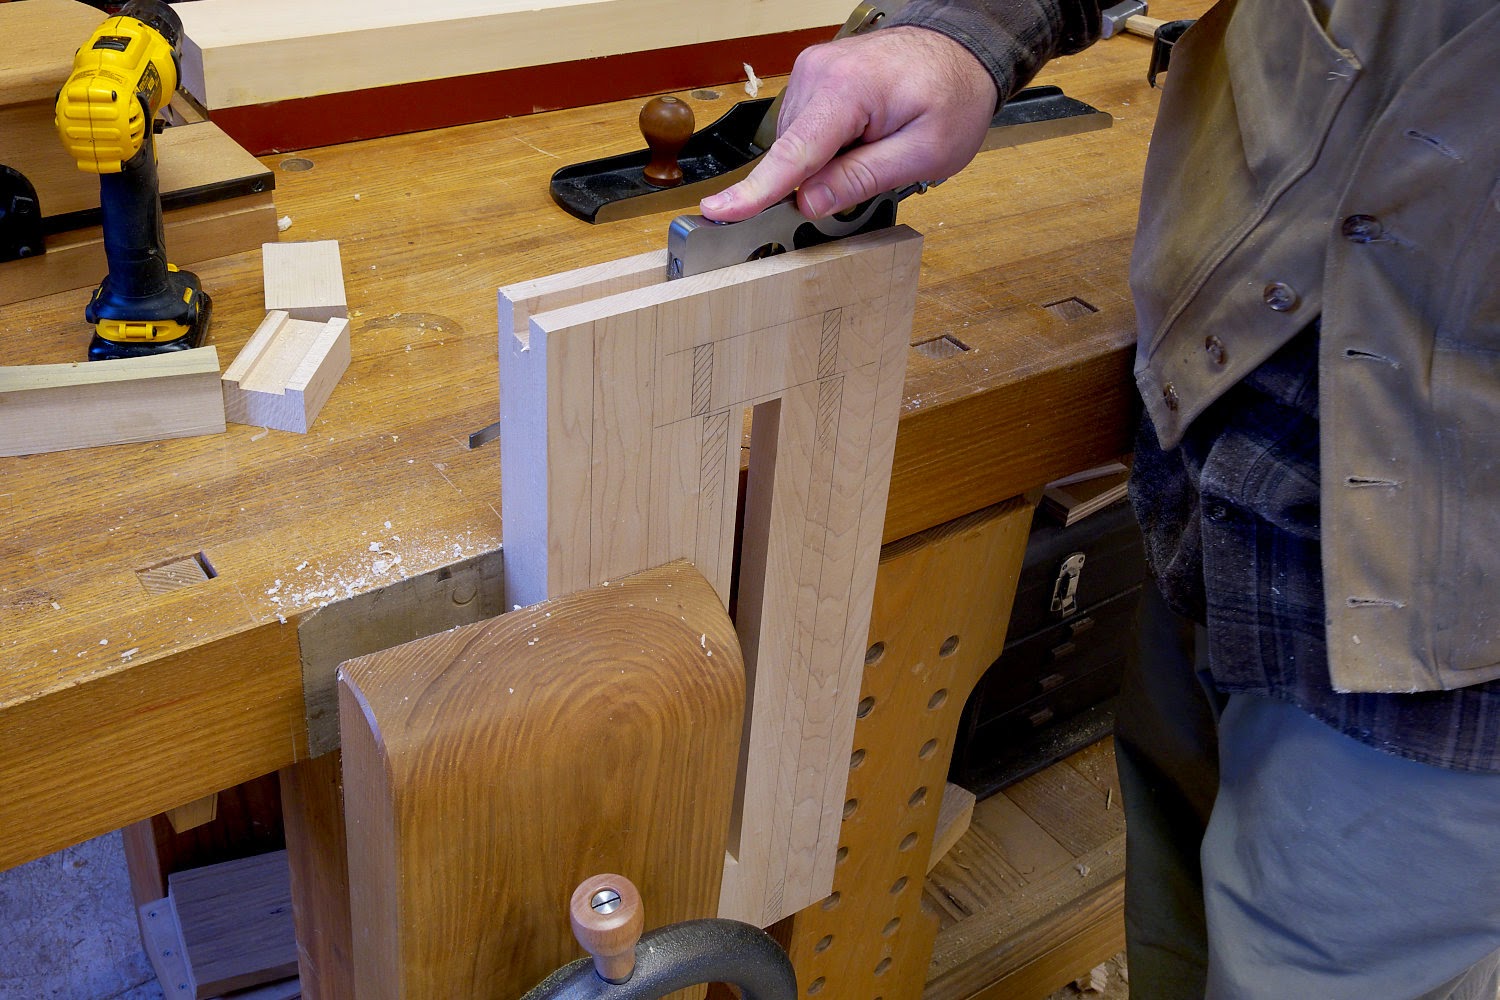
Next, lay out the joinery on the nut block. The tenons on the original are 7/16" wide, but if your tooling is happier with 1/2" feel free to use that. I'm trying to make mine as close to the original as possible, so I'm using 7/16". The grain here is running vertically. The threaded portion of the nut should be facing in. You'll also note that the nut block is a bit oversized in length and width, but not in thickness.


Also lay out the grooves for the runners on the top of the body and the end.


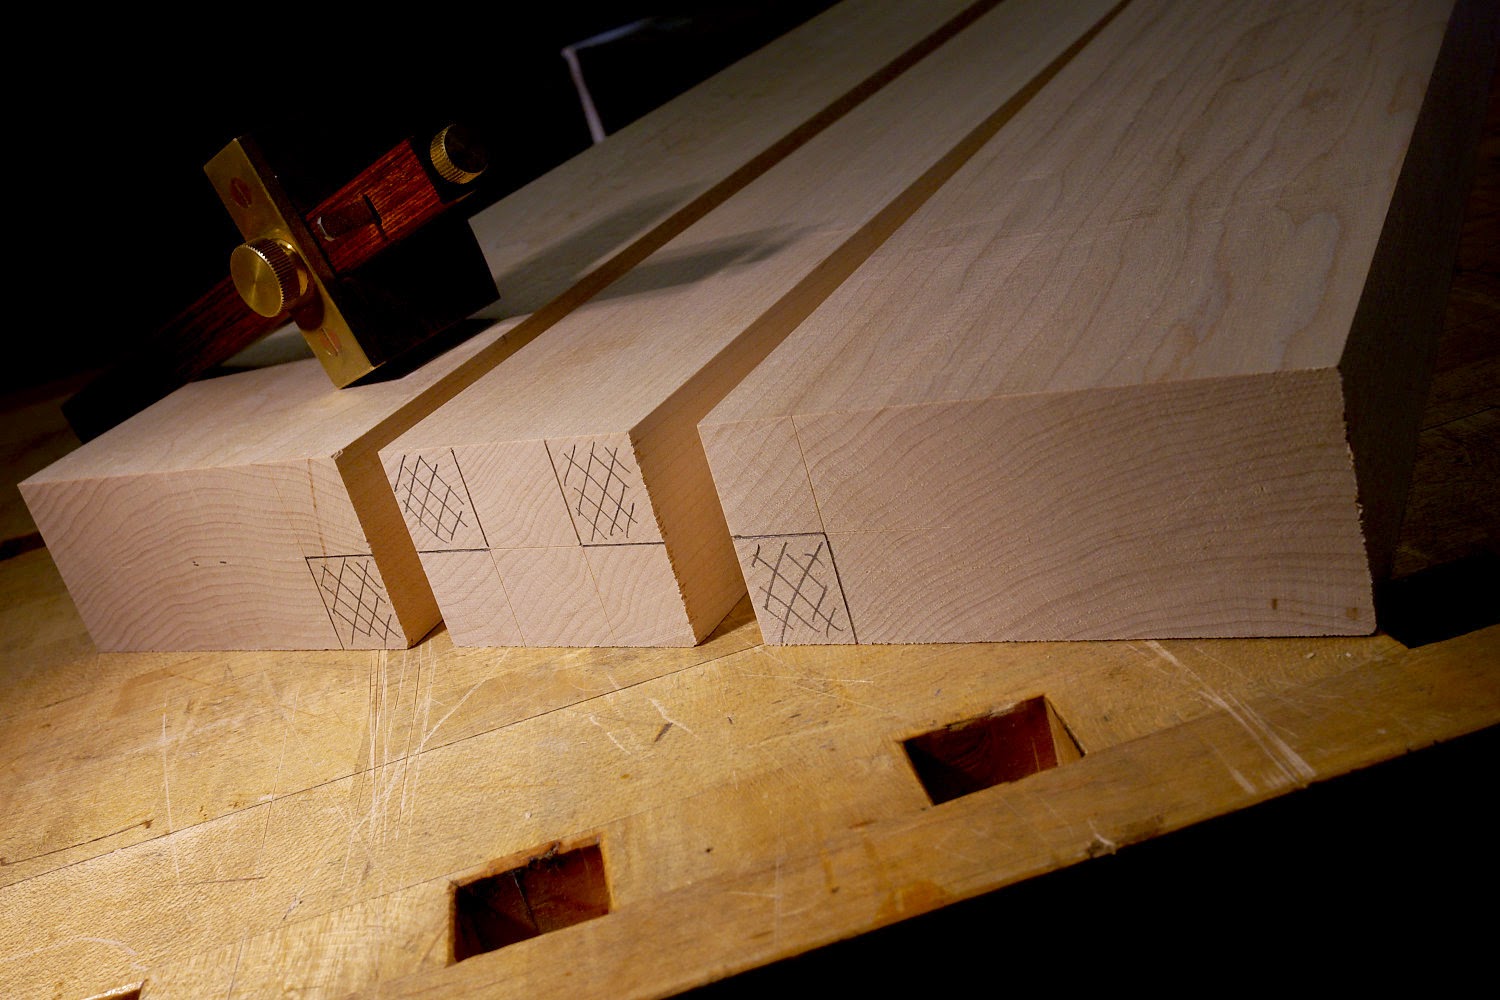
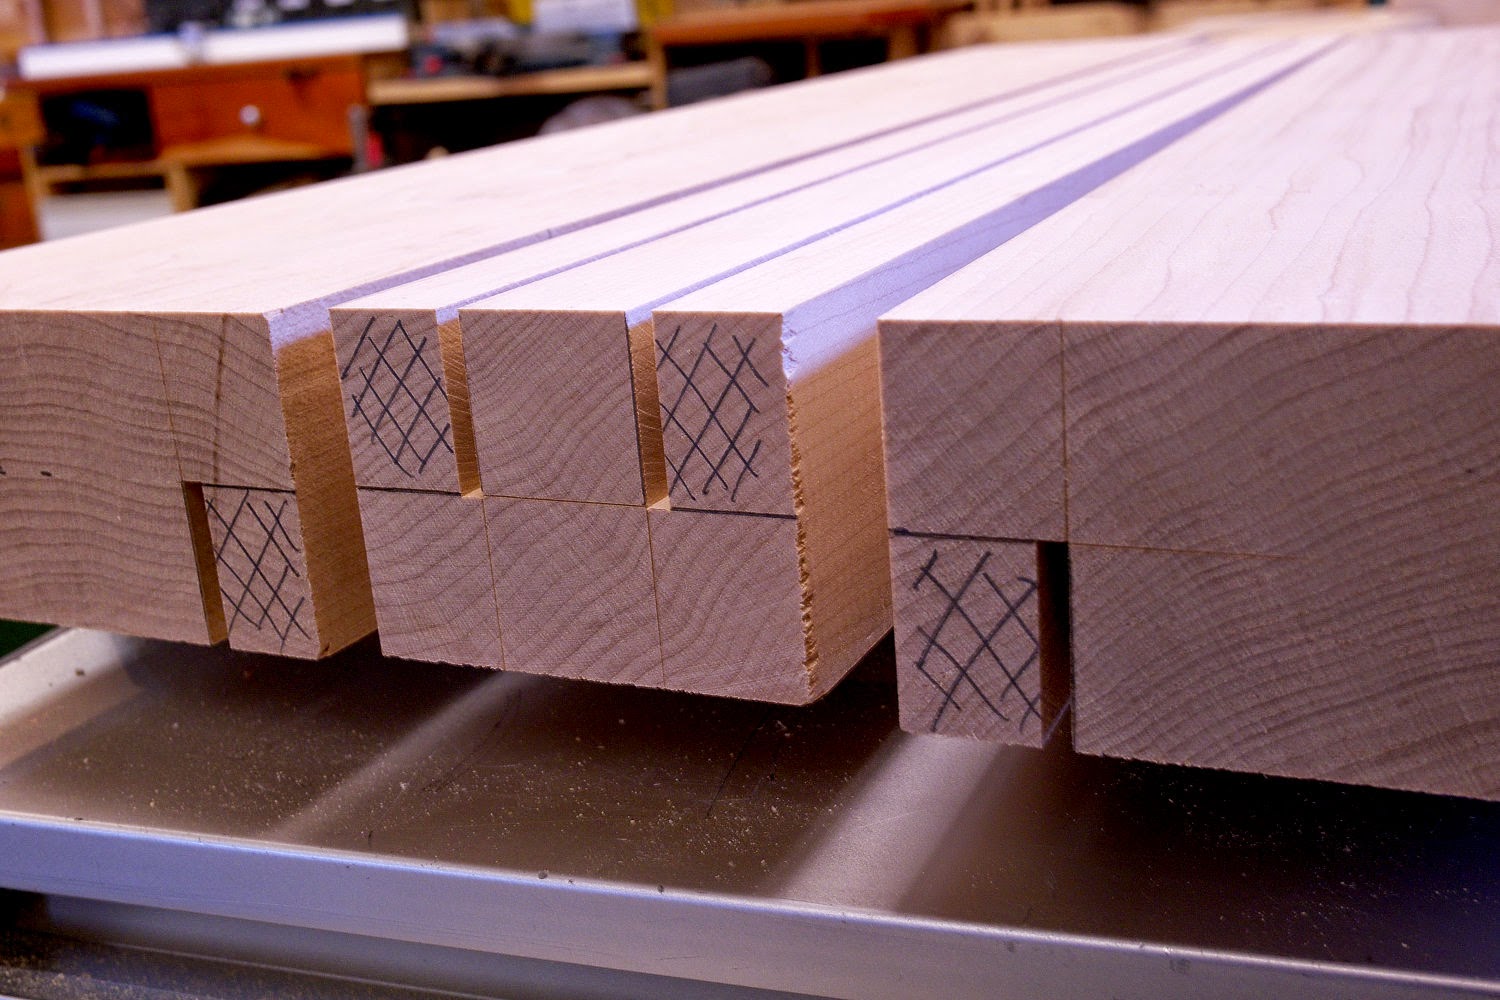
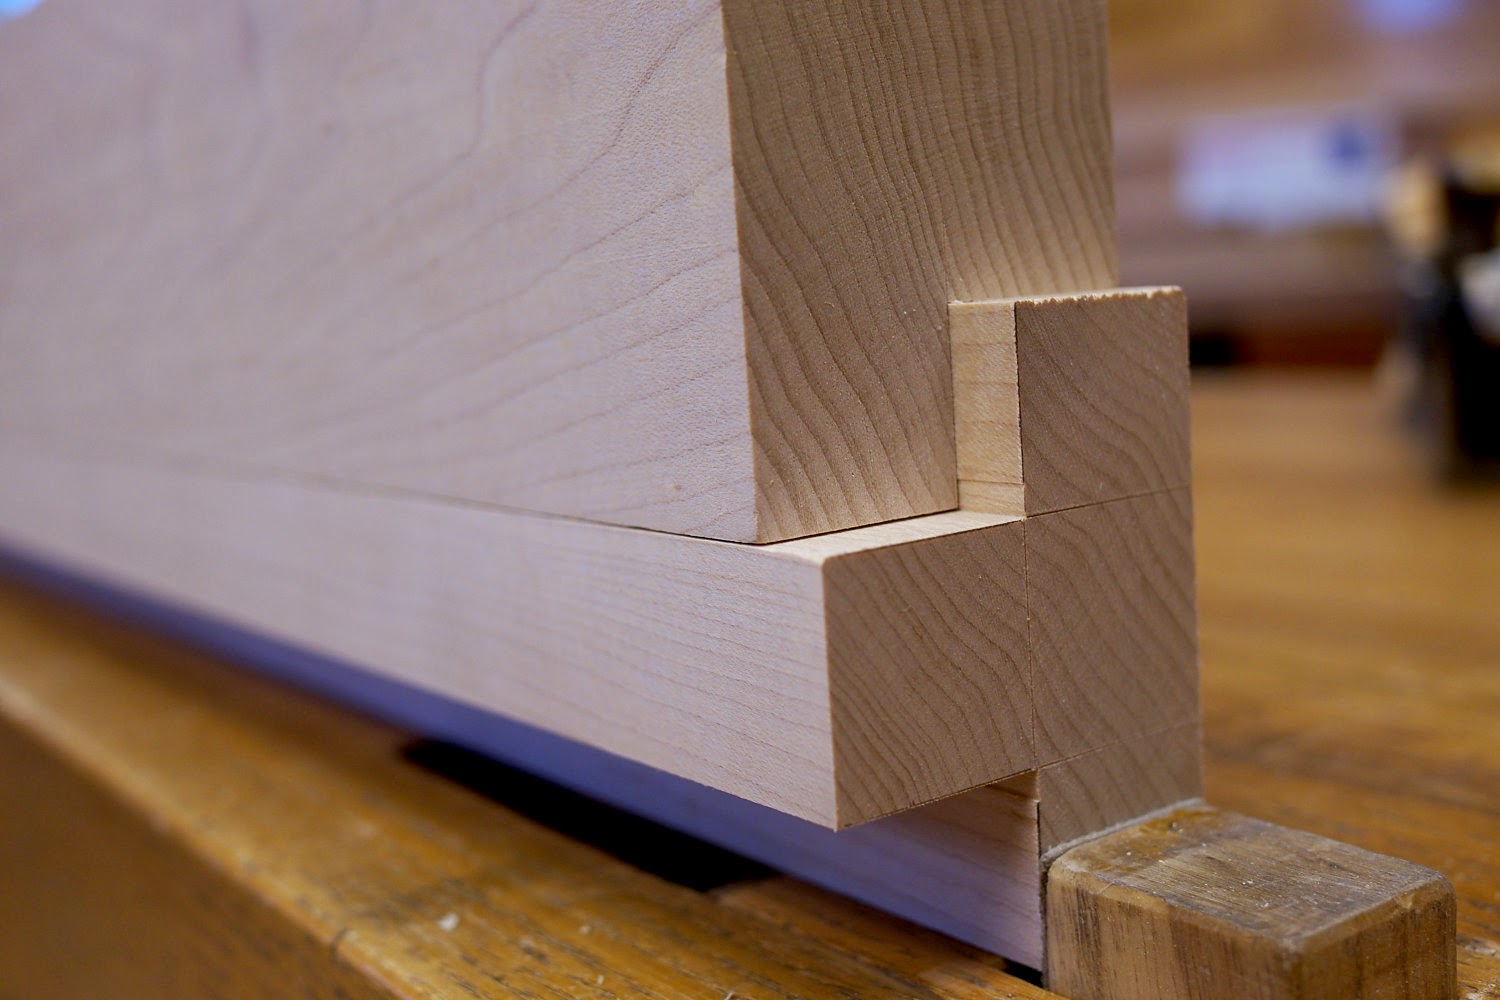
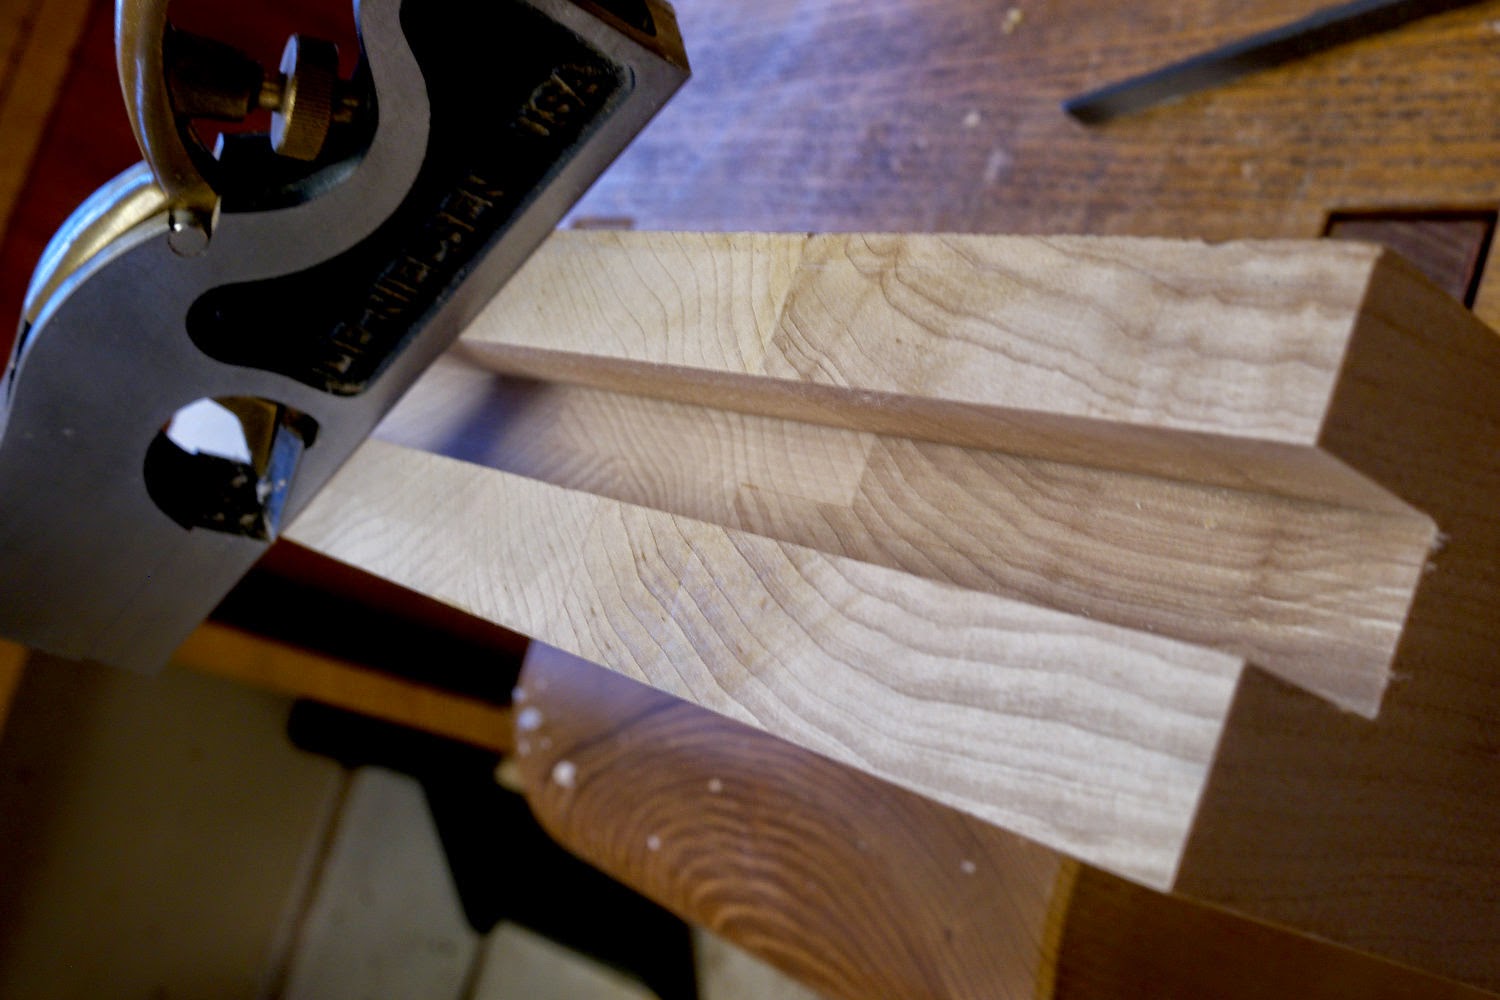
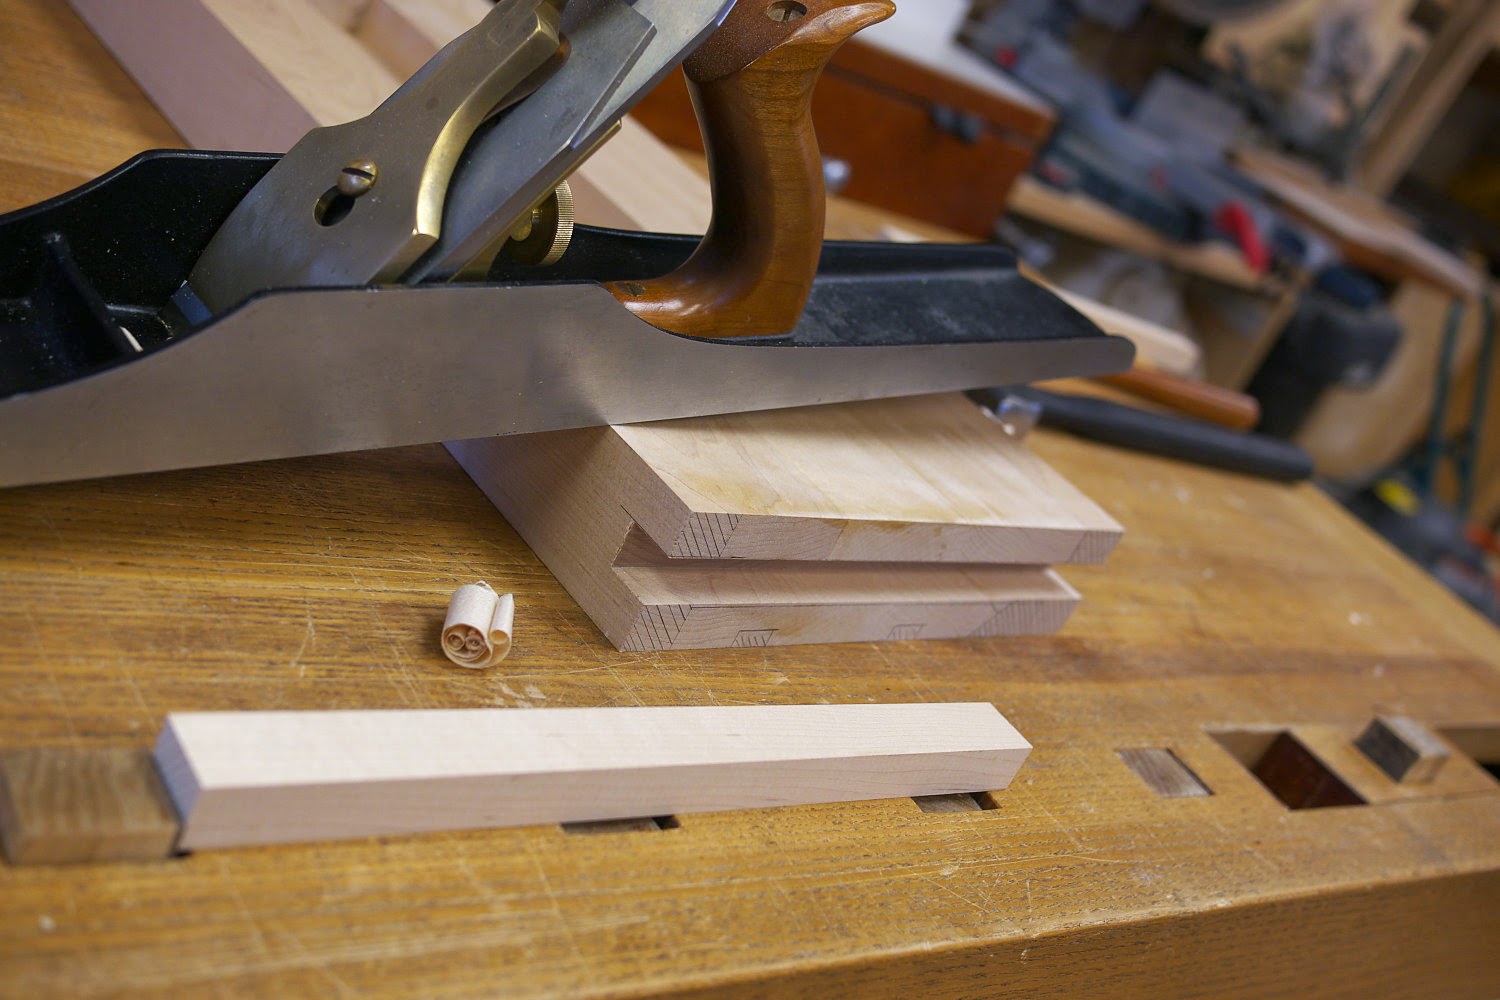
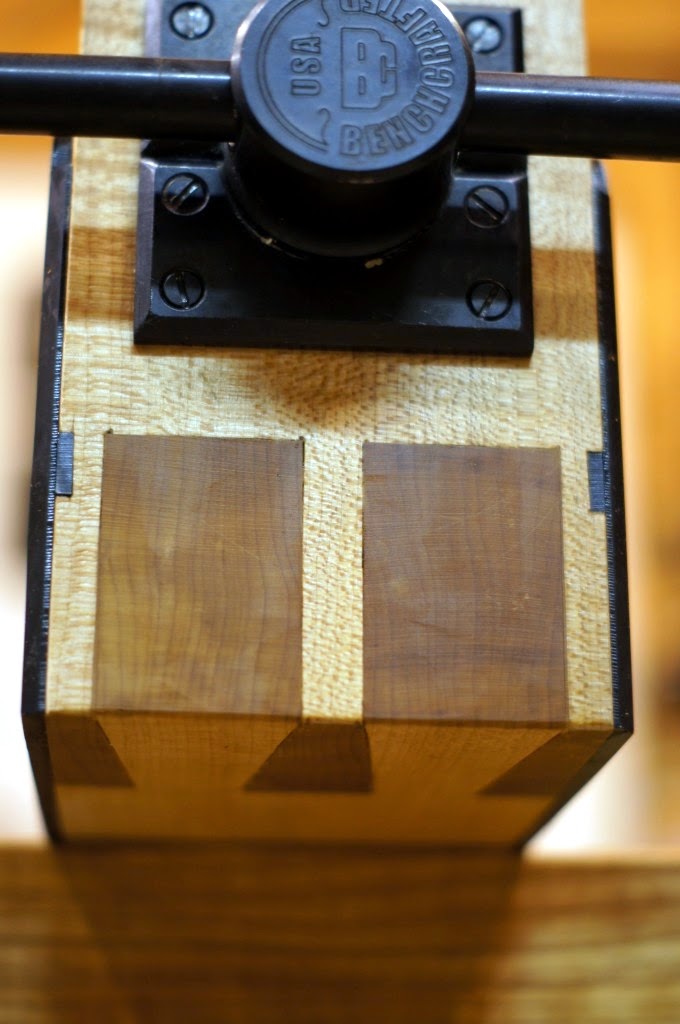
I cut the tenons on the nut block with machines and by hand. The cheeks were cut on the bandsaw. I cut the majority of the waste between the tenons freehand, getting as close to my scribed shoulder line as I dared. 


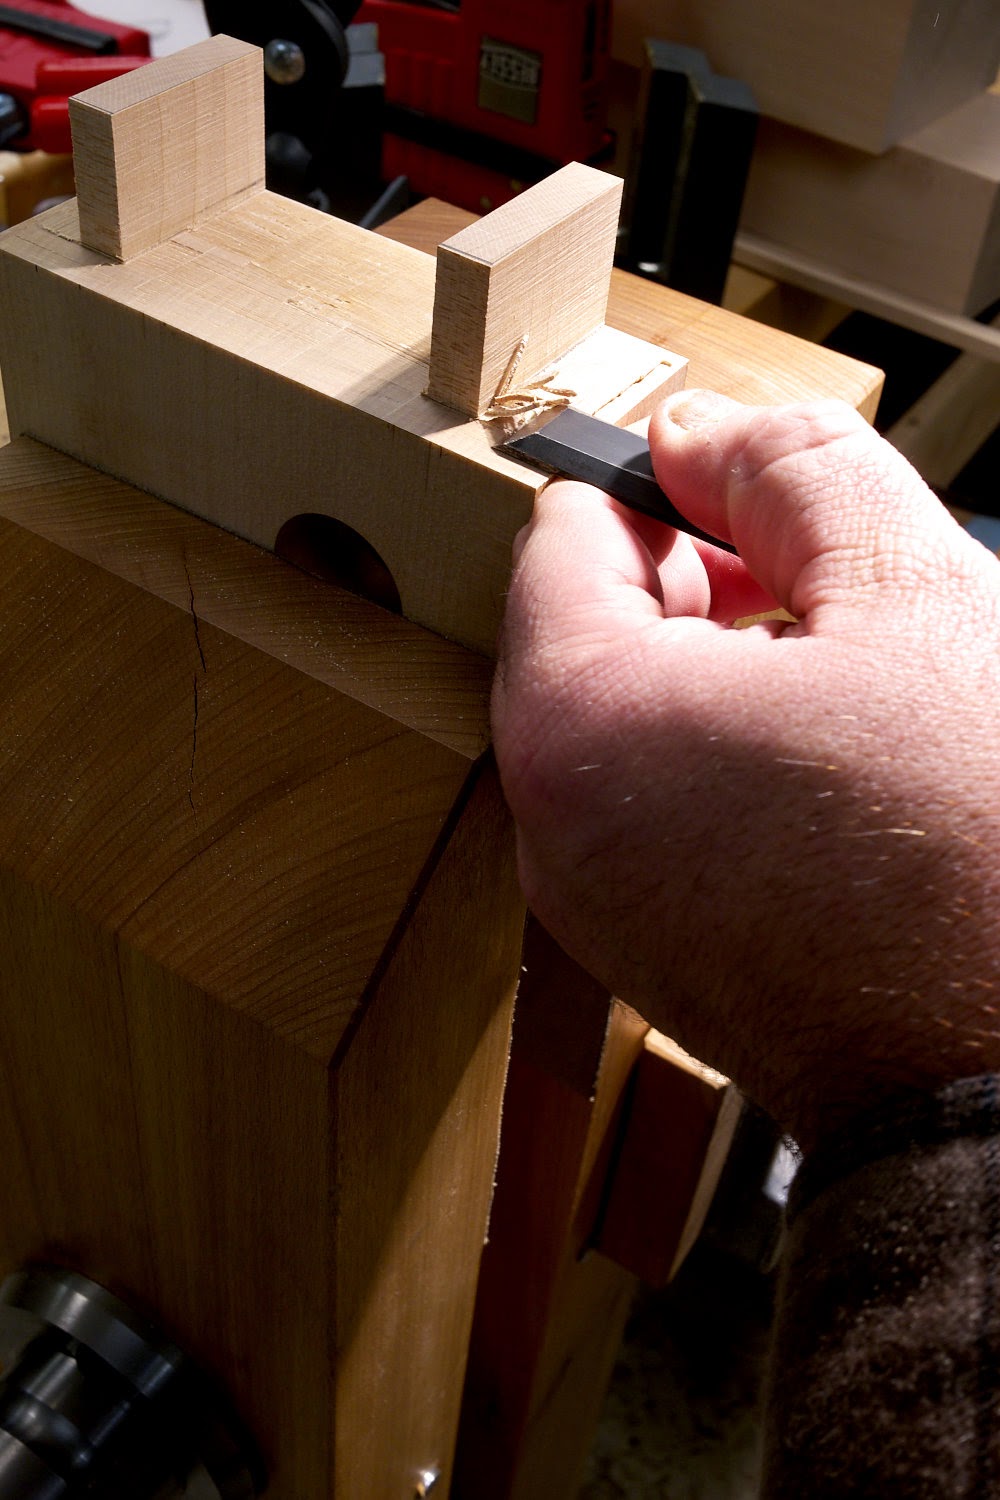
The shoulders are chopped with a chisel placed directly in the scribe line.  On the outside shoulders I only chop down one blow, then turn the block and repeat on the adjacent face. It's nearly impossible to chop flat to two adjacent surfaces, even with scribe lines. So I use this method.


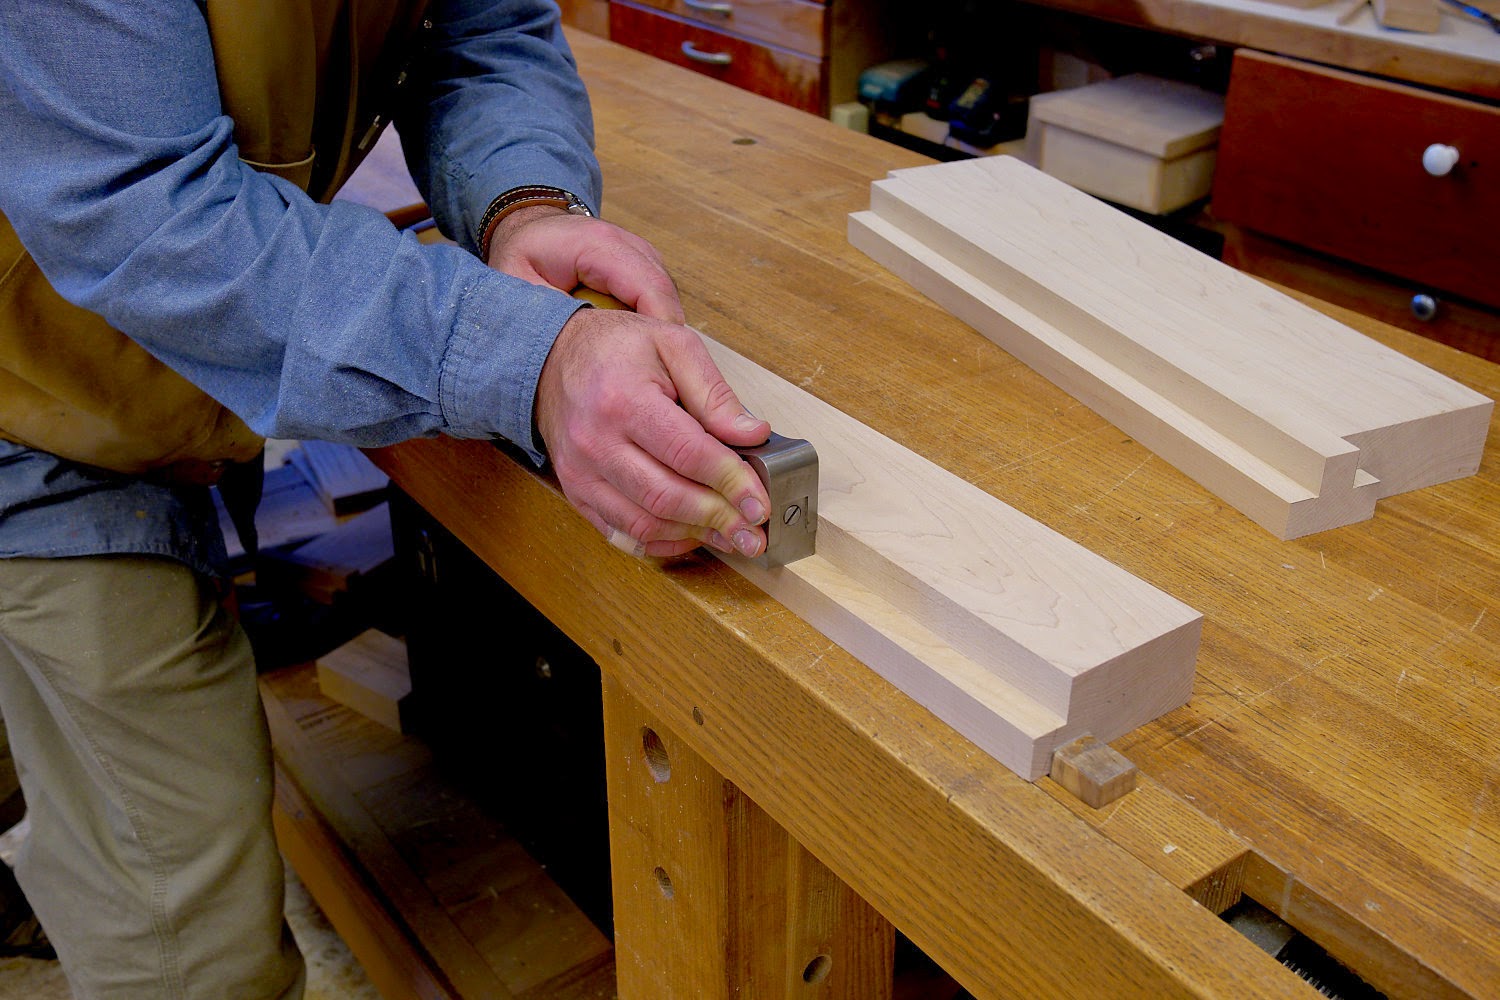
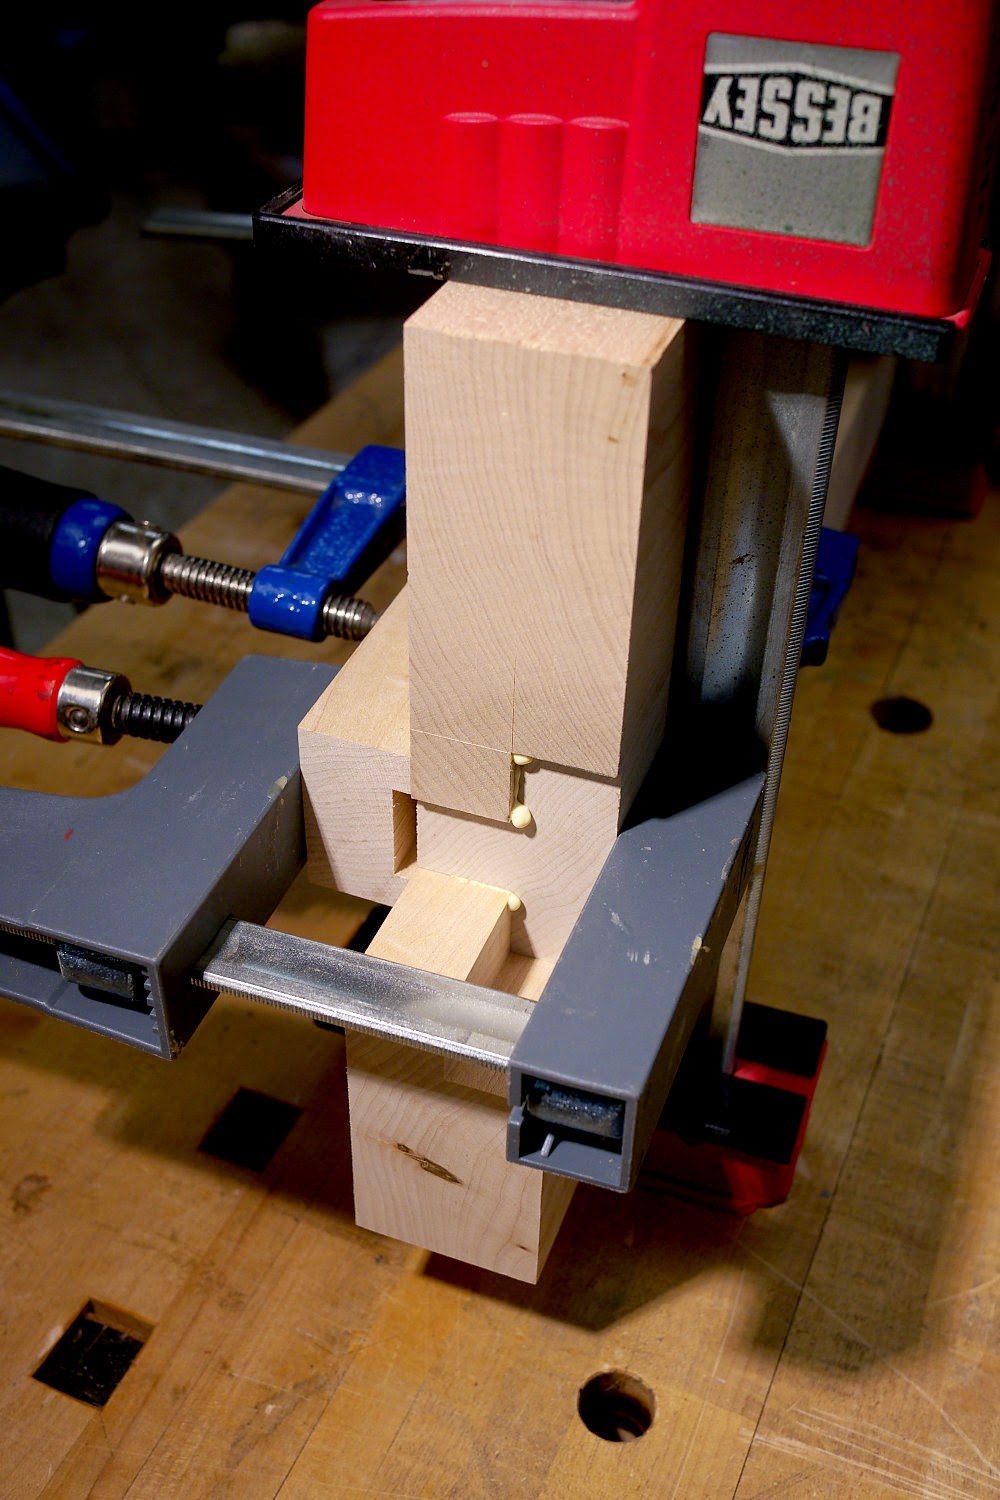
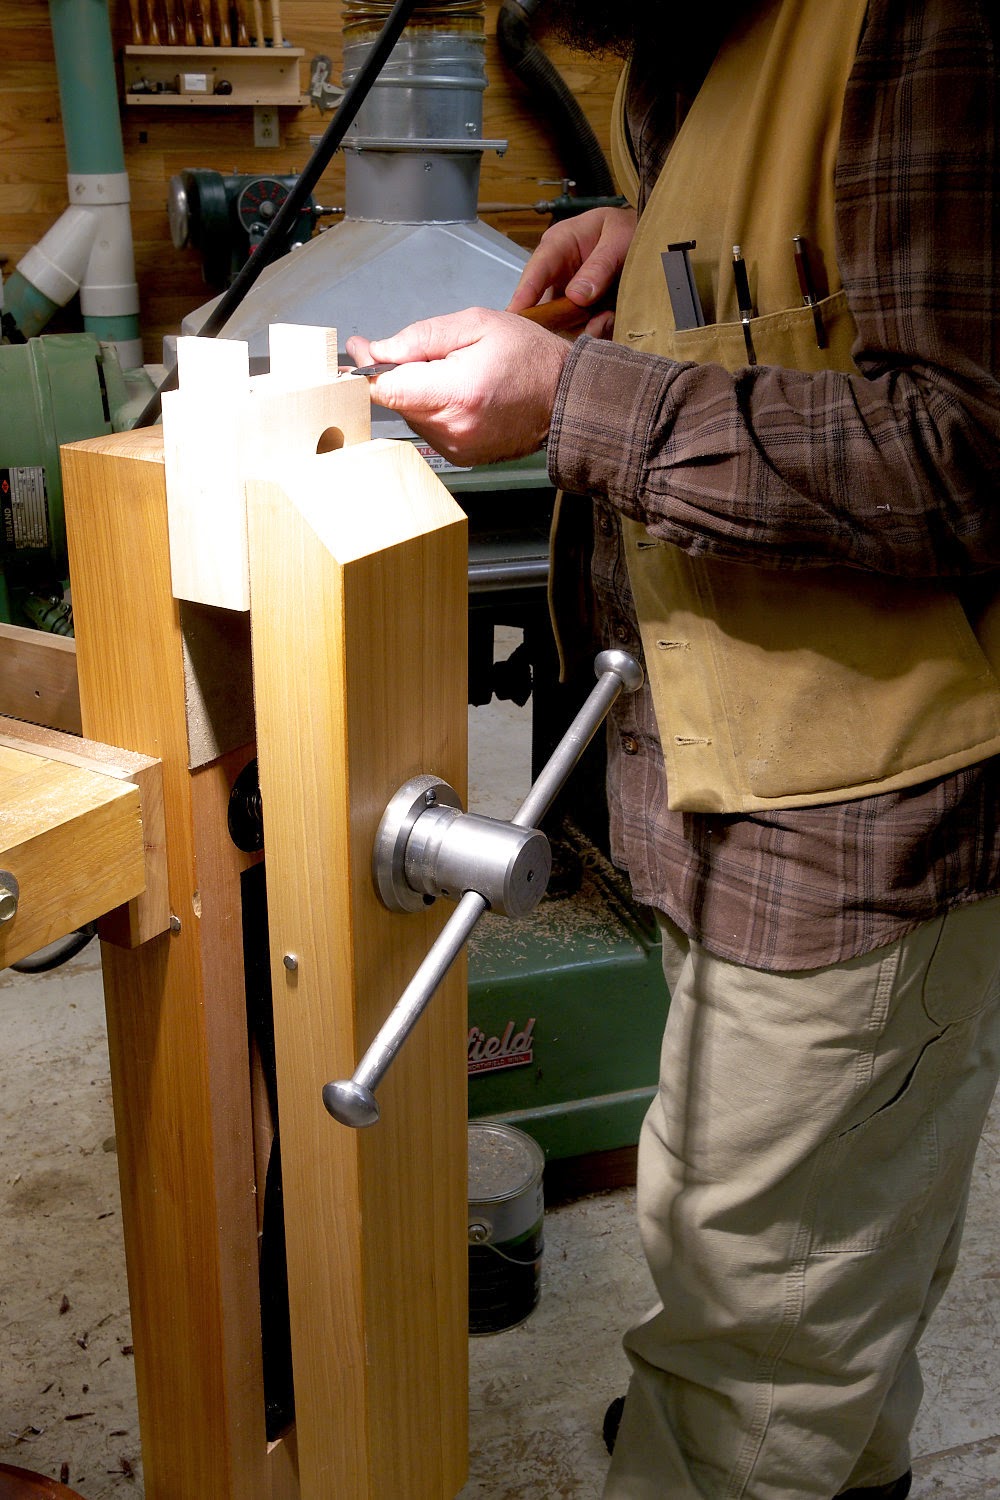
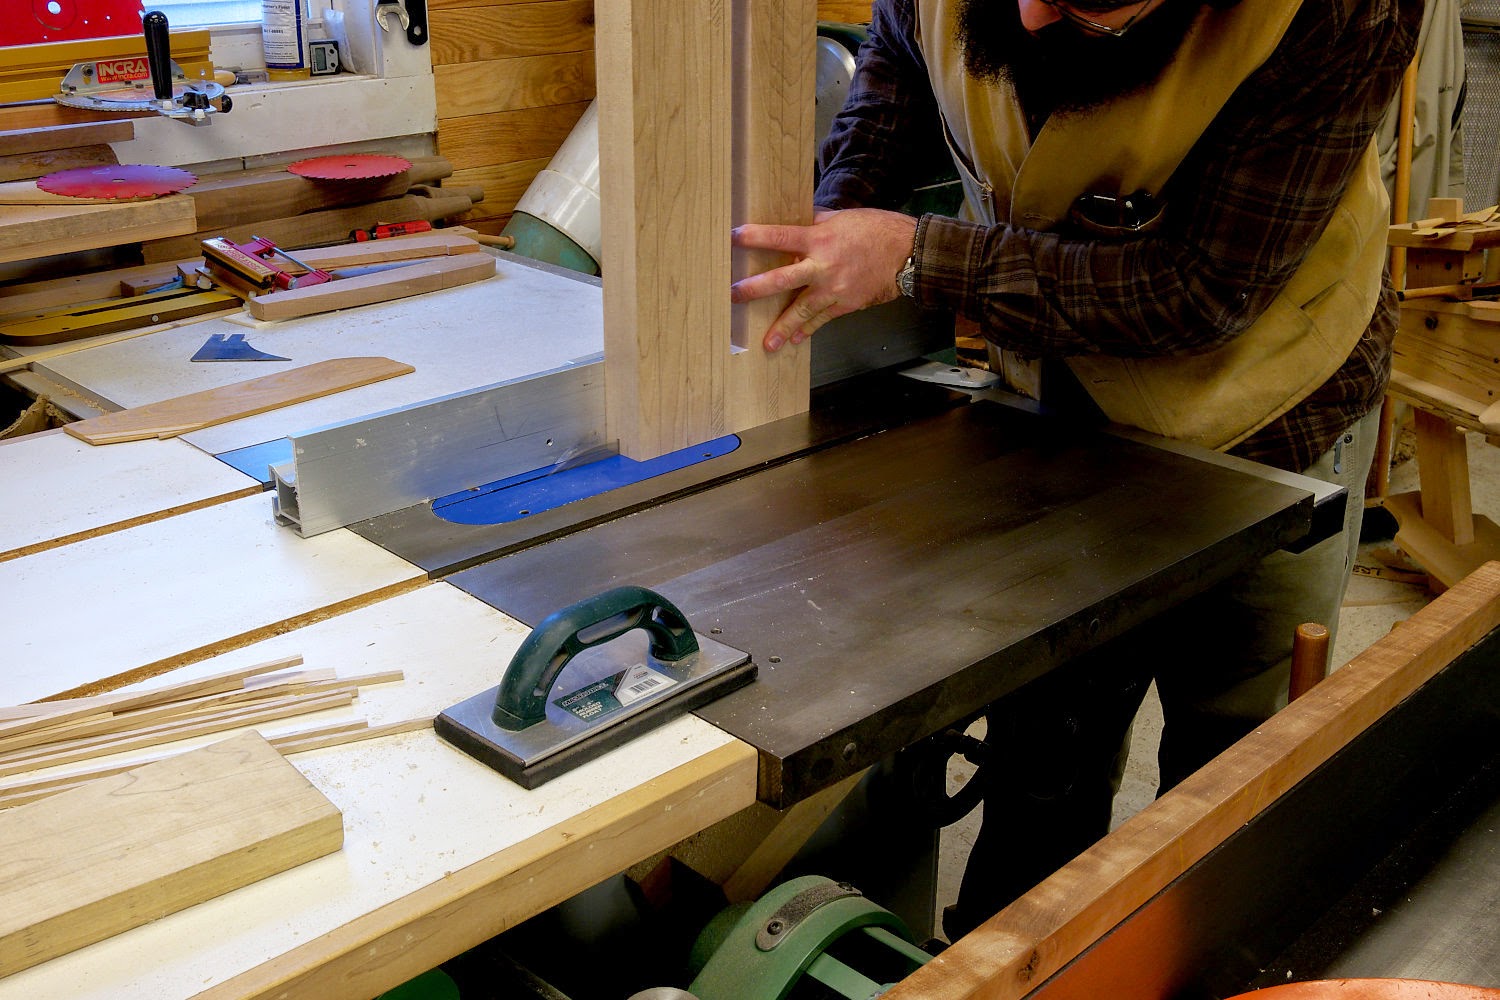
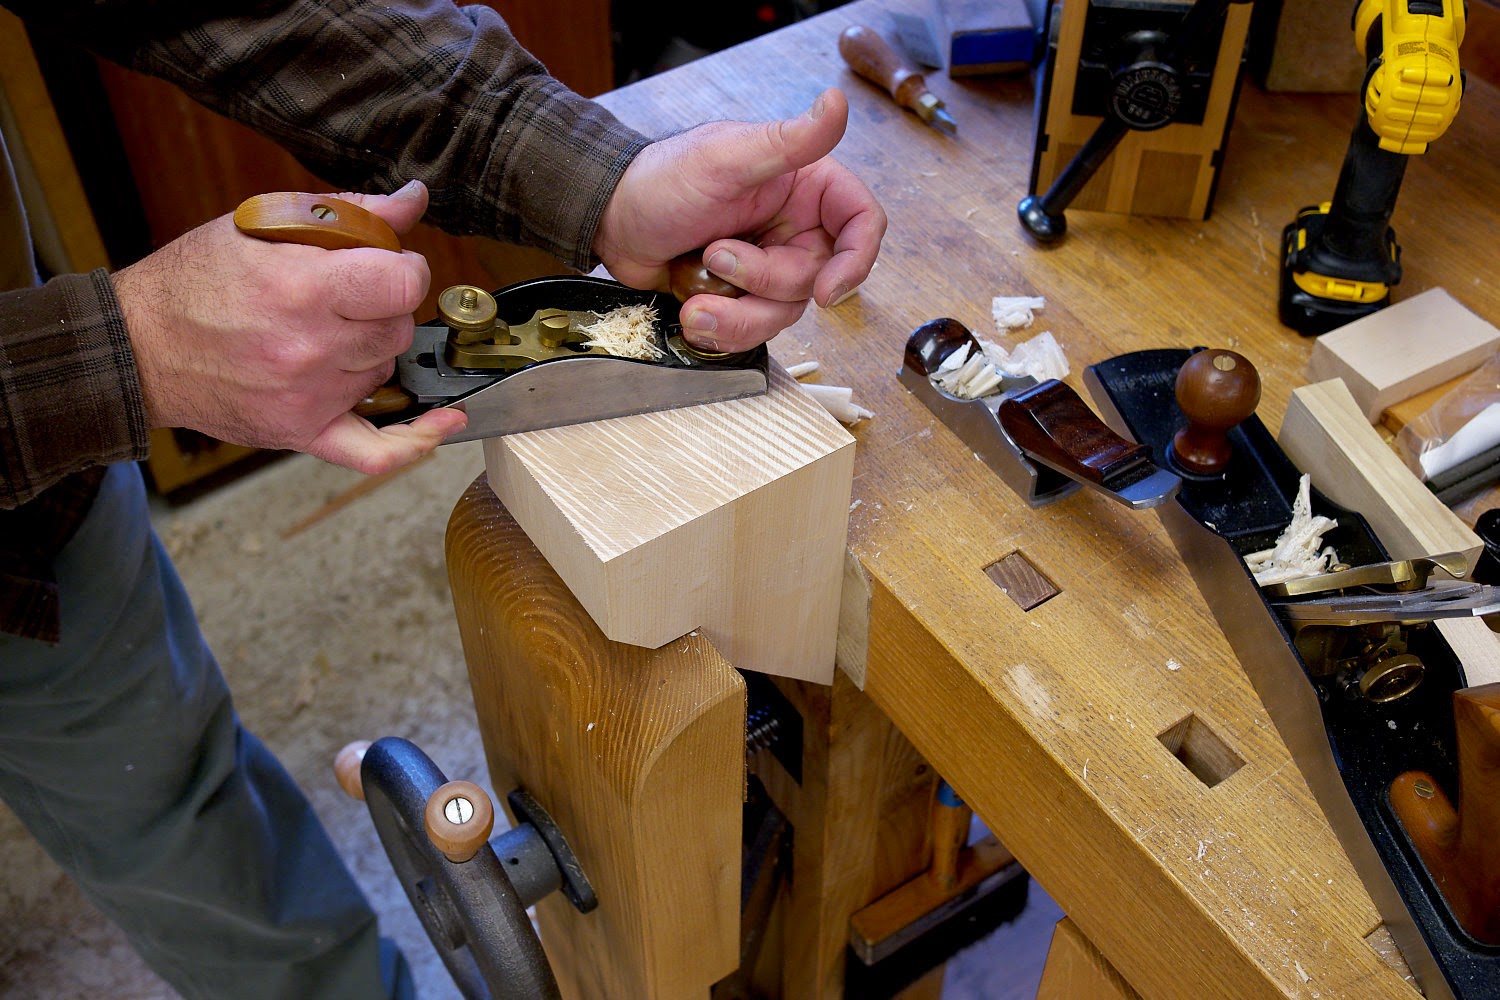
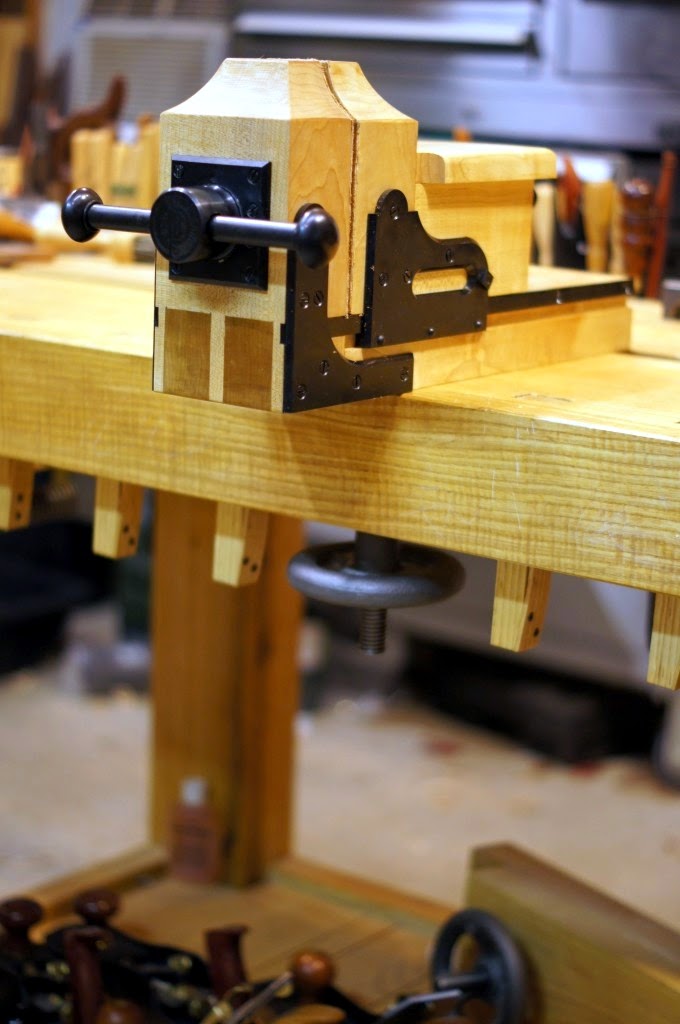
Once I've chopped down on all three sides I mount the workpiece vertically in a high vise which places the work at chest height where I can use my paring chisel to shave the remaining waste flat to the chopped areas.


I can exert lots of controlled pressure using my high vise. It's awesome. If you have the means, I highly recommend picking one up.


The trick to paring waste like this is to take small bites with the edge of the chisel. I do about half the waste, then start from the opposite side to balance wear on the tool.

Here's the video on drilling the ferrule and tenon.


Building The La Forge Royale Miter Jack- Part 3

$
0
0

This morning I got started by squaring up the jaws. The back face needs to be 90 degrees to the bottom so I have a reference surface for milling the grooves in the bottom. I marked lines on one face, then flipped the jaws over to do the other face.


For some reason the joint on the other face had opened up. Lots of potential reasons for this. Pick your favorite. I don't care. These were milled to final height, so I can't rip and reglue without loosing material, although I may do just that, and let the jaws be 1/8" shorter than the original. It wouldn't affect anything. Still, a dissapointment.

On to other other tasks.


I cut the groove at the ends of the body on the table saw. This is simple stuff.


See that horizontal line above the groove? That's my layout line based on the SU drawing. Turns out the groove in the original is actually 5/8" wide, not the 11/16" in the SU drawing. It doesn't matter though. That's not some magical dimension. Either way will work. The way the original is built is reflected in the drawing below. Pay attention to the dims only, The lines themselves are still wrong. You must be on your toes if you're going to work in the Benchcrafted shop.


I use a combo blade on my table saw most the time, which leaves an uneven floor in the groove. I smoothed it with a small shoulder plane.


The offcuts from cutting the rabbets in the body components are the perfect size for the splines. They'll just need a few passes with a hand plane to get a nice tight fit. This time of year I fit them really tight. You should too. If you can, orient the radial plane vertically, so most the movement in the spline is along the depth of the groove. This will help keep the spline in place over the long haul.


I glued the splines in place and called it a day.

Building The La Forge Royale Miter Jack- Part 4

$
0
0


Damage control. I couldn't stomach scrapping the jaws, so I regrouped and reglued. I cut a notch in the angled face for some clamp purchase. See what I mean by keeping stuff as big as possible for as long as possible? The glue lines on the blocks are now tight and invisible.


 I began squaring up the 90 degree side, which is all end grain. My clamping notch came in quite handy.


Here's my process. The first step is to get the long grain sides and bottom perpendicular to each other. That's pretty easy stuff, since the blocks were already at that state before glue up. I check the end for square in one direction only. This is important. I don't try to get the surface square to both the faces and the bottom at once. It's much easier and controllable to concentrate on one plane at a time. Here I'm checking against the bottom after a few passes to get rid of the bandsawn surface. At this point I don't even check against the sides of the jaw, just the bottom. To remove high spots I take progressive stop cuts, starting at the area that needs the most material removal. Take a short stroke, then another one a little longer, and so forth. I never tilt the sole of the plane since that's what "sees" flat. What's happening here is your creating a small plateau, then another one slightly larger with each progressive stroke. The plane rides the plateau until you've removed material down to the floor of the  valley. Of course its on a minute scale. Once the end is flat and perpendicular in one plane, I rotate the piece and check the end for perpendicular with the sides. If it's out of square, I now have a very easy time of squaring it up, since I know the other plane is square, I can simply take full length strokes all the way across the end. This time instead of using stop cuts, I simply take more full length passes over the high areas. As long as I take full length strokes I'm guaranteed not to throw the other plane off square. Finally, when I'm close to perpendicular, I take one light pass at back at 90 degrees to flatten the orginal plane, which should still be square, but could be a little humped if I didn't take even passes across the other direction.


Once its  all flat and square I make one final light pass with a dead sharp finely set plane simply to improve the surface quality of the end grain. You need to be careful with blowing out the arrises with this technique, but if you use a finely set plane, very sharp, and take light passes it should be minimal. Another reason to keep things oversize.


To mill the grooves in the body and jaws I ripped the waste off the back (90 degree) edge of the body and then tweaked that edge so it was parallel to the slot in the body. This is important since the moving jaws also key into this slot. Not parallel, and they will bind.


I'm within a couple thou of parallel. Close enough.


I set up a dado stack for 5/8" and made the stop cuts on the table saw. I didn't bother with a physical stop, but just drew a line on the fence. I made the cut up to the line, back out about 1/4", shut the saw off with my knee, then waited for the blade to stop before moving again.


Don't forget to cut the grooves on the two jaws at the same fence setting. I wanted the back edge of the base to be bit proud of the end grain faces of the jaws, so I used some masking tape as a shim to shift the blocks. That makes it very easy to flush up the base with jaws later.

I forgot to mill up the half miter jaw before cutting these grooves, so I had to setup the dado stack again and try to nail the locations. More on that later.


Next, I got busy fitting the runners. Put the ray plane horizontal if you can. The runners won't snug up as much in the summer.


Once the moving jaw is riding on its rails, send it off to the nut house and mark for the garter pin location.


I just drew a circle. This is just a clearance hole, it doesn't need to be dead accurate.


3/4" hole about 5/16" deep.


The pocket for the half miter jaw.


You could jig up for this on the table saw, but what a waste of time. I rip down with my crosscut panel saw, because I don't have a rip panel saw. It takes a long time.


The other cut is made. That's ripping.


Here's a moment of hand tool zen. Sharpen up your largest shoulder plane, set the iron dead square, a light cut, and proceed to take buttery shaving of creamy hard maple with precision and control.


I start taking down the vertical wall first.


Okay, I did use the table saw after all. I took one shallow pass along the vertical wall to act as a reference plane. No jigs, just a straight cut along the fence. This allows me to precisely monitor my progress with the shoulder plane.

Before I plane entirely to the reference kerf, I flip the piece and start working on the 22.5 deg side.


I check progress regularly with protractor head-equipped Starrett combo square tool device. If you need to tweak the angle, make progressive stopped cuts.


Three things must be perfect. The flatness of the surfaces, their relationship to each other (square) and the angle of the half miter surface to the back of the jaw. The final step is to make in the inside corner crisp and tidy with a paring chisel.


The retaining block for the half miter jaw can be had from the remainder of the body spacer stock.


Building The La Forge Royale Miter Jack- Part 5

$
0
0

It seems this is taking forever. Well, technically this should be about a one day build, but setting up shots does eat up a fair bit of time. And that's a not a mini boom mic on the right there. It's my hammer's handle. Here I'm marking screw centers for the moving jaw runner.


And installing such.


Follow the same procedure to install the retaining block. Make sure you shift the screw locations towards center to clear the other screws.


Install the hook. But wait, don't actually install it yet. You'll screw it up.


The half miter jaw. Oversized (naturally.) Bandsaw to the lines.


Dial in the fit with the pocket using hand planes.


With the jaw snugly in place, mark for the runner grooves. You should make the half miter jaw block when you mill the jaws so you can cut these grooves when milling the grooves for the base and jaws. I had to set up the dado stack again, and use some finicky setups to get these grooves in the right location. It wasn't too bad really. I just used a test piece until I got the fence set via trial and error and all went smashingly.


Um, I'm not entirely sure what I'm doing here. Maybe tweaking the fit of the jaw in the pocket? Yeah, that's what I'm doing.


Yep, definitely.


Go ahead and attach the half miter retaining block to the half miter jaw. Okay, now you can attach the hook to the moving jaw retaining block. But get it right, not like my sorry attempt. I drilled in the wrong spot and the hook butts into the spacer block. It's too far to the right.


I drilled another hole a bit more to the left (where you should drill your's.)


Uh huh. That's better.


The runners get nailed onto the underside of the jaw. These are traditional Bostich square cut nails.


Then sawn off and planed up nice an tidy. Don't you just love the look of end grain hard maple? Especially against a radial plane. It screams "joinery!"


You can cut the nut block to final shape.


If you'd like to build one of these, we still have kits available. The kits include all the metal bits (including fasteners) plus the meticulously-crafted wood screw and nut block from Nick Dombrowski.

More info here.


Building The La Forge Royale Miter Jack- Part 6

$
0
0

We're on the home stretch now. All the hard work and meticulous joinery is going to pay off real soon. Marking for the garter screws with a Vix bit. A transfer punch is useless here due to the countersink.


Remove the moving jaw from body and drill pilot holes. You'll find it much easier to install the garter screws with the nut block removed from the body.


Note that I had still not driven the groove pin into the screw's tenon. The garter pin is still loose. The groove pin will get installed later after the jack is finished.


Finally its time to cut the miter on the front of the body. I set the blade to dead on 45. If you're unsure of your setting, make some test cuts and check the mating pieces with a square. Also make sure that the bottom of the body and the top are coplanar. No sense in making the 45 deg side accurate with the bottom if its not parallel with the inside where you'll be placing your workpiece. 


Next, mark, predrill, and drive the four screws that hold the fixed jaw and the nut block. You don't technically need the nut block attached for this next step, but it does make a nice handle.


Also attach the moving jaw and the half miter jaw. Cinch down on the retaining blocks so they keep the jaws from moving about. Also, and this is important, the short end of the half miter jaw will need to be planed flush before the next step, so the base will run flat against the table saw fence.


With the same fence setting, run the base through the saw. This will create a small flat on the bottom of the jaw that's exactly in line with the beveled edge of the base.


Place a straight edge on the bevel and mark the sides of the three jaws.


Cut close to the line, but not to it. You'll plane the rest off by hand.


While the blocks are off the base, hand plane the bevel with precise strokes to remove the table saw marks. This buys you one more guide for planing the blocks to a precise 45.


The runners at the fixed jaw end need to be trimmed flush. Wow, do I need a fresh blade on my bandsaw.


Cut close with a saw and break off the little waste pieces.


Pare the end grain from above and then along the ledge. I need to sharpen my chisel. That's pitiful.


Plane the protruding ends flush.


The setup for planing the 45 degree faces.


I start with a jointer plane for its mass, since I need to remove a fair amount of material. Look close. You can see a gap under the plane's toe. This is the amount of material I need to remove from jaw face. So when you bandsaw, get close. This is hard work.


Check constantly to make sure you're keeping the jaws square to the outside faces (which reflect the inside of the jaws if you've made them correctly) in both directions, and at 45 to the body's edge. I use the same techniques as before when planing the 90 degree ends of the jaws. Use stop cuts and again, constantly check your progress with your square.


If you've cut a consistent distance from the pencil line on the bandsaw, you should be able to simply take repeated shavings from the entire surface until its flush with the body's edge. I apparently cut a little off square on my moving jaw. You can see the low spot above, along the inside face of the jaw. I had to plane all the surrounding wood away before the marks were removed. Doing this with a hand plane is really the only way to get this right. You can get the jaws dead flat and right on the money angle-wise. If you have a belt sander that starts looking really attractive, don't be a fool. Those things can't make flat.


Again, gauge from the bottom of the jack, but only if its dead parallel with the inside surface.


The inside corner of the moving jaw out at the tip didn't quite clean up. I didn't want to take the surfaces down any further after getting them dead on. Also, my brother stopped in the shop earlier today and while checking out the vise, broke off that corner. I made him fix it before he left, but when he pulled out a carton of Durham's Rock-Hard I told him to hit the road.


So I chiseled it flat.


Then cut a little piece with the same grain direction.


Glued it on with CA and accelerator.


 Sawed the big piece off, and planed the rest flush.


The 90 degree face was flushed up and trued by simply planing the back edge of the body flush (remember the blue tape at the table saw?) The end grain did need just a smidge of planing to get it dead flush.


I looked close at the end grain of the half miter jaw and the grain flows nearly perfectly between it and the fixed jaw. I'm still trying to figure out how this can even happen. Even if I cut it from the same section of the tree, it should not match this close. It nearly the same at the front too (see a few pics up). Incredible. I should have bought a lottery ticket today.


Last thing I did today was trim the splines flush and break the corners with 220. The main part of the jack is complete. I need to get back on my deadline project before I completely finish this. So it may be a couple weeks or so before I get a chance to make the screw handle and base. Those bits have no moving parts, and do not need to be so precise. Man am I looking forward to making them after all this!


A Case For Sharp Tools Pt. 2

$
0
0


In my case for sharp tools will reside this set of dividers, hand forged by blacksmith Seth Gould, and which was gifted to me recently. But before I talk about the dividers, a little back story.

Some months ago Raney Nelson of Daed Toolworks posted about his forging hammer by Gould. Not wanted to be left out of the picture once Seth got too busy, I put my order in earlier this fall. But not for a forging hammer. I wanted a hammer, of 375 gram weight, for driving chisels and cut nails. I've been using a mass-produced Japanese hammer, which I like, but I wanted something with a little more charm. I've admired Seth's work since Raney first pointed me to his website.


I asked Seth to make my hammer very plain. I'm increasingly attracted to simple looking tools, so I didn't want an overt amount of file work on the tool. Just enough to put it above a basic workaday design. The head is square in profile, with file work only on the top arrises. The faces are both slightly crowned, which works well for driving chisels and traditional cut nails (or wire nails). One thing I never liked about my Japanese hammer were the two different faces. I would use the crowned side for driving nails, but was always annoyed by having to remember which side was crowned when driving nails flush. The flat face does not work for that, but a crowned face works for both nails and chisels just fine.


I told Seth that I wanted my handle to be like Raney's forging hammer, that is, with a charred ebonized finish. I've been experimenting with this finish a bit on my own lately, and for certain things, it is incredible. You can more or less ebonize the surface in just a couple minutes, and it has the added benefit of somewhat hardening and burnishing the surface as well. It's very earthy and natural. Wondering about finishing larger pieces of furniture using this technique, I stumbled on this video:


The aspect I like most about Seth's work is the the thoughtful use of textures. These dividers look as though they jumped off the pages of Smith's Key, or A Pattern Book Of Tools And Household Goods. They look exactly like an engraver's plate come to life.


Here are more elements from my case for sharp tools. If you've not done double bevel marquetry, what are you waiting for? Dust off your scrollsaw, mount a jewelers blade, and make flawless inlay. It's a fun and easy technique.


Reason #1 Why You Should Come To Handworks 2015

$
0
0

Studley.

After working for the better part of the last two months on my own case for sharp tools, I have a completely different view of Studley's chest. The man was an animal. I don't mean a lion, or a tiger, or even a Tasmanian devil of woodworking. He was a mythological woodworking beast. If Studley was Greek, and ancient, he would be Daedalus, or a Cockatrice. Or both. A god of skillful craftsmanship that can kill you with a look.

I saw Studley's chest and bench. And I lived.

As I worked the lid of my case for sharp tools, I tasted, albeit briefly, of Studley's obsession with perfection, both in design and execution. Although not built in the same style, or using the same materials, I constantly was called back to the gothic arches, the flawlessly inlaid pearl, the crisp fair chamfers, the silver retaining levers, the subtle fluting of ebony spheres. And I realized that no one, to my knowledge, has reached the level of Studley's tool chest in over a century since Studley's passing. If you're out there, and have somehow completely squashed your ego, let us know. Both about your work, and your incredible self-control.


I've made difficult projects before. Three-dimensional stuff with inlay, incredibly fine fretwork in bone and ivory, geometric parquetry, chicken ala king. But something about this chest lid gave me a new found respect and admiration for Studley. His chest isn't simply an incredible piece of woodworking. Its a look into the human mind. A glimpse of the creative energy that has its origins in something beyond this world, beyond science, beyond a lump of fat between our ears, beyond our capacity for explanation.

I realized that the Studley chest isn't about woodworking. It isn't about Henry Studley. It's not even about the tools. It's about us. People. About the incredible capabilities that lie deep within us, that we're only just slightly aware of. Studley's chest is a germ of creativity that sprouted into something that we can all participate in.

If you want to harvest a seed from Studley's garden, I suggest you do everything humanly possible to get yourself to Cedar Rapids on the weekend of May 16, where the Studley tool chest and workbench will be on display, likely for the last time in all our lives.


Building The La Forge Royale Miter Jack- Part 7

$
0
0


The screw handle gets made from a chunk of hard maple. The original looks like oak to me, so make your's from oak if you want. This doesn't get a ton of stress, so maple is fine. The orginal octagonal mortise was cut with a large drill, then pared. I cut mine on my scroll saw (since it was handy) and only had to do a little paring for a sweet fit on the screw's octagonal shaft. 


Cut out the handle on the bandsaw, refine the surfaces, then round the arrises. I used a belt sander, and a trim router with a bearing guided roundover bit. The original handle has more of a bullnose profile around the edge, but I was itching to finish this today, so I took the lazy way out.


It doesn't much matter if you fit the handle perfectly, it won't stay perfect unless your shop is the same humidity year round.


 Now is a good time to drill and install the 3/8" dowel on the end of the fixed jaw. This allows you to store the jack on its end without it tipping over.


Okay. The base. This is a tricky piece. But I think I've got a decent sequence here to make it relatively painless. I don't think he has a blog post up yet, but Raney Nelson of Daed Toolworks just finished his jack earlier this week, and he opted for a different style base. Check his blog in the near future.


I'm calling this the "square" pocket since it's made while the base is still square. I set up the drill press with a fence and forstner bit to get rid of most the waste.


Then I came in from the other side with the same setup to get rid of even more waste. I overlap my plunges to get as flat a wall as possible.


Cut the blocky waste piece as much as possible with a backsaw.


Then pop out the waste piece with a mallet whack. The little web that remains gets chopped out.


The square pocket is then chopped and pared to the layout lines. The original base was made pretty quickly, so I didn't fuss here trying to get perfect surfaces. 


Next, cut the big ogee on the bandsaw. Yes, I still need to change my blade.


Then refine the surfaces. I used a spindle sander, a round plane, scraper, and sandpaper.


With all those steps done, you can cut the miter. A 10" table saw won't be able to do it in one pass. I wouldn't do it that way anyway, for safety reasons.


Saw the rest of the miter off by hand, staying away from the finished surface.


Refine the surface with a long plane. I so love having a row of dogs on my bench. Makes holding stuff like this child's play.


Then I chamfer the edges of the square pocket.


Set the base down on the mitered edge. The angled pocket is now in the perfect position for drilling out the waste, just like in the square pocket.


 I set the fence and start drilling right on the arris. If you do this, go slow at first until the bit makes enough of a hole to keep itself jigged in place. I use overlapping holes, and reset the fence once.


 Don't drill to full depth unless you don't mind seeing the holes left from the center spur.


If that bothers you, stop short, saw some kerfs at an angle, bang out the waste and pare the pocket to final shape. It's going to be tricky holding onto the base as you chop. Just slog through.


 With the pocket pared to shape (again, I didn't waste any time making it pretty, but just chopped as aggressively as I could to get it done quick) round the arrises of the pocket with slicing cuts from a long paring chisel. The original has distinct facets here, so I made mine the same way.


The groove pin can finally be driven into place. I used the same support block as before.


Before screwing the base to the body, I made the little half-moon cutout in the end of the base. This helps you gain access to the hook when engaging the half-miter jaw.


I would recommend you finish your jack with a coat or two of tung oil, BLO, or my favorite Minwax Antique Oil. The runners and moving parts should also get a light of wax to keep them running smoothly. 

After the finish on mine dries, I'll do a post on the different ways the jack can be used. 

Once again, we still have a few jack kits left if you'd like to build one. Price is $198. Details on our store page.

Ramon's Roubo

$
0
0

Hey Benchcrafted......I discovered your amazing vises (after very little searching actually) and ordered sometime in February 2014. What an incredible build....I am in love with this workbench....truly a fantastic design with the best-in-the-world hardware.

I just wanted to thank you and your team for all the effort and hard work that you all obviously put into creating the ultimate workbench.  I've sent some pics of mine.....completed in 74 hours (literally a few here and there,
six hours at the most at one time)  The bench is made of Wormy Maple and Bubinga with an Ash and Bubinga tool chest (not part of the 74 hours)

Thanks again....I could not be more pleased with a company like
Benchcrafted.....simply,  extraordinary......ciao, Ramon.

You can see more of Ramon's work at his website: www.ramonvaldezfinefurniture.com


Why You Should Be Using Tru-Oil

$
0
0

When asked what may favorite finish is, I usually respond "shellac".

But that's not entirely true. While shellac is my favorite finishing material, due to its endless list of pluses, my absolute favorite finish to apply and touch is Birchwood Casey Tru-Oil.

I've been using the stuff for about twelve years now, and I consider it one of the absolute best finishes you can use, for nearly anything. I know that sounds like a lot of fluff, but it really is the case.


If you like French polish, but don't like some of the quirks of the finish (keep that pad moving now!) then you should try Tru-Oil. It's sort of the French polish for the lazy. So maybe we should call it.....well, French polish.

Anyway. Here's a quick rundown of my sequence.

If you don't sand, polish the wood surface with your finest smoothing plane until it gleams in the sunlight. If you can't plane, sharpen a card scraper to perfection and made the surface as smooth as you can. If you (can) sand, work progressively through the grits until you reach 1000. Yes, 1000. Then go over the entire surface with 0000 steel wool. Liberon brand. Wipe it down with a rag soaked in mineral spirits to get all the dust off.

Cut a square out of an old t-shirt about the size of a playing card, then ball that up inside another piece of the same size (like making a small French polish pad) dribble a dime size puddle of Tru-Oil onto the pad, tap it off onto a scrap of wood to distribute the finish, then in smooth, even strokes wipe the finish onto the wood. The goal is to get as thin a coat on as possible. Do not leave any sags or runs, or pools. Thin coats is the key.


Let that coat dry for a couple three hours. If its humid it might take longer. Feel the surface. If there are any rough spots, carefully and lightly sand with 1000 grit. Repeat the application described above. With thin coats like this, you can apply three coats a day unless you shop is humid. One first thing in the am, one after lunch, and one before bed.

When I finish furniture with this method, I usually do six coats (so, two days or so) then sand back with 1000 grit a bit more aggressively  (use a lubricant like mineral spirits) to level the finish. Even though you put it on super thin, there are always a few areas that will be heavier. Then I'll do six more coats or until I'm satisfied with the evenness and sheen level. The final coats will have a semi-gloss to gloss sheen.

With open pore woods, like walnut, the pores will remain open using the thin coats technique, but without a built-up area around each pore like you would get with a brushed finish.


If you keep the coats thin, you can control sheen by simply stopping when you achieve what you're after. The more coats, the shinier it will get. Designed for finishing gun stocks, this is a very durable finish that will last under fairly hard use. It's a favorite finish for guitar makers as well, and those see some pretty hard use.

The very last step is to let the finish cure for about a week. If I want to knock back the sheen a little I rub with 0000 steel wool, very lightly, then apply a tiny bit of lemon oil and burnish with a piece of burlap or coarse fabric. The resultant finish has beautiful clarity, which allows the luster of the wood to shine, and if feels like silk to the touch.

Right now I'm letting the last coat of Tru-Oil cure on the lid of my case for sharp tools. This is by far the most difficult part of finishing for me. That seemingly endless wait before you get to see the finished piece assembled for the first time.

Give Tru-Oil a try. I think it might become your new favorite finish that doesn't rhyme with shellac.


Tru-Oil. Here's Your Chance

$
0
0

If you hate Amazon, you're living in denial.

This is a great price for any finish. If you don't use much finish at a time, decant the Tru Oil into smaller bottles, and keep them sealed.

Matt's Carving Vise

$
0
0

Matt O'Neill did a nice job on his Carver's Vise. Here are some pics.

We may do another run of these, but it all depends on demand. If you'd like to buy one, keep an eye on the blog, if we get enough requests we'll announce it here.

For what its worth, my carver's vise is parked more or less permanently at the back left corner of the bench at all times, directly opposite my Glide. It never gets in the way, and comes in quite handy for close detail work.


Viewing all 305 articles
Browse latest View live