Quantcast
Channel: Benchcrafted
Viewing all 305 articles
Browse latest View live

Cutting Huge Dovetails For Benches And Other Stuff

$
0
0

A few years ago I wrote an article for Popular Woodworking Magazine on how I cut very large dovetails for joining the end cap to the benchtop when installing our Tail Vise. But the technique applies to any large dovetail joint you might encounter. I've always been fascinated by these large joints since I first saw Frank Klausz's bench in the early 90's at a woodworking show in Chicago. Frank was off teaching a seminar, so I pored over his bench, virtually alone. That bird's eye skirt that formed the tool tray was burned into my memory that day, along with Frank's signature under the gloss of the Waterlox. That was also my first exposure to Odate and Lie-Nielsen. Odate was sitting in his booth completely alone, sharpening a plane iron on the floor. No one seemed interested in him. I do remember watching him for some time and feeling a great sense of awe and mystery. A few years later I got my first Lie-Nielsen plane, a 164, which I paid Thomas for in beeswax. I didn't have enough money, so we traded. I still have that plane, use it regularly, and will never sell it.

The thing I like about the technique is that it doesn't require much skill in using a backsaw. In fact, I don't even use a backsaw to cut the joint. It's done almost entirely with machines, guided by very precise (but easy) layout by hand. If you're careful, you get results like the example above. We all know the dovetail is overhyped. But a crisp, well proportioned example still gives me a buzz.

The article is available for free directly from the Popular Woodworking Magazine website.

Condor Tails Article


Knobs And The Lead Times

$
0
0

UPDATE:  There seems to be some confusion concerning lead times.  We've always had lead times, clearly posted on our Store page.  Most of the year the leads are 1-2 weeks.  Our lead times do not reflect and have never reflected anything other than a waxing and waning of demand as pertains to the time of year, i.e. Christmas and especially post-Christmas demand was quite unexpected this year. The addition of overseas dealers has also had an impact on lead times. 

We've been a tad behind lately in our order fulfillment. For this we apologize. Here's the story behind what's happening.

First, the holidays. People buy more stuff, obviously. We try to anticipate sales, but the last guy who got it right is sitting on a beach in Tahiti right now. We're sitting elsewhere.

Second, Hollywood. Paramount Pictures is filming an epic docudrama about the construction of the Statue of Liberty, and the set designer is recreating a late 19th c. French carpentry shop for the movie. So we're building 40 benches in French Oak, outfitted with Classic leg vises for the studio. This has taken enormous amounts of time.

Third. Dymondwood. Rutland Ply, the makers of Dymondwood have not rebuilt. We've been told that another facility is being readied for production, but when is still a question mark, in addition to all the other question marks associated with getting something new up and running. We've used up all we can find. For now we'll be filling some orders for M-series vises with beech knobs. Yes, it looks nothing like Dymondwood, but it's functional. We're also hesitant to use any sort of actual rosewood, due to supply issues, and the problems it poses with drying and turning. So we're looking into different materials which should alleviate much of the lead time issues in the next couple weeks. Although a departure from our traditional rosewood look, we're considering doing something completely different for the M-series vises. Ceramic-coated aluminum (sort of a modern, tactical look) Micarta, and if the price of red metals works out, solid bronze.

We'll have an announcement in the near future about what we end up doing. But for the time being, if you order a vise now, you'll likely be getting beech knobs. If you'd like to upgrade later to whatever we end up using, we'll make that option available.

Oh, the part about the movie was not true. But it would be pretty neat to see that in a movie, wouldn't it?

Nate's STR

$
0
0

Dear Benchcrafted,

Last winter I purchased your "bench makers" package and built myself a splittop Roubo. The plans you provided were excellent and the hardware is prettydarn sweet.

I am a joiner producing a full spectrum of work - furniture to architecturalelements. I specialize in exterior living spaces (ie, historic porches,fences, decks). Since building the bench I've had plenty of time to test itin a variety of ways. I won't bore you with the normal holding prowless theleg and tail vices exhibit over furniture components. This is obvious.

However, I have run into a couple of interesting scenarios with curves thatthe leg vice excelled at holding. The ease of use and rapidity in which Icould move components around on the bench brought a smile to my face. Thisis getting long winded. The Roubo is awesome. The vises kick ass. Keep upthe good work!

Nate
__

Nate Plasha owns and operates Black Locust Craftsmen in Burlington, VT.


Plate 11 Benches In The Rough

$
0
0

Boules of French Oak destined to become Plate 11 benches at the French Oak Roubo Project II.

Photos by Wyatt Childs

How We're Handling The Knobs

$
0
0

Due to a fire at Rutland Plywood in 2014, the availability and manufacture of Dymondwood has ceased. We turned our last knob from the material a couple weeks ago and all those knobs are already spoken for. Plus, we're in the red on a few, which has caused our lead times to grow a bit from our standard 1-2 weeks (in which we usually ship within a couple days) to 3-4 weeks.

We tried our best to hold out until Rutland rebuilt, but its not happening.

Our vises were fitted with rosewood knobs from the very beginning, but when Cocobolo was put on the CITES list, we decided to abandon its use and move to Dymondwood. Cost was a factor, but the future instability of the species was the the nail in the coffin. So it's difficult to move from a high-class material like rosewood to anything else. With the loss of Rutland, we were forced to take a closer look at what we wanted to do in the long run. Our goal is getting our vises in customer's hands in a timely manner, and dealing with uncertain materials is an enormous pain for us and frustrating for customers. Who wants any of that?

So here's what we're doing.

From now on all of our M-series vises (Glide M, Tail Vise M) will be fitted with knobs made from acrylic-infused American black cherry. While new cherry knobs might have a similar tonal value to the infused beech knobs of our C-series vises, with UV exposure the cherry will darken nicely. Why cherry? It's abundant and it looks good. The acrylic infusion process renders the wood entirely stable, and incredibly durable.

For a short period while we're tooling up for producing cherry knobs, M-series customers may receive infused beech knobs with their vises. If you are one of those customers, and would like to outfit your vise(s) with cherry knobs once we have them available, drop us an email and we'll sell you a set at a special price. This offer is only for those who received beech knobs with M-series vises. We won't be offering knobs of either species ala carte, or the option of choosing a different species.

Today I'm A Strapping Lad

$
0
0

This weekend I'm finishing up a Roorkee chair from Lost Art Press's book on Campaign Furniture.

I've built in a lot of different styles over the years, from Shaker and Craftsman to Mesopotamian River Valley and beyond, but this is my first piece of campaign furniture. This is the only thing I've worked on that has made me want to spey cast for steelhead, take a cape buffalo, pull in a marlin on a handline, and win the 24 hours of Le Mans. Simultaneously.

Actually, the only reason I'm building this chair is that my twelve year old nephew caught a glimpse of it on my monitor last year and begged me to help him build one. How could I say no?

The other reason for the build is that Schwarz has an uncanny knack for making me want to build nearly everything he builds. I can't explain this. I think he may have slipped me a mickey in his basement a couple years ago. All I remember is a glass of yellow liquid, some guy who looked like a genie, and glitter.

After assembling the ridiculous amount of extra tooling,  hardware, and cow skin needed to build this ridiculously expensive thing, I realized I'd forgotten to buy an essential tool. The leather strap cutter.

So this morning, a day after our latigo arrived, I headed out to the shop to whip up my own cutter. I took a peek at how the commercial ones are made, then started to make my own.

Here's what I came up with.

After rooting through my hardware bins I couldn't find any metal bits for locking the adjustable arm. So I simply cut an angled mortise and fit a wedge. Quick, easy, and it holds perfectly. I love wedgies.

The arm itself is just two sticks of beech, screwed together at one end with a 3/16" beech spacer.

To the business end of the arm is fit a #2 Xacto blade. I simply clamped the joined arms in a vise and cut about 1/2" deep with a Dozuki. The kerf of the saw was just a tad less than the thickness of the blade, which I simply pressed into place. It's held only by friction. The cutting force is completely against the bottom of the kerf, so the blade stays put just fine. We cut about 20' of straps today with the tool.

The arrises in the slot we relieved with a knife so the leather can enter easily. Likewise, the ends of the arms are scooped out on the entry side to help guide the leather at the beginning of the cut, which was for us the trickiest part of getting the cut started.

The body of the tool was mortised out after turning the handle down on the lathe. Then we sawed and planed one side flat to act as the fence.

The tool works great and took less than 2 hours to make. And lots of that was spent rooting through my hardware bins looking for stuff I didn't use.

I don't recommend you waste your time on building one of these, since the commercial ones are fine (so I read) and only cost about $25. But if you forget to buy one like I did, know that you can throw a perfectly good one together with stuff you likely already have laying around the shop.


How To Install Barrel Nuts

$
0
0

We have a love-hate relationship with our barrel nuts. On one hand, they offer a really quick, solid and cheap way to put together a knockdown workbench base. On the other, if you don't get the holes lined up, you can easily crossthread the fasteners and ruin them. I know this firsthand because I've done it myself, both when building benches commercially, and during a class I taught at Kelly Mehler's school a few years ago. I even had a student run to the hardware store for a tap to fix his nuts. So I snuck away to the local tap to sob with some other nuts.

But the alternative is equally as fussy. We've long considered changing the barrel nut to a flat tapped plate that would slip into a square mortise and slide around very easily to find the end of the bolt, eliminating the self-jigging of a round nut. The problem with this is two-fold. First, you have to cut a square mortise. It's time consuming compared to banging out four holes on the drill press. And the cost of cutting, refining, drilling and tapping square plates is much higher than turning round barrel nuts. The former would require lots of machine time and human involvement. The latter are turned automatically on a bar-fed CNC lathe, which is why we can sell the set for less than $30 (and that price has remained the same for several years, even undergoing a price reduction at one point.)

Here's the sequence we use to install barrel nuts. It applies to both our main barrel nuts, and the end cap barrel nuts. These instructions are also available soon in PDF form on our downloads page.


Prep

The barrel nuts come with a zinc plating to prevent rust. Sometimes this coating builds up inside the threads at the plating facility. Before trying to install fasteners in your bench, thread the bolts fully in and out of the nuts a couple times to test their fit. As with any mechanism made from metal, a couple drops of oil will help lubricate the threads and ensure a smooth installation. We bias the fit tolerance on the nuts a bit tight so they hold well. Don’t be alarmed if you can’t thread them by hand at first. A few cycles with a wrench will loosen them up. Your leg and rail joinery should be cut and ready to assemble. A short stub tenon (1”) is sufficient.


Drill the holes in the legs only

Drill a ½” hole through the leg using a drill press (if possible) for the bolt. For looks, you can counterbore for the washer and bolt head if you want it recessed into the edge of the leg. Position the hole so it’s centered on the rail in both directions. Barrel nuts work well in material no thinner than 1-3/4”. This allows you to leave enough material at the bottom of the barrel nut hole so its not visible from the front of the rail. But if your rail is thinner and the barrel nut hole needs to go completely through the rail, it’s fine.


Next, assemble the workbench base (clamp it if possible, or brace it against a wall or bench) and use a long ½” drill bit to drill the hole in the end of the rail.
The hole in the leg acts as a guide bushing so the hole goes straight into the end of the rail.
Drill an inch or so at a time at most, backing out frequently to clear the shavings. Drill as deep as you can. If you need to go deeper (depending on your particular leg’s width and drill bit length) remove the leg and continue drilling the rail only.

Barrel Nut Layout

To find the position of the barrel nut hole, you’re going to use the position of the hole you just drilled as a guide.
Place a bolt deeply into the rail and carry the position of the exact center of the bolt up and across the mortise and just onto the face of the rail.
Next, place a straightedge on the mark, sight from above, and line it up so it’s dead parallel with the bolt. Mark a line against the straightedge.


 Thread the barrel nut onto the bolt so the bolt protrudes about ¼” past the nut, and while holding the bolt in the correct place for your leg width, mark the center of the barrel nut on the bolt line.

Drill a 1” hole on the mark, drilling 1/8” deeper than it needs to be to allow for some clearance.
In a 1-3/4” thick rail there will be enough barrel nut protruding that you can easily grab it with your fingers and thread the bolt in with your other hand. The bolt should end up right in the center of the barrel nut hole.


The final step is to enlarge the ½” bolt hole in the leg and rail. Because of seasonal movement you want the bolt to always fit loosely. This does not compromise strength at all. It also allows a bit of forgiveness if some of your holes aren’t as precisely located at they should be. Enlarge the holes to 9/16” or even 5/8” with a twist drill. If you’ve also mis-located the barrel nut hole enough that the bolt won’t thread in easily by hand, you can correct your error by enlarging the barrel nut hole, or simply drilling out some waste on either side of the existing hole using a Forstner bit. Make sure you clamp the rail firmly to your drill press table when cutting this partial hole.


If you feel resistance as you’re threading the bolt into the nut, stop and examine what’s happening. The fasteners should thread together easily and smoothly, and only require a wrench for the final turn or two.You may need to tighten up the bolts in mid-winter when your bench parts dry and shrink. This is normal.                

Hand Forged Holdfasts - In Stock

$
0
0

Our hand-forged holdfasts are once again in stock. If you'd like one, or many, the only way to order is to send us an email info@benchcrafted.com. State how many you'd like, and provide your full shipping address, and we'll send you a bill. Price is $185 per. 

These are made entirely by hand, using traditional methods. 

For video, and more info, click me


Reason #2 - Why You Should Come To Handworks 2015

$
0
0

The Foreign Invasion

Short of gassing up your Piper Cub and spending two months braving airport security in places like Timbuktu, there's only one practical way to see the fine wares from great toolmakers the world over. And that's in Amana, IA at Handworks 2015, less than three months away.

From Canada


Veritas

Rob Lee and the Atlas of the hand-tool world: Lee Valley and Veritas. Imagine if you will, that the Lee Valley catalog was no more. Would you feel like you lost a family member? Yeah, I thought so. And Lee Valley is very much a family business, and they treat their customers like it too. Here's to hoping they bring something new and shiny to the old barn.


Sauer And Steiner

Konrad Sauer is arguably the most accomplished infill planemaker to have ever lived. And he's still alive! Konrad's planes are not just works of art, but are also the most highly functional and satisfying planes I've ever laid my hands on. And I've tried them all. Literally. Every infill plane ever made has crossed my bench. That's a complete lie of course, but there's no joking about Konrad's planes. They are the pinnacle of the toolmaking craft. If you're new to infills, don't be shy. Konrad is a woodworker just like the rest of us, and there's nothing he likes more than sharing the craft with fellow enthusiasts.


From England


David Barron

From Southampon, England, furniture maker and tool maker David Barron will be showing his work and tools in America for the first time. We first became acquainted with David a few years ago through his blog. When if you hear "English woodworking" you imagine impossibly fine dovetails, incredibly figured timbers, a precision in wood that you thought impossible, then David is the embodiment of that tradition. His toolchest with piston fit tray is something to behold. See more at David's blog. 


Philly Planes

Phil Edwards is a wooden plane maker who we last had the pleasure of meeting at the very first Woodworking In America in Berea Kentucky. Phil works in the classic English tradition, and offers a full line of traditional wooden planes from hollows and rounds to full size jointers. Check out Phil's Facebook page for more pics of his gorgeous work.

From Ireland


Daniel and Sally Shaw-Smith

The creators of the legendary "Hands" series on traditional Irish crafts will be in the Festhalle Barn to offer the entire original series on DVD and answer questions about their incredible documentary produced in the 1970's and 80's before many of the traditional Irish crafts and trades died out. As we've said many times, and can't emphasize enough, the Hands videos are treasures of humanity from a time and place when superficiality and shallow pop culture barely existed. A glimpse of life from a more meaningful era than our's. You can preview their documentary excellence here.

From Australia


Vesper Tools

Chris Vesper makes the finest bevel gauges and squares we have ever seen. They are flawless in every way. I use a Vesper bevel gauge almost on a daily basis. It is not only perfectly crafted, its also built like a tank and although I've dropped it on more than one occasion, it's not only weathered the fall perfectly, but didn't loose its setting.

And just in case you missed it:  Reason #1 Why You Should Come To Handworks 2015


How I Got Green Woodworking

$
0
0

Green woodworking. It's a term that's batted around quite a bit nowadays. Trouble is, what does it really mean?

Yes, in general the term refers to working wood while its still "green" or wet. But what I never had a clear idea on was the exact reason to work it wet. Maybe I'm thick. Or maybe the literature out there didn't give a clear reason why.

Back when I was cutting my teeth on serious woodworking, I'd read up on every aspect of the craft. Langsner, Alexander, Dunbar, among others. But none of it stuck with me, so I ventured down the road paved with kiln-dried planks and started building stuff. But what about chairs? They were a sort of mystery in my early days. Sure, I could use my skills to build them with kiln dried woods and furniture joints, but as I got more interested in making them, I discovered Galbert and couldn't get images of his work out of my head. Can't make those with planks of wood from the lumberyard. Or could I? When I bought two stick chairs from Chris Schwarz and asked how he got the stock, his answer sort of shocked me. "It's just regular lumber." I knew he'd studied with professional chair makers, so his answer carried some weight.

I decided it was time to take decisive action, decidedly. A week-long, intensive class with Galbert cemented the principles in my mind, and it's affected my woodworking much like the first instrument I built. My woodwork will never be the same.

Here's why you work green wood. It's easy. That's it. There's nothing more to it than that. There's no magic in the moisture. There's no mojo in the medullary. If there's a single reason to build stuff out of green wood is that you can, with a tiny, cheap tool kit, get furniture parts from a tree. And not rustic furniture parts either, but the best furniture parts. You are your own sawmill.

And if you think you have to split green wood because it gets you strong parts, well, that's mostly true, but it's also not entirely accurate. One thing I learned from luthiery is how soundboards are produced. Chair parts need to be strong. But you know what else needs to be incredibly strong? The soundboard on an oud or lute. See, on a typical oud (or again, most any lute) the soundboard is made of spruce that is only about 1/16"-3/32" thick. This isn't oak mind you, its a soft wood. To the soundboard is glued the bridge, to which is tied 11 strings, which when brought to pitch exert over 100 pounds of constant, unrelenting, levering tension through the bridge and the glue-only joint (no pins, tenons, or joinery of any sort) to the soundboard. And if that soundboard has any grain runout, if the grain lines don't flow virtually uninterrupted from the bottom of the sound box to the neck, it will fail. The bridge will find the exiting tubes of lignin and rip a hole in the face in a violent, explosive instant. Bam! And the crowd goes wild. So how are soundboards produced? By sawing. The spruce logs are first split, then each soundboard is sawn from the split face to keep runout to an absolute minimum. The same principle can apply to harvesting chair parts from straight, sawn boards.

Here's the other thing I learned about chair joints from Galbert that took away all of my past frustration. There is no such thing as a dry piece going into a wet piece. This always threw me for a loop. How do you stage parts? How do you keep them "wet?" Do you have to make a chair in a certain amount of time? Do you have to build a whole dining room full of chairs in a week before the legs dry out? The answer is no, because no matter what you do in your shop, a nearly finished chair part can sit in storage for years and still become part of a perfect chair joint. And that's because you're joining a dry part to a super-dry part. And the beauty of all this is, you control when the super-dry part becomes super-dry. It's all in your control. I think of my drying kiln as a shrinking machine. It makes stuff smaller, then it gets bigger when I remove it from the kiln (but not immediately.) That lets me make tenons that can't, under any circumstances, shrink and become loose, unless I put the entire finished chair back in the kiln. I shape the tenon when its in its shrunken state. After it hits glue and lives in the non-kiln environment, it gets bigger. Forever. For me, this was the key that unlocked the understanding of how green woodworking relates to how chairs are joined. Theoretically, you could process enough chair parts for the rest of your life while they are green (again for ease of work) then store them in your shop and build chairs with them at your leisure. When I figured this out, I realized that one could use dry wood, even well-sawn straight-grain lumber and extract chair parts successfully from the planks. Remember Schwarz: "it's just regular lumber." Of course there is a bit more to it than that, but at its core, this is it.

This info was transmitted to me by Pete during our class. But you don't have to take a class with Pete (although I highly recommend it) to get access to his savant-like knowledge of this craft. His new work, Chairmaker's Notebook published by Lost Art Press is now available. I've been reading the PDF for a couple weeks now, and have come to a conclusion. This book isn't about chair making. It's woodworking Kung Fu.

Even if you don't plan to make a chair, this is the #1 book on how a tree is put together, and how best to take it apart.


Video: Other Ways Of Reversing Hide Glue

$
0
0


Don't argue with the dead guys. This is real technique.

Making a Simple Lid Stay

$
0
0

I don't much like lid stays. They take up too much room, look contrived, and force you to compromise the design of your chest. I've never seen one I like, or one that works well. The best lid stay in my opinion is the wall behind your (tool) chest, but what if you can't put your chest against the wall?

But before you assume my opinion has any value, I should say that I don't have any experience working from a tool chest, only building chests for home use, but my opinion about stays applies to tool chests as well, I would imagine.

So I got thinking, what about a stay that holds the lid open, but also keeps it from shutting? So, not a chain, not a wooden stop at the back of the lid, not a gas-shock-encrusted whoopty-do from Rockler, but simply a stick that engages both the lid and carcase and immobilizes the lid.

Here's what I came up with. I made it with materials and tools that anyone can get locally.


The principle is simple. A stick with a pin on each end. One pin engages the lid, the other pin engages the carcase. The metal bits you see above are truss head rivets (or wagon box rivets), bronze sleeve bearings and a piece of 1/8 x 3/4" hot rolled flat steel. All stuff you can get at the hardware store or Homeus Depotamus.


To make the stay look hand-forged, I did a little hand forgery. First I needed to drill the two holes on the ends.


The hole is 15/64", which is a tad smaller than the shaft of the 1/4" rivet.


A bit of work at the 1" belt grinder, along with some files established the shape of the end.


I decided to try my hand at some fancy file work. This is really fun stuff. A bit tricky keeping the two sides symmetrical though.


After I fancified the other end, I took a bastard file to the faces to get rid of the mill finish and make it look more "natural".


Then I whacked the steel with a hammer to mimic the look of a hand-wrought piece. Finally, I went over the whole thing with a wire wheel to blend it all in and ease any sharp edges.


I chamfered the rivets to ease their entry in the hole.


I ran a chainsaw file in the hole and enlarged it until it was about 0.005" smaller than the rivet shaft, so when the rivet is tapped in, it stay tight. In machinist talk, that's a "press fit".


Then to make it all look hand-wrought I filed the head of the rivet and whacked it with a hammer.


Another minute on the wire wheel, followed up by a couple coats of gun blue and some wax made it look like this.


I cut the bronze bearings in half to get two per piece (they ended up about 3/8" long.) The batten for the chest lid gets drilled to accept the bearing. This keeps the stay pin from wallowing out the hole over time. I glued it in with a bit of CA.


Did the same to the carcase.


The thing works. There's enough flex in the 1/8" steel to engage the stay with ease. Here's the only downside. If the stay takes a firm hit, from outside, or inside, it can pop out of the hole, causing the lid to swing free. This can happen with a chain stay too, with the lid slamming shut. A better situation than swinging to the back and ripping hinges out. On this chest I positioned the stay so the lid is leaning slightly back. But I'm going to move the hole in the carcase forward so the lid is slightly leaning forward. That way, if the stay gets knocked the lid will simply slam shut instead of falling back. There are a bunch of ways to fix the stay further, but I like things to work quickly and easily, so I'll be keeping the stay in this form.

A Chest In My Boot

$
0
0

A covert exchange in a harvested Indiana corn field.

Three woodwoorking nerds gather on a Chicago side street.

A back-alley hand off in Roger's Park.

The case for sharp tools is home.

What Is Toe In?

$
0
0

Toe-in can be confusing. Lots of people think their leg vise (or any face vise) should close with perfectly parallel jaws, like a veneer press. And in theory, that would indeed be ideal, but only if your work piece also has perfectly parallel faces. The reality is that its easier and more functional to make a vise with toe-in than with perfectly parallel jaws, with the bonus that toed-in jaws hold less perfect pieces as perfectly well as perfectly parallel pieces. 

Here's why toe-in works. Think of your leg vise as a holdfast, with the moving jaw (chop) being the holdfast itself, and the leg your bench top. You would never place the pad of the holdfast right at the edge of a board, where the holding pressure is only on a very small portion of the board. Rather, you try and place your holdfast near the center of the board, to distribute the clamping pressure over a wide area. If your vise didn't have toe-in, chances are it would grab your workpiece, like the holdfast placed at the edge of the board, below the center of the piece, that is, closer to the bottom edge near the vise screw (where there's less holding power.) Then when you go to plane the edge of your board, it slips and pivots. That's because you're holding the piece at the farthest point (in the vise's weak spot) from where you're stressing the board. This arrangement puts the most stress on the board, making it very easy for the board to shift in the vise. 

Toe-in moves  the holdfast pad (moving jaw) from the edge to the middle of the board, and thus pins the board firmly to the bench top (vise leg.)

The other reason for toe-in is for workpiece stability. If you're working the board into the edge of the bench (dovetailing), and not along the bench (edge planing) you want the piece held at the very top edge of vise opening. If the piece were held lower down in the vise (lack of toe-in) the jaws will be slightly open at the top and your board can vibrate in the jaw during sawing. 

Below is a customer pic of their Glide installation. The top of the bench will fall between the red arrows. The Crisscross is built with toe-in, and because of a number of factors, the toe-in will be slightly variable from bench to bench. But that's the beauty of toe-in. It doesn't need to be precise. As long as there is some toe-in, you're fine. The range is very forgiving. At the bottom of this chop, there's about a 1/2" gap, but once the jaw reaches the top 4" of the vise (the only area that holds your work) the toe becomes subtle. And that's a good thing, since once you tighten the vise down a bit, the jaw flexes slightly and spreads holding pressure over more of your workpiece, with the most pressure right at the top of the jaw--exactly where you want it. 


A Case For Sharp Tools-The Lid

$
0
0

Now that I've been relieved of my secrecy by "the boss" I'm free to share some more about what ate up entirely too much of my December and January.

Last fall I got an email from Megan Fitzpatrick, editor of Popular Woodworking Magazine asking if I'd write for the magazine again. I of course said yes, since I not only have a personal affection for the staff at the magazine, but also because of how they treat their contributors. The past articles I've written have been published word for word, with only very minor, if any, editing (parenthetical words at the end of the sentence have their punctuation within the parentheses.) Not that I'm particularly concerned with being edited, but rather because I enjoy experiencing the voice of a particular writer almost as much as the content itself. Your experience may be different, since I wrote this article in the voice of Chewbacca.

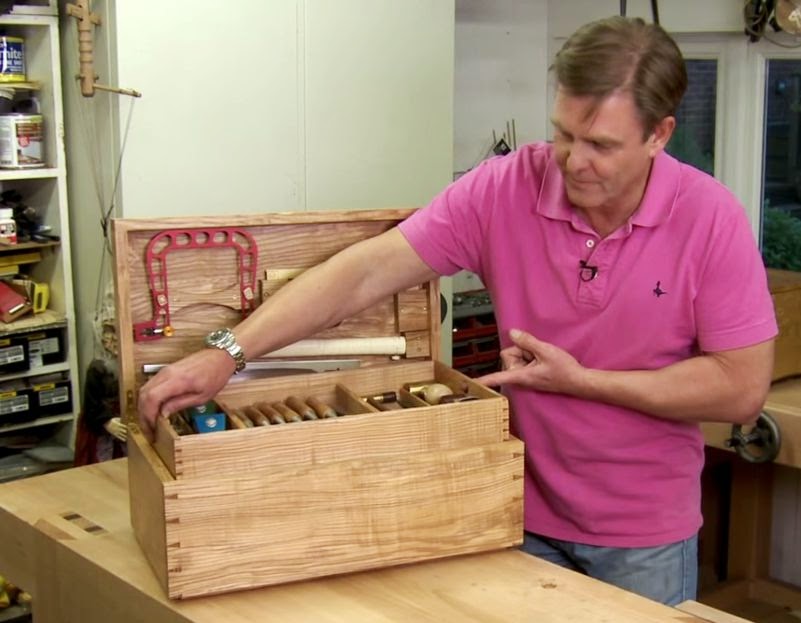
The other reason I decided to take this project on was a complete no-brainer. Chris Schwarz asked if I'd make a fancy lid for a chest he would build, and then write about how I did it. It took me about three nanoseconds to make that decision.


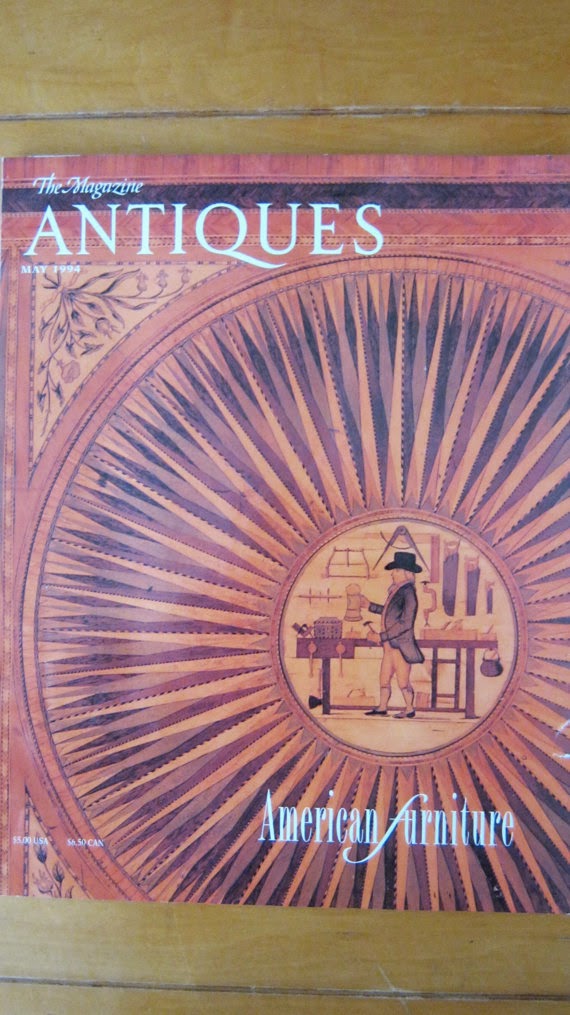
The design for this lid sprung from an English chest featuring a joiner hoisting a frothy mug of ale before his bench and tools. Knowing I couldn't possibly improve on that absolutely perfect theme, I ventured off into my own territory, borrowing only the sunburst and central circle elements from the English chest.

I won't bore you with all the various iterations I played with before I settled on a final design, which didn't happen until I was nearly finished with the chest. The central circle was originally going to feature a painting of Daedalus' joiner from a famous Pompeii fresco, but Chris and I decided that as cool as that would be, something made of wood made more sense.

It wasn't until the last few weeks before the deadline that I decided on the carved montage of tools. Inspiration for this came from a 17th century Dutch joiner's guild coin, a carved marble panel of an absolute mess of tools, and strong urging from Chris.

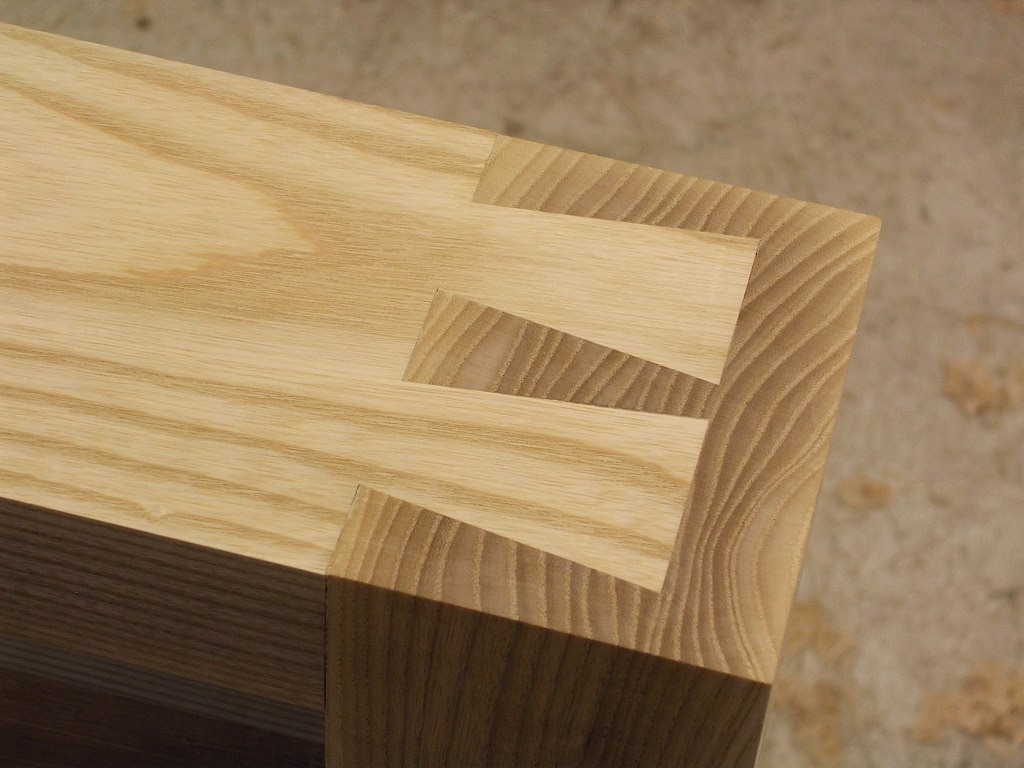
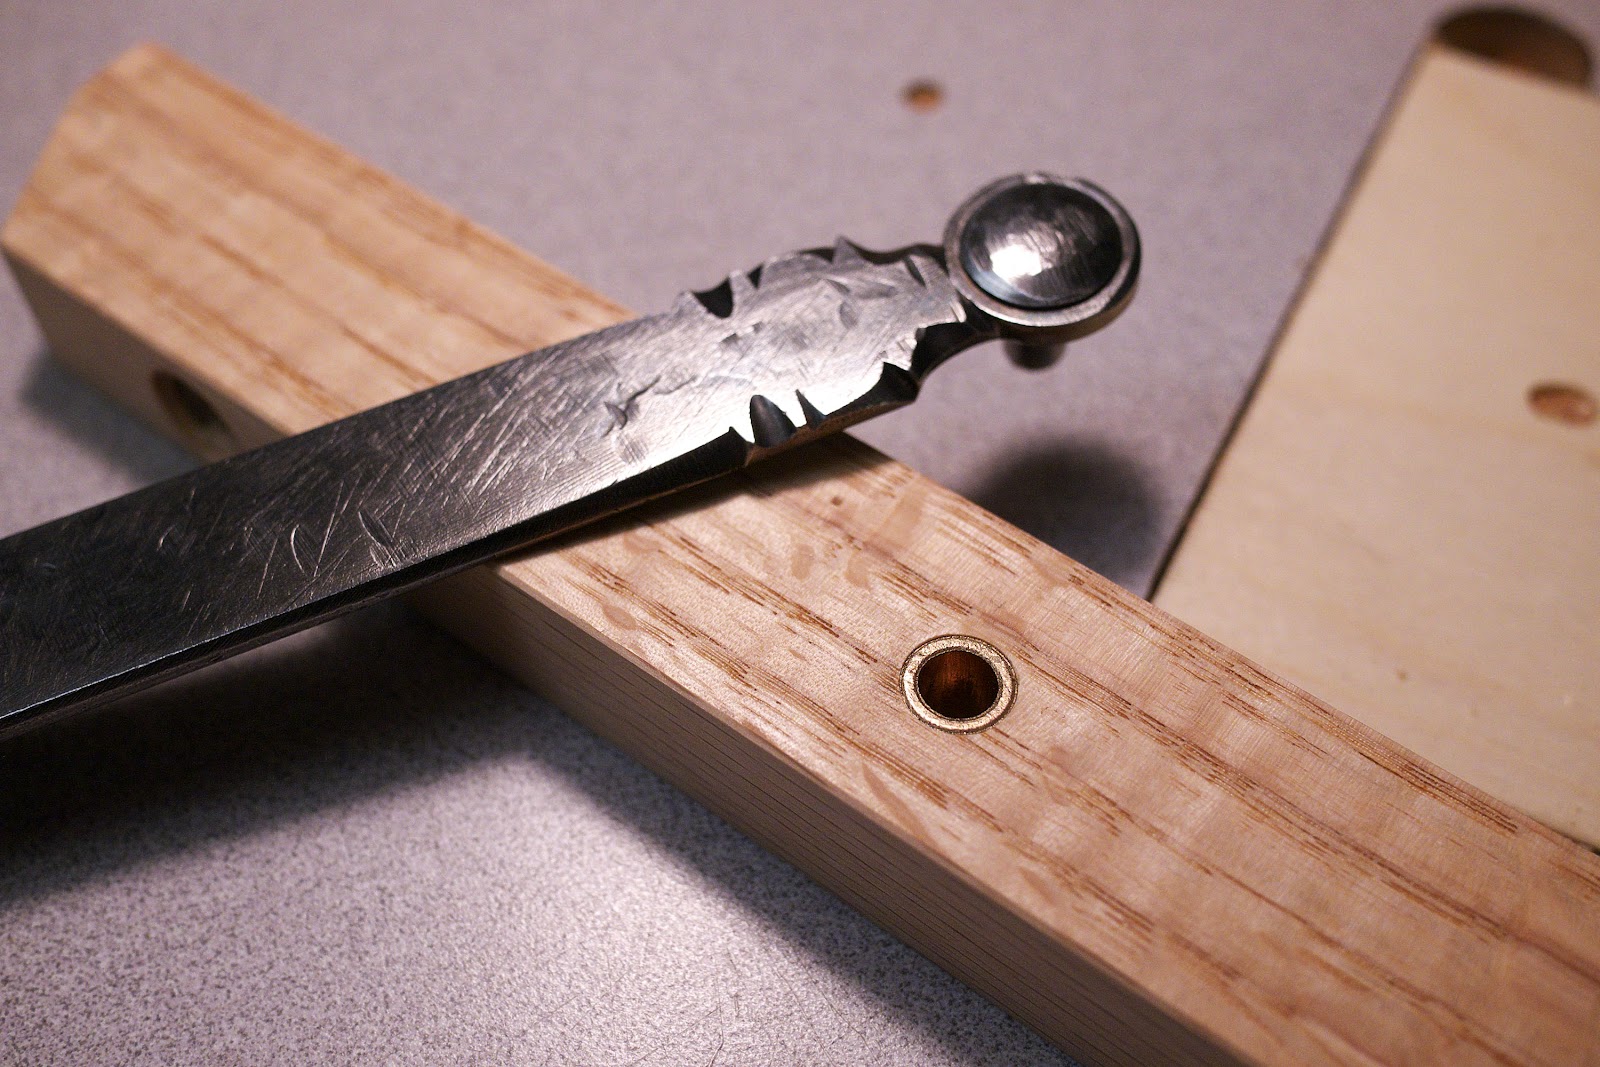
The tools themselves are not just representative of craftsmanship in general, but are modeled after actual tools from my kit. The dividers were a Christmas gift from my family, a hand-forged set from blacksmith Seth Gould. The backsaw is an Eccentric Toolworks dovetail saw that was gifted to me by a dear friend. And the chisels are taken from engravings from l'Art du Menuisier, my favorite woodworking book. As with most woodworkers, hand-cut dovetails hold a special importance for me, so the tools reflect that.

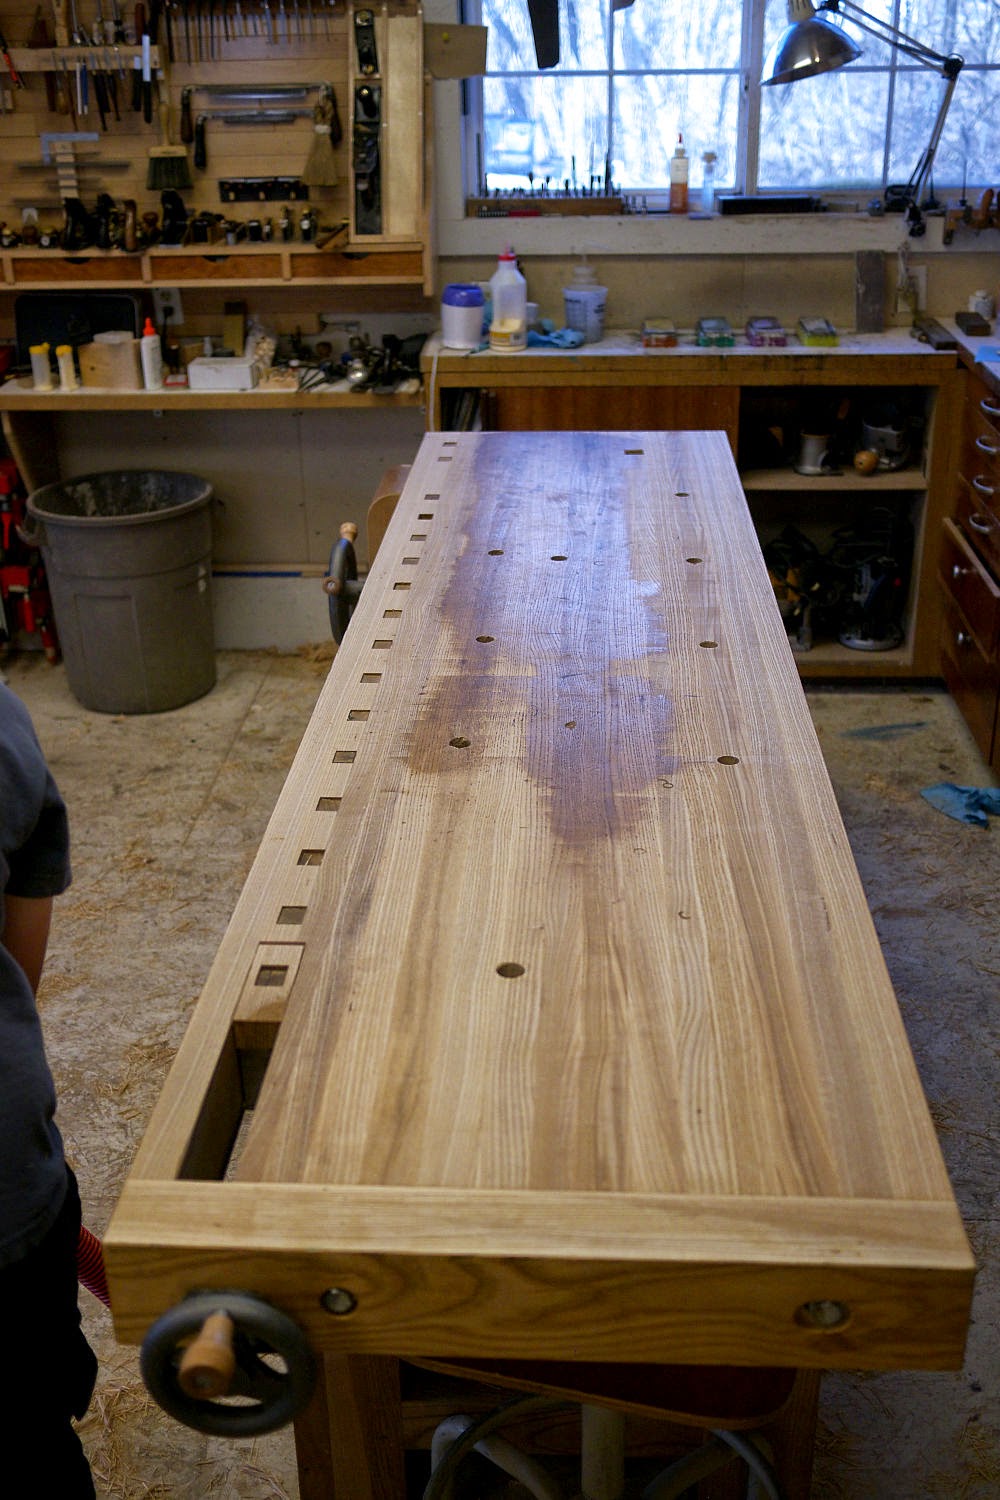
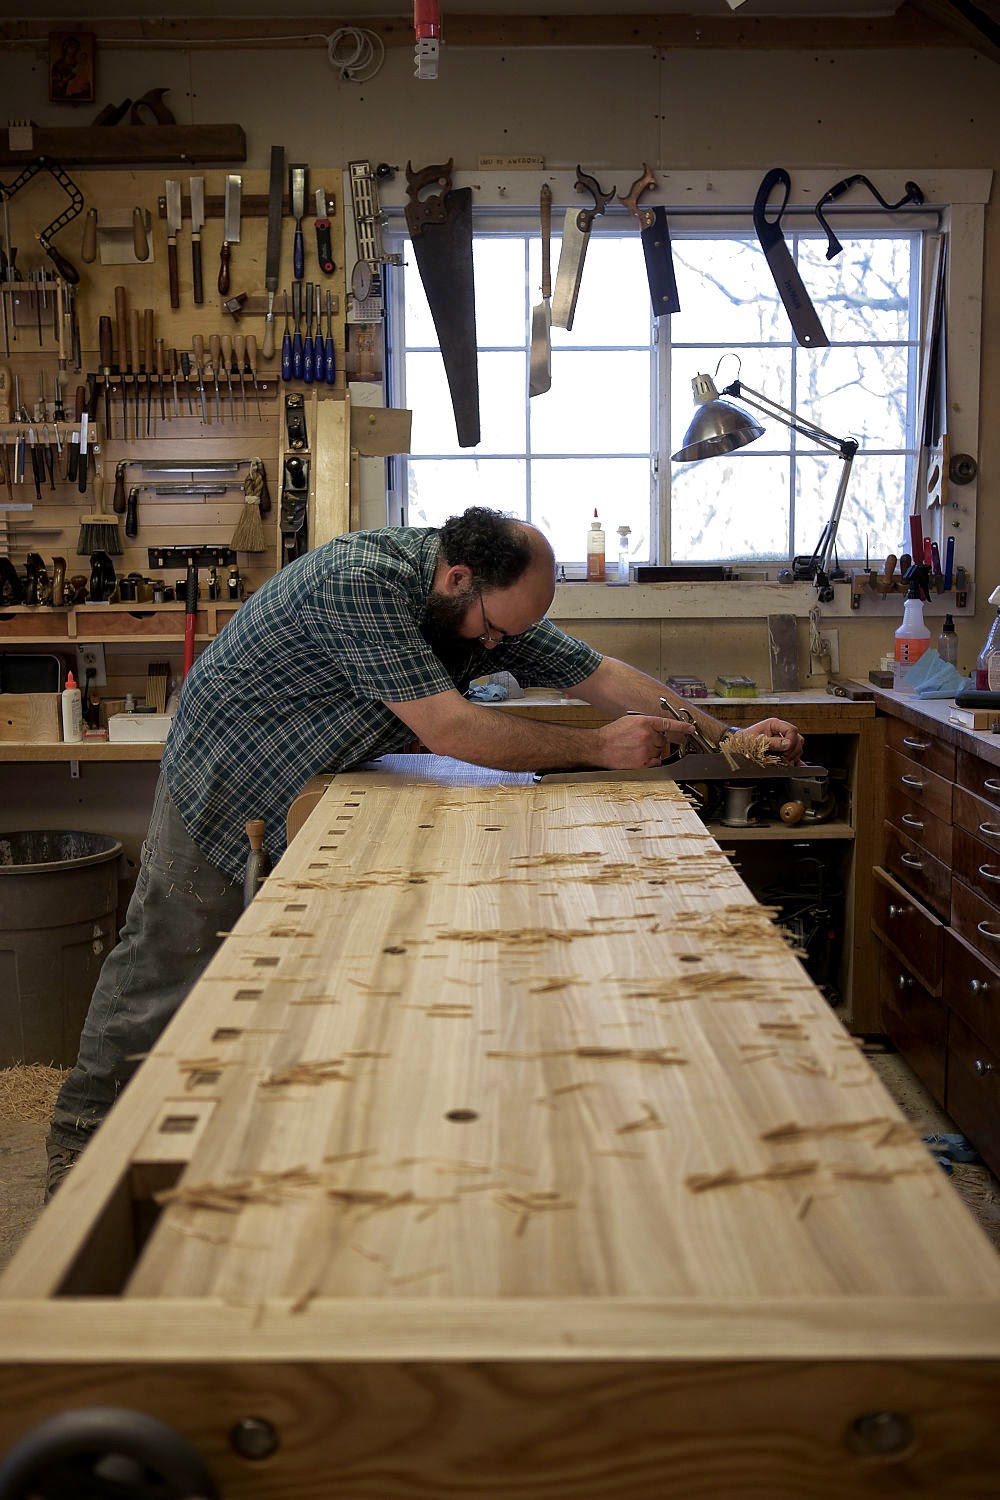
This project is sort of like taking a steam roller to an oud. Lots of similar design elements, albeit on the flat plane. I'm okay with building this stuff in three dimensions, but for some reason laying it up on a solid panel had me scratching my head a bit. Not about the process, but more about the substrate. I cover the process of building a bomb-proof, stable, lightweight, nail-grabbing panel out of solid wood that has all the benefits, but none of the drawbacks of commercial ply. It's cool stuff.

And that reminds me that I have a few people to thank for helping me along the way.

Bill Thomas
Bill is one of the finest woodworkers I've never met. I've followed his work for a few years now, all online. If you want to see an absolute tour de force of woodworking technique, check out his Georgian Secretary build at the OWWM Woodworking forum.

Patrick Edwards
Yes, that one. The master.

Chris Schwarz
I haven't done too many joint projects in my time, but this has been the best. Chris gave me more or less free reign over the design. And he didn't balk one iota when I decided the lid looked too long for its width. He trashed the first dovetailed carcase and started fresh just for me.

Peter Ross
Peter was excellent to work with (as usual). I usually mate up work like this with highly refined hardware (polished brass or stainless). Not anymore. I think the crisp and rigid parquetry of the lid looks simply incredible with Peter's hand-forged wrought-iron work. The finish on the hinges and crab lock are right off the hammer and file, no polishing or further refinement. They look perfect with the lid. Perfect.

Raney Nelson
When I was in the throes of this project, and its looming deadline, Raney provided an excellent coalescing mechanism for some crazy ideas I had floating around. He also provided me with the excellent, infill-grade kingwood and boxwood I used for the backgrounds and tool montage.

Jon Fiant
That's your macassar ebony Jon, thanks again.

Before you ask me how many hours I have in the lid, know that I'm blissfully ignorant of that number. I think if I really knew how many late nights, weekends, early morning and "days off" I have in this, I would likely wretch. Still, it doesn't stop me from designing the next one in my head.

Chris' article on the chest comes out in the August issue, my bit in the following, October issue.

If you want to see this chest, I plan to have it in the Benchcrafted booth at Handworks on May 15-16.


In Only 6 Weeks: Handworks, Amana Iowa

$
0
0

Six weeks from now preparations will begin in the utopian village of Amana, IA for Handworks: Woodworking Tools and Traditions

By now its no secret that this shindig was hatched by us back in 2011. The formula was simple. Ask a bunch of our fellow toolmakers, and those driving the craft to meet up in an old dairy barn just for the fun of it and invite all our customers. No entry fee, a presentation by the gurus, free tools, all in an old German hamlet founded on the very craft that we love.

Handworks is not a regular event. Heck, we don't even know if it will happen again. And I can promise you that it will never happen again the same weekend, in the same location as the Studley Exhibit.

If you were there for the first Handworks, there is even more reason to come back for this version. And if you missed it in 2013, well, you get the point. Here's who's new this time (in addition to nearly everyone who was at Handworks 2013):

Anderson Planes
Bad Axe Tools
David Barron 
Hock Tools
Lake Erie Toolworks
Patrick Leach
Philly Planes
Plate 11 Bench Co,
Daniel and Sally Shaw-Smith
Sauer and Steiner
Vesper Tools
Blackburn Tools
Frank Strazza
Jim Van Hoven
Mary May
Sterling Toolworks
Jarrod Stone Dahl
Claire Minihan
Lee and Lindsay Lee
Jim Sannerud
Tim Manney
Don Weber
Greg Pennington
Peter Galbert

If that wasn't enough reason, there are insane door prizes being offered: infill planes, shooting planes, hollows and rounds, a complete workbench, new and most awesome tools!

And don't forget the Godfather Of Hand Tools. Roy Underhill will uproot the powers that be during his riveting talk on Saturday morning. It's free, so better get there early.


Dog Prints

$
0
0

Some folks have requested more details on what size to make their dogs for the Benchcrafted Tail Vise. Here they are, directly from our Split Top Roubo plans.


After Seven Years, I Flatten My Bench

$
0
0

This week, after nearly seven years, I flattened the ash Roubo bench I built in 2008. If I recall correctly, I've only flattened it once after the initial session in 2008. I've flattened a lot of benches since then, but never touched this one since it didn't need it. It performed fine, especially for planing thin stuff, which should show you how much your bench is out of whack. It was still dead straight along its length, but when I set the edge of my #7 across the top, I could see about 3/32" of light right in the middle.

If you think about that for a moment, you'll realize that that's flat enough for 99.999% of your work. It really is. Why? Because I've built oodles of furniture on this bench in the past seven years, and none of the processes I use (including hand planing nearly every surface) called out for better.

So more than anything, I flattened the bench for looks and grip, since this hollow hasn't affected my work at all.

Nevertheless, here's some points worth mentioning.


Flatness isn't critical. A hollow across the width of the bench isn't a big deal. Unless you're traversing very wide and thin boards, a hollow is workable. Thicker stuff, especially hardwoods, won't deflect. You might have a problem flattening softwood boards that are 18" and wider, as they might deflect into a hollow. Still, I've done that on this bench and haven't had an issue.

Laminated tops can cup. I didn't expect this top to cup. But it did. Others I've made have not cupped to this extent. It's laminated from 8/4 flat stock, so most of the movement is in the thickness of the bench (that's mostly radial plane on the top surface) not across its width.

End caps work in thick massive tops. The end cap on this bench is strictly to accommodate the wagon vise, but it's actually done a fair amount towards keeping the top flat. In the first picture, I've made about eight passes with my #7, set for a heavy cut. On the fourth pass I was taking full width shavings across the grain about 1/4 down the top. This told me that the end cap had kept the top flat towards the end, and less so farther down the top. In fact, the opposite end of the bench was the most deeply cupped. It has no end cap. So, was the end cap keeping it flat? Or reducing moisture exchange? Probably both. So far all of you who've built benches with two end caps (even though I told you the second was unnecessary) nice move.

All work and no plane make jack a dull blade. Seven years of dust, grime, bits of steel wool, dried finish, dandruff, and skin cells from my Turkish apprentice, allow maybe three passes before the edge of a plane iron becomes a toothing blade. I sharpened five times to flatten this top. I took eleven passes total.

Traverse, and walk away. The best surface texture for a bench top is a toothy one. No, not necessarily one made by a toothing plane (although that works just fine) but the toothy surface you get from planing directly across the grain with a generous cut, and a cambered iron. When I finished this bench, the top was smooth planed because I wanted it to look like furniture. Yes, I'm guilty. But I admit the folly of  my ways. Traverse your top, let it be toothy, and your work will stay put.

No finish is the best finish. I once thought two coats of an oil varnish mix was a perfect finish for a bench top. Enough to keep it clean, that was the goal. But even that thin coat, when applied over a stupidly smooth-planed surface will burnish and polish, and make a slick, hard surface after seven years. The opposite of what you want in a bench top. I would sacrifice the convenience of not having to worry about glue and finish drips at the cost of an ideal surface any day. You can always use a drop cloth on the bench if you need to glue or finish on it. Will an unfinished bench get dirty? Yes. But that will urge you to clean it with your jointer plane. Which brings me to my next point.

Flatten your bench often. Flattening benches is not fun. Okay, maybe the first time, or after a sweet build, but never because you have to. I would rather freshen the surface once a year every year with a pass or two, than the dozen passes this bench required.

Light surfaces are best. The oil varnish on this bench had really darkened the surface. Now it looks bright and fresh, which I like. I'm always after more light, and lightness in the shop.

This bench is now ready for Handworks, where you can see it at the Sauer and Steiner booth. So now you know the real reason for my flattening session.


Take a little bit of Handworks home

$
0
0


With Handworks right around the corner, we've had a few requests for posters.  Initially we weren't going to print any but then decided that it was a decent idea.

We'll have a limited run of these available in the Festhalle barn during Handworks, size is 12x18 printed on medium weight matte finish stock.  Nothing fancy.  Cost will be $1.00 each with all proceeds going to charity (same as all Handworks donations).

You Don't Know Jack. Get To Know Jack.

$
0
0

So, do you remember the La Forge Royale Miter Jack we've been working on? Is your's finished? Good, because we're just now getting around to shooting some video of the thing. Which we did today, even though it was 68 degrees outside, billowy white clouds, no humidity, light breeze. The kind of weather that makes you wish you were a meter reader. Wait, does anyone do that anymore? Well, you get the drift.

The La Forge Royale miter jack is indeed a piece of imperial hand-tool jiggery that you won't be able to live without, even if you think your fancy-pants shooting board is your Obi-Wan Kenobi to the miter jack's Luke Skywalker. If you think this jack can't perform, it can bullseye whomp rats with the best of them. For the record, after building the La Forge Royale Miter Jack, I've named all my shooting boards Jar-Jar Binks.

But all tomfoolery aside, a miter jack really does deserve a place in your pantheon of appliances. Why? It can do stuff that a shooting board struggles with.

Like angled tenon shoulders. Shooting boards can't do those at all. At all! The miter jack excels here. It provides a dead flat and precise ramp to ride your chisel down, ensuring your shoulders are all in the same plane. Easy and fun. Especially if you like Asian joints. No, I'm not talking about the place downtown with the incredible steamed dumplings (I paused here for 10 minutes and daydreamed) I'm talking about Japanese joinery, like the triple miter.

Or what about square shoulders? With a miter jack you can pare square shoulders with ease, even tweak a tenon you've managed to screw up with a shoulder plane (we've all done it, you know its true.) If you have a French-style flush saw you can even use the jack to saw angled tenon shoulders. No paring required.

Or how about tweaking a miter that's off 45 by just a tad? Easy stuff for the jack. You'd have to re-plane the fence on your shooting board, add a shim, or adjust the fence (if you have an adjustable one). Okay the shooting board works pretty well here, but the jack can hold its own. Shift the workpiece a bit, plane, done. 10 seconds. Shooting board? 10.2 seconds.

And what about half miters? Yeah, the LFRMJ can do those too, with its integral, quick deploying twenty-two-and-a-half-degree auxiliary ramping jaw. Wrapping moldings around forty-five's has never been more fun.

There's more the miter jack can do. Like planing miters on odd-shaped stuff, like crown moulding. But to really know what its capable of, you must first have one at the ready. And we can help you with that. We still have a few miter jack kits left in stock from the small run we did late last year. You can purchase directly on our store page. Each order will receive the decal pictured above along with their kit. If you ordered a kit already, and would like a decal, drop us an email and we'll toss one in the mail for you. If you request a decal, but didn't order a kit, we might feel generous and send you one for free, but we also might lick it first to teach you a lesson about mooching.

If we have any jack kits left in a couple weeks, you'll be able to purchase at the Benchcrafted booth at Handworks.


Viewing all 305 articles
Browse latest View live